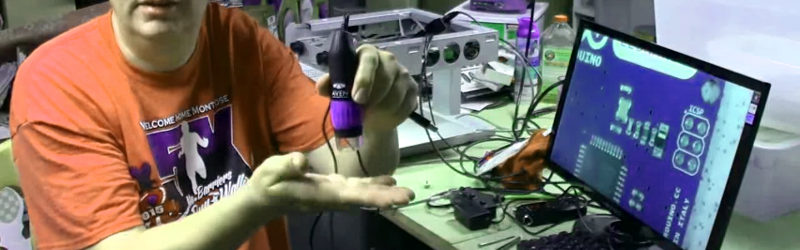
The nice thing with having a hacker cred is that family and friends are always on the lookout for stuff they think might be useful to you. [Craig Hollabaugh]’s son-in-law found an inspection camera and thought it would be handy for his hobby work. The MagniSight Explorer was first introduced in 2001. It is good for surface mount board work and inspection, except that its analog 480p video is quite dated by today’s standards. So [Craig] upgraded it for crystal clear 1080P/30 video and 5 megapixel images using a $35 Raspberry Pi 2 and a $26 Raspberry Pi Camera Module. After the upgrade, the unit is now a great tool for SMT rework.
There’s not a lot to the upgrade, but [Craig] gives a nice rundown in the 15 minute video of the MagniSight’s internals. He shows us the original analog camera module and its video card, which is able to do some additional processing like black and white output and reverse video (negative). As he mentions, it would be easy for him to do the same via software on the Raspberry Pi. A video camera lens takes care of magnification and two shafts coupled to it via flat belts (rubber bands?) take care of zoom and focus. A front coated mirror angled 45 degrees in front of the lens turns the optical path 90 degrees to allow the lens/camera to “look down”. After experimenting a bit to find the correct focal spot behind the lens unit for the Raspberry Pi camera, he covered the camera module with insulation tape and then just glued it to the old camera mount. After hooking it up to an HDMI monitor, the results are quite nice and he reckons he can easily work with components down to 0402 in size.
He’s got a couple of more upgrades in mind to make the system even better. He plans to replace the existing compact fluorescent lamps with a string of LED’s which will provide more uniform illumination. Plus, he can control their brightness, and selectively turn them on or off to get the optimum lighting. The other interesting upgrade would be to add stepper motors to the X-Y translation stage and automate their movement. After looking up a board file and its BoM, he may even be able to search for a part designator and move the stage to bring the part into focus.


Its worse than 480p in its original state, its 480i.
Superglue? Surprised it didn’t ruin the optics!
Not a problem if used sparingly and the optics are free of oils, moisture and other stuff that reacts with cyanoacrylate based adhesives. There may be low volatile versions which don’t cause fogging.
According to Star Trek, super glue emits “Eichner Radiation” which causes “plasma plague”. http://en.memory-alpha.wikia.com/wiki/Cyanoacrylate
I busted a gut laughing at that when I saw that episode.
What optics, I removed those. :-)
I glued the electrical tape to the housing. Glue never got near the board.
‘The nice thing with having a hacker cred is that family and friends are always on the lookout for stuff they think might be useful to you.’
Or as my wife calls them, ‘enablers’.
You’re right. My family finds all sorts of stuff/junk.
You need to invest in finding high WAF projects then :)
Last year a good friend found an old F-16 to work on,
http://hackaday.com/2014/11/14/powering-your-f-16-with-an-arduino/
so you’ll never know what you’re going they are going to drag in.
I have an Elmo Video Presenter for surface mount assemble. From memory, I think it is a P30.
It has very good zoom and built in SD card slot for pictures. Also USB and lots of features.
This is a later model..
http://www.elmousa.com/p30hd-visual-presenter
Have a look on Ebay :)
One of the best things is the camera is quite high above the base so there is plenty of room to solder while watching. A worthwhile mod to your project is to mount the camera higher up to give work room.
Looks very useful. Though, I have to admit, when I first saw the name “preschool” toy popped into my brain.
I have a similar thing, but an older model. It outputs S-Video PAL signals, which makes for a high-quality picture, albeit at 625-line resolution. Quite a handy thing for Hackspace tutorials, I expect.
Beautiful project, but the video is impossible to look because the camera moves non-stop and it makes me sick. The next time fix the camera. Thank you
Interesting build. I currently still use pure optical magnifaction with a binocular and was thinking about upgrading to a camera/screen solution for better workplace ergonomics. One problem i’ve seen with a lot of camera based systems is the depth of field at higher magnifications. How does that look with the Raspicam and your optics? Is the DOF good enough to work without the need to constantly fumble with the focus setting?
If you have enough light then adding a diaphragm would increase depth of field when zooming in theoretically.
Even with something as simple as a piece of cardboard with a small hole underneath the lens should work I think.
for SMT work, its fine. the board to the top of parts are all in focus, but not much more than that at high magnification.
where did you get those LED light strips? And how much did they cost?
Thanks!
http://www.ebay.com/itm/351258991929?_trksid=p2057872.m2749.l2649&ssPageName=STRK%3AMEBIDX%3AIT
20 6 LED strips for $8.99
The one thing I learned from the few times I attempted to work with SMT components is that SMT is best left to anybody else. Hell the last time I tried to repair an SMT board I eventually just broke down and cludged on some through hole components.
SMT is the one thing I can still justify spending the premium on breakouts not to have to deal with. At least until the point I have a pick and place machine and a reflow oven on my desk. Both of which are at just about the bottom of my list of things and my desk is pretty much at its maximum capacity anyhow.
Hakko hot tweezers works wonderful even on 0201. And the other trick to work with 0402 or smaller smd is use hot air soldering with solder paste and use it with a stand. The stand for the hot air solder gun is a must, you can align or replace your components with stainless tweezers. If you can afford or get one use a bottom heater, and that’s it.
I disagree completely. Been soldering almost weekly for 40 years. Once I got the surface mount zen, I never went back. 0603 parts are piece of cake. For rework, get a hot air gun with some nozzles, I only use one size, never changed it, some different flat tips for your soldering at 290C, some fine gauge solder, like 28 or 30, and solder wick. There are different techniques for sure but I’ll never do a thru-hole board again, ever.
When building boards from scratch, I use leaded paste 63/37 from syringe and a toaster oven ramped to 190C and your done.
When you replace the florescent lights with LEDs will you need a diffuser cover of some sort? I mean so that individual points of light from multiple LEDs aren’t showing up on the more reflective components. You could get two powerful single emitter LEDs to reduce how many points of light are shining I guess – I was thinking if there wasn’t a cover you could just use a piece of frosted plexi as a diffuser.
for sure. Those bright leds are quite a spot source. Haven’t figure the diffuser out yet. Thanks for writing.
Nice article and thanks for the effort to report/communicate on some diverse investigation.
I have an odd idea I want to explore:-
– low cost (480p) b/w ir capable camera module preferrably with i2c or spi output (not parallel)
So I can interface with the lowest end micro possible then do a selective scan of the image (b/w gray scale 8 bit) to look for a particular pattern – speed of operation isnt an issue but power consumption is.
Had a look around on-semi & others, even ebay but so far no luck :-(
If someone/something comes through from replies here will happily open & publish it here :-)
Cheers
http://www.adafruit.com/product/397
Thanks holla2040,
Hmmm, haven’t seen these before interesting, could well be suitable, the chip looks familiar, wonder if its a processor with flash too ie hackable (eeks). There’s a variation with a movement pic change sense too, price is manageable re hobby/proto, might well suit once i work through the tech details, links suggest others have written code to interface & obtain jpegs too, opens a few possibilities, thanks a lot for that poignant conscientious effort – into bookworm mode for foreseeable future,
cheers
Mike Massen
Not that I want to mitigate his work, but what he in fact did is connected a PI can to a Raspberry Pi and put the cam in the enclosure of an old cam. Nothing wrong with that, but I wouldnt really call that ‘giving a camera a face lift’ if any, it was the face of the camera that was kept
Just bought a magnisight pi3 and cam. Couple of questions.
You removed the lens off the pi cam. Is that a must and is it hard. Was this for the focal point.
I’m going to rebuild this for my uncle who can hardly see. Is there a way to just have him click on an icon to start the cam and if so how. I’ve never used the pi.
Help please
I wanted to use the machines optics, and they wouldn’t work (couldn’t focus) with the rpi camera lens on the camera. you should be able to create a linux desktop icon that launches vlc or whatever video player you want to user.