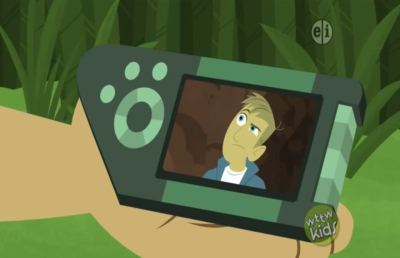
“To the Tortuga!” my husband and I heard the announcement from the backyard. Our two boys, Ben (7) and Miles (3), had become pleasantly obsessed with the coolest brothers in nature – the Kratt Brothers. From the moment that these two energetic animal-loving brothers were discovered by our kids, they’ve been huge fans. Our house has been transported to the Sonora Desert where we saved a Gila Monster, then to the Australian Outback to learn about the Thorny Devil. We even went to swing with the Spider Monkeys in South America and then back to the good ‘ole U.S. of A to harness the speed of the Roadrunner – since we are, after all, a family of runners!

Turns Out Daddy is an Engineer
What can a Daddy really do in this situation? In our case, a lot. Ben and Miles’ Daddy is Joe Grand, a real life computer engineer and a long time staple in the hacker and maker communities. Together, Joe and the boys have built robots, a 3D printer, and crazy looking circuit boards. Both kids have “component boxes,” shoe boxes covered in stickers, where they stash all their favorite electronic bits and pieces, and when soldering time comes around they fight for the first turn with the soldering iron. They are predisposed to working with electronics, but the path of engineering exploration is open for families in ways that it has never been before. The trick is for you to get involved in the process along with your kids.
Joe jumped at the chance to help the boys and I jumped at the chance to learn about and document the process. What started out as wishful thinking turned into a project that the whole family brought to life. As a fitness specialist and Waldorf parent, I feel like there’s a time and place for technology. While I’d rather play physical games like tag or write stories about magical adventures, the spark in my boys’ eyes when they see electronics is undeniable. It is my job to help foster that passion – even with my lack of technical expertise.
It Starts with a Plan
Joe and Ben sat at the kitchen table and brainstormed what their version of the Creaturepod would actually do. Ben had a vision of how it would function and what it would look like. He made some drawings and Joe took notes. As some may know, Joe is a minimalist when it comes to electronics. He likes simple, cheap, and useful, incorporating no more than is actually needed. The Creaturepod would be no different. Ben and Joe finally narrowed down the features: It would be a walkie talkie system where you could choose one of three friends to talk to. The display would show a picture of the selected friend. And, it had to look like the fictional Creaturepod.
From there, the engineering began. Joe created a high level block diagram and the kids helped him browse Digi-Key and Adafruit to select some of the major components. Ben chose orange and Miles chose blue for the channel/friend selection buttons. They wanted to have the center button (push-to-talk) be big and round. Components were ordered and the three builders waited patiently for the goodies to arrive. The boys also posed for their pictures that would ultimately be displayed on the LCD when their channel was selected.
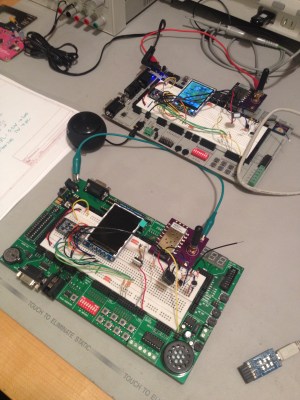
 The heavy task that came next was building the prototype. Joe has previously marveled at Ben’s soldering skills, claiming that “He solders better than most adult engineers.” Ben soldered the header pins to the Arduino module and breakout boards (LCD and radio) while Joe plugged them into a Parallax Professional Development Board (a feature-laden prototyping board) and built up the circuitry. The first goal was to get the LCD to display pictures of Ben and Miles’ friends. It didn’t take long using Adafruit’s pre-existing graphics libraries, but they had a few wiring issues to work out. While they were debugging, it became Ben’s bedtime. He tried to go to sleep, but was too excited knowing that Joe was downstairs trying to get the display up and running. He first came down “looking for a toy,” then he came down to “get water.” We gave in and let him stay up late with his daddy until the LCD came to life.
The next day, Joe finished up the coding for the prototype. It was a relatively simple task of interfacing with the DRA818U (PDF) radio transceiver module (basically a head-less ham radio), which was configured using standard asynchronous serial and a series of “AT” commands, and creating the basic operating behavior, which was to read the buttons and set the TX/RX frequencies and load the correct image onto the LCD. According to Ben, coding was “the most boring part to watch.”
(Boring) Code Complete; Time to Test
If you thought the cellphone commercials were hard to listen to (“Can you hear me now?”), try listening to a 7-year-old and an excited dad trying to communicate through a two-way radio, up and down your neighborhood streets. As always, pushing the limits – seeing just how far that signal will go. Static noise, then “Can you hear me? This is Daddy. Come in Creaturepod One. Do you read me?” over and over again. The DRA818U transceiver supports 0.5W (low) and 1W (high) transmission power. At low power, the signal nearly reached across the entire neighborhood, much further than is needed just for kids to talk between their houses.
Joe and Ben noticed that the microphone would occasionally cut out during transmissions, so they added a small transistor-based microphone pre-amp to make the input level into the radio a little higher. This helped the voice quality a bit, but didn’t stop the cutting out of the signal. After some more research, Joe discovered that there was significant noise fed into the power and ground lines when the transceiver module was transmitting. He wasn’t sure if this was caused by a poor quality antenna or because he prototyped the wireless/RF system on a breadboard, which typically can’t handle high frequencies. When he touched the antenna during transmitting, the microphone would stop cutting out. Clearly, this was an RF issue and he hoped it would go away with a properly designed PCB. I’m happy to report that it did.
Fabbing the Creaturepod
Once the testing was a success, it was time for some circuit board layout. Ben took measurements of the board and drew the artwork that he wanted to be silkscreened onto it. Joe spent a few nights sitting in bed with his laptop working on the design, refining it to look just like the fictional toy Creaturepod and adding some artistic features. He didn’t want to have any solder pads or traces visible on the top side of the board, so he worked out ways to hide them underneath other components. This would make assembly more difficult, since certain components had to be mounted before others, but for a one-off project, it wasn’t a big deal. It was during this time that we were greeted with an important realization. Ben said: “Daddy, I didn’t realize how much work this takes!” It’s true. Engineering is hard!
They shipped the board off to OSH Park on a Tuesday. Because Laen and his team are so awesome, they upgraded the order to Super Swift service and the boards shipped on Friday. Living up the road from Laen, they didn’t have to wait long for the package. On Saturday, Joe and the boys were giddy with excitement and kept looking outside every time they thought they heard the mailman. When the boards finally arrived, they rushed into Joe’s office and tore open the envelope. The rest of the day was spent putting everything together: Ben and Miles inspected the PCBs and sanded off the small “nibs” around the edges caused by panelization, Ben soldered the through-hole parts and Joe soldered up the rest, they programmed the firmware onto the units (using a pogo pin adapter that Joe threw together), and did some testing. Everything worked fine, except that the gain on the speaker output was too high. A quick resistor change brought things to a more manageable level.
Toys Mean More When You Build Them Yourself
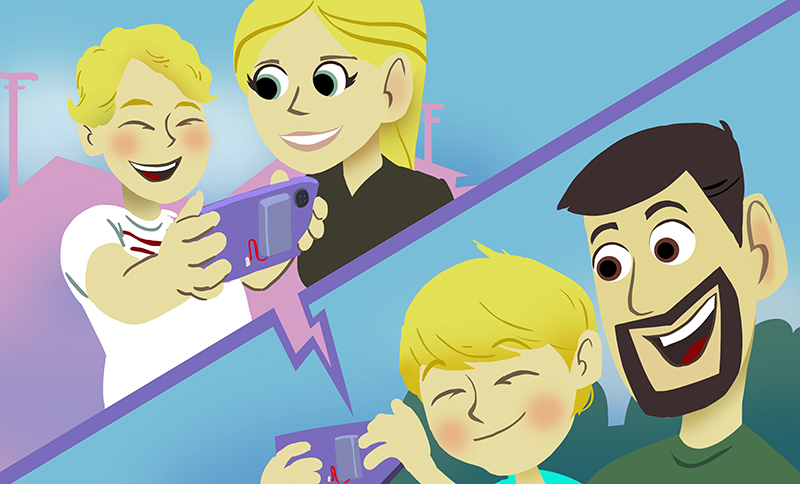
After all that, it was finally time to play! A few weeks after we finished the Creaturepods, they’re still making the rounds in nearly every playdate. They’ve weathered most usage by our energetic kids and their neighborhood friends (except for one LCD that didn’t survive a drop, causing the chip-on-glass to break and requiring Joe to grudgingly replace the 10-pin through-hole module). But look on the bright side, he knows exactly where to source the replacement parts unlike store-bought electronics.
Building the Creaturepod as a family is something we’ll always remember. We got excited, frustrated, bored, and excited again, together. Our kids got to experience the thrill of taking an idea from concept to reality and learned about the focus and effort that it requires to do so. Nothing was pushed on them and they only did the tasks that they could handle at the times they could handle them. Even without having a Daddy like ours to help with the electronics design, there are hackerspaces and maker communities all over the world filled with creative, intelligent minds willing to explore, build, share, and teach. Build your own Creaturepod replica using the open source design files, or develop your own project based on a favorite piece of technology. The opportunity has never been better to fuel the minds of our future hackers and builders. As Ben and Miles might say on their next Creaturepod adventure: “Activate engineer powers!”
 Keely Grand (@keelygrand) is a mom, athlete, personal trainer, and writer who aims to inspire people to lead healthy, functional, and happy lives. She spends her afternoons as a cross country and track coach, helping high school students experience all the good things running can bring. When the moon is high and the stars are sparkling, she taps away at her keyboard writing blog posts or book summaries for her friends and clients throughout the country. Since 2002, she has listened to, edited for, and tolerated her “Sultan of Soldering” husband, Joe Grand.


Wow, what a great story, and such awesome gadgets to boot! +10 000 parent points to the Grands :) Spending time with my dad building stuff in the garage inspired me, and I wish more kids could experience that. Good work Joe and Keely!
Lol, im a huge parallax fan and own some of Joes products. I literally sat down and read this while my daughter was watching Wild Kratts. She is a bit young at 17 months, but she can say names of components and shes always stealing my tools and PCBs accidently in reach and acts like shes soldering them :). I bought her a brand new RS 200 in 1 for when shes old enough. Kids are great!
17 Months?! I’ll bet most of the people here will wish they had that much of a head start.
there are so many special snowflakes in this family it’s a goddamn blizzard
What’s the BOM on this project? My kids would love this kind of setup. Frankly, if the RF is in an allowable spectrum, this would be a great commercial project.
Come to think of it, between Wild Krats and Odd Squad, PBS kids have some pretty sweet gadget shows on these days.
It’d be really cool if SparkFun or AdaFruit partnered with PBS to sell these kits. Some of the proceeds could go to PBS or the Wild Kratt production company.
It could be placed on FRS frequencies with a simple firmware modification. However, there is no reason for the kids to not get/have their ham license and use those frequencies. Self built gadgets is exactly why we have Ham Radio.
Now Joe Grand’s wife is posting here too!
LOVE IT
Awesome work! Joe and Keely are really setting an example on how to inspire the next generation of hardware hackers.
Excellent article, and excellent parenting.
You’re making me wish stuff like this was possible when my own son was young.
Dude – from one hacker Dad to another, major props. My boys are obsessed with Wild Kratts right now too – too bad I can’t show them this…how do I explain “kids, Daddy isn’t Kingpin…” :-) And major props to Keely too – excellent writeup!
this is a great article and more, good to see this on hackaday!
you guys are awesome <3
Wonderful write-up. What a great project to foster creativity and bonding! You guys are very lucky!
And this is why we must cut funding to PBS… How dare they produce content our kids enjoy and learn about the word by??? This is absurd!
Jokes(?) aside, my sincerest congratulations! This gave me ideas on things to do with my 5 years old son who LOVES Wild Kratts. Even my 16 month old daughter stands in awe in front of the TV when this show is on! He already got a good introduction not one of the subjects daddy studied (Biology) and he is pretty god at it. Time to investigate the other subject (Electronics Engineering) together. Thank you for keeping our children’s minds inquisitive.
It would be great if stuff like this showed up here more frequently – nice story – but also a project with a BOM and links to ref materials – Nice write up!
When I was a kid about 30 years ago, we had this Hungarian cartoon on TV (not in Hungary) named “Explorer Boy”. His creations could put McGyver to shame. He was probably the first hacker I had seen. Does anybody know the actual name of it? He had a little dog, too.