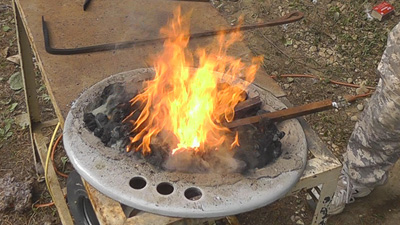
The sweltering heat had finally moved on and Giant Tick season was coming to a close (not kidding, they are HUGE here), when I decided to fire up my hacked together blacksmith forge made out of an old bathroom sink and aquarium stand.
In the age-old formula I needed to supply an air source to a fuel to create enough heat to make iron malleable. I got the idea that this particular bathroom sink might be a good candidate for a fire bowl after I banged my shin with it and then cursed at it. It was clearly made of cast iron and as proof it was clearly unfazed by my tirade of words which I hope my son has learned from the Internet and not from listening to me remodel the bathroom.
You’ve heard of Carbon-14 dating? I was able to judge the age of this particular sink using “1970’s Color Swatch” dating; the powder blue puts it somewhere in the mid-to-late 1970s… Apparently the sinks were made of cast iron and not Melamine™ back then.
 The aquarium stand itself had actually been in use. As luck would have it, the last Kissing Gourami fish passed on after a prolonged deathwatch. Funny that the last of a full tank of fish can die off over the course of a year, and yet take another year for the very last fish to expire. Meanwhile the pump has to be kept running, the water cleaned, and the cats shooed away.
In short, the aquarium stand had just freed up. I figured if it could hold a 250lb 30 gallon tank containing a 2 oz. fish it should do just fine as a forge base. I married it up with a hefty piece of steel for the top, my guess is about 3/16” thick based on measuring the width of a scar on the back of my leg that I got when brushing up against the corner of it a couple of years back.


The plumbing came from my junk pile — I have a habit of buying stuff at Home Depot which is immediately thrown in my junk pile so that one day when I do go to use it I feel like I have recycled something. The T-joint connected to the sink’s drain hole provides an ash and debris clean-out by uncapping the bottom opening. The middle opening is fed by an AC air blower on a dimmer switch. I am using a squirrel cage blower that I got from Grainger (yes, it sat in my junk pile too and now I’ve rescued it). Many people use a hair dryer; in my case I no longer have hair and my last dryer I used in a Plexiglas™ bender after watching [Jeri Ellsworth’s] video many years ago.
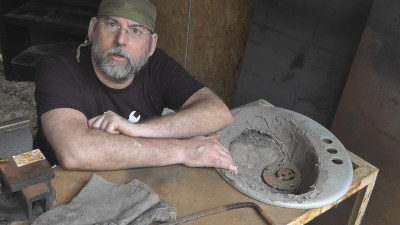
Put the Cement in the Sink
The trick is to melt the stock iron, but not the iron bowl so I lined the sink with refractory cement. My first batch of refractory cement came from a bag of refractory cement powder from a local sand, cement, and gravel quarry outlet.
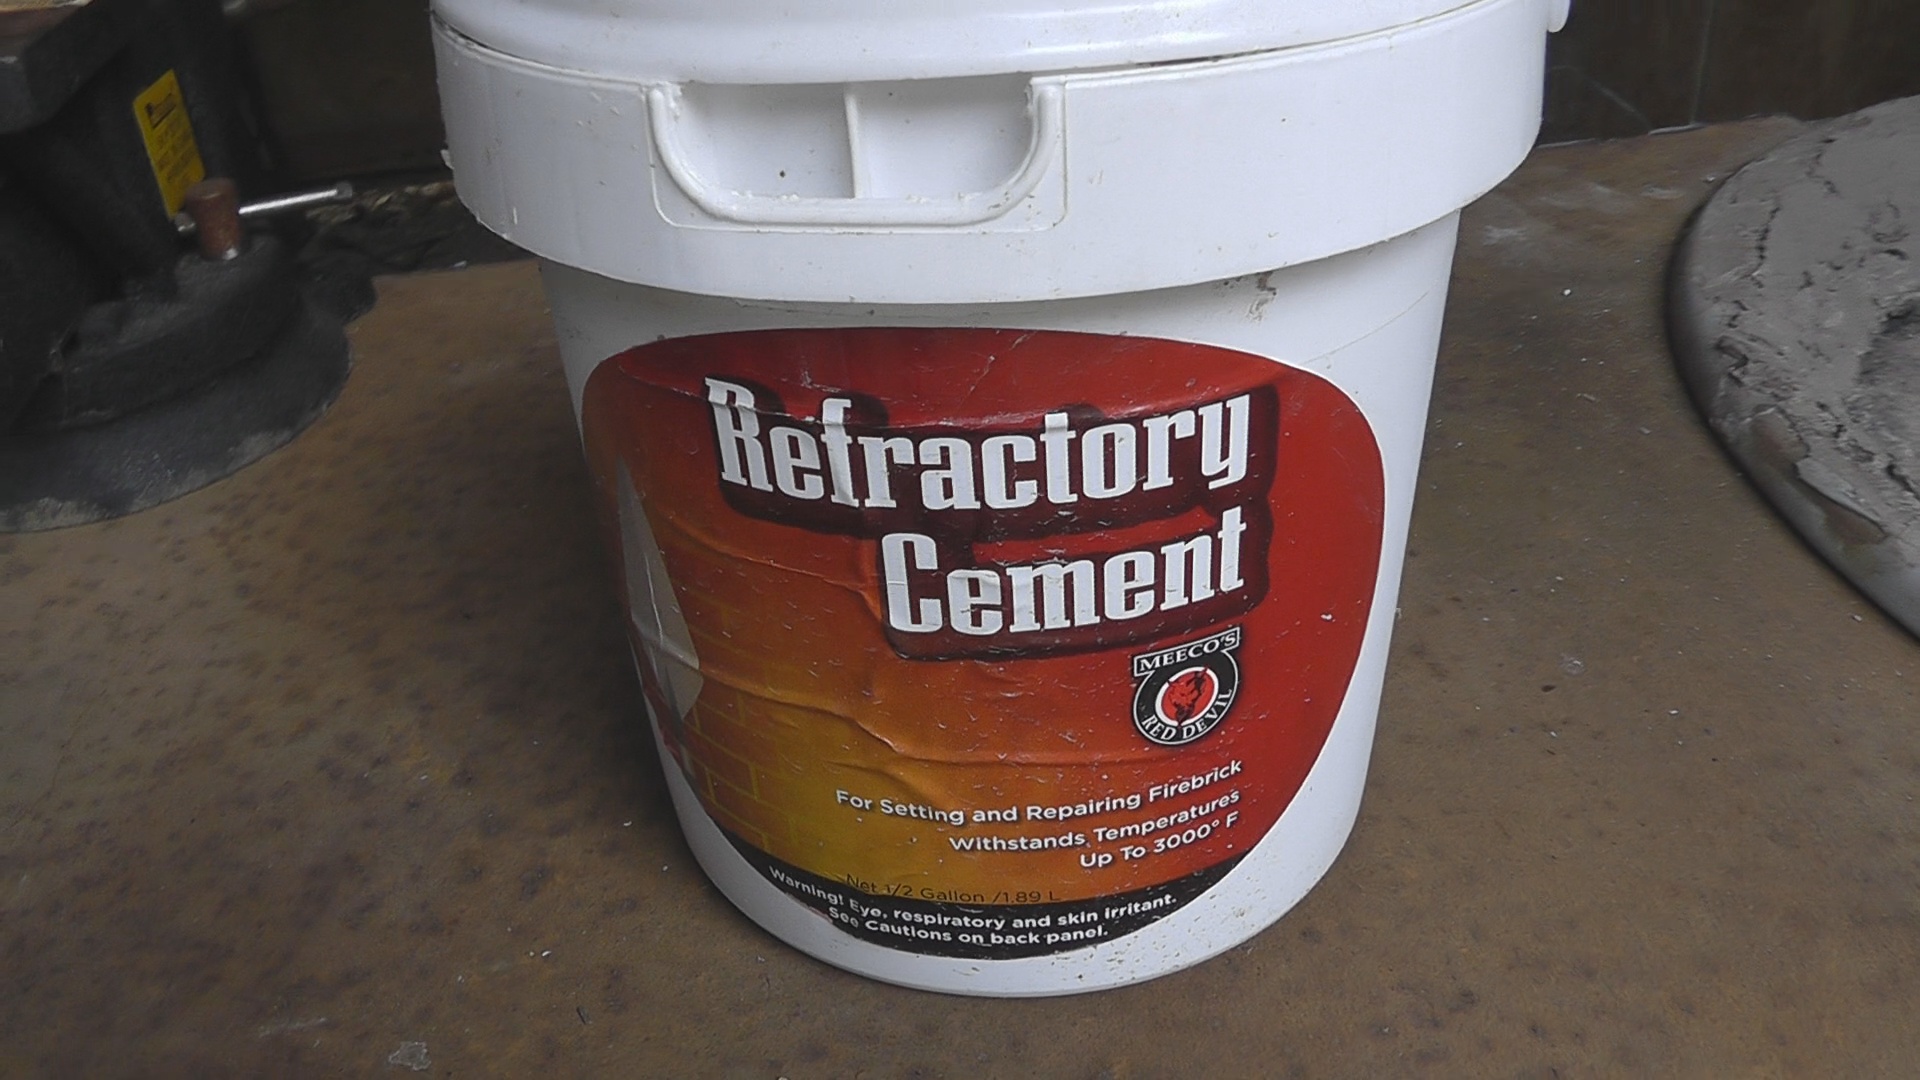
I mixed the cement and applied to the inside of the bowl some time ago. This year when I moved the forge into my new building (it was the building before this that cost me a finger) I realized that some of the sandy cement mixture had been washed away; probably during a recent hurricane (we have had a couple of hurricanes go directly overhead recently including Sandy). This time I went to the local hardware store and grabbed a container of premixed refractory cement… or maybe it was Amazon. A quick slather and set and I had a pretty reasonable coating protecting my powder blue sink.
Finally the piece that I purchased on this redo of the forge is the metal piece that covers the air inlet known as the tuyère which is spelled tuyère but is otherwise unpronounceable. I do know people that think they know how to pronounce it, they are mostly wrong.


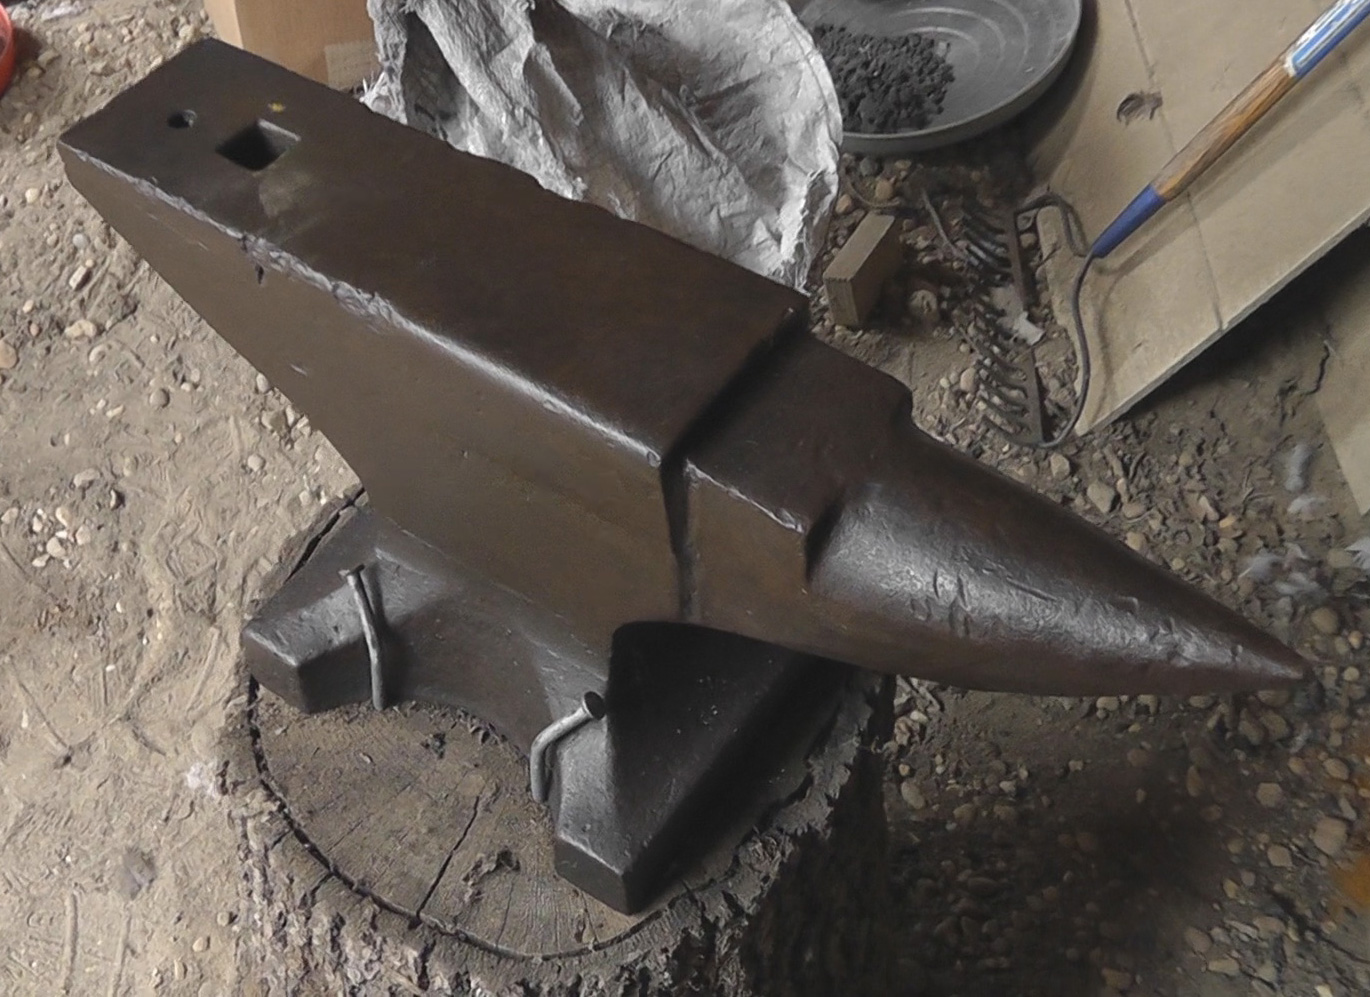
Finally the coal: basically you want, you need, blacksmithing coal. If one were to burn the coal used by the power industry one would find one’s self on one’s back from the sulfurous fumes (and other carcinogenic chemicals best left to the big power plants to release into our atmosphere). I got my first batch from a blacksmith in Delaware where I bought my anvil, sadly the container it was in was not hurricane proof and I found a bog-like watery sludge when I started to shoot this video the first time.
This last batch of coal I bought online from Centaur Forge. Their shipping was included, which is something to check so that you don’t effectively double the cost of a bag of coal. The chunks are between ¼” and ¾” where I was used to ¼” to ½” but otherwise it burns clean, very low sulfur and metal bends in its presence when heated.
Starting the fire is still somewhat of a pain. Many people use newspaper and coal dust, some use pine needles, I use lighter fluid. Even with half a bottle of Kingston™ I found that you still have to make a pocket in the coal that has direct air flow from the blower and allows the edges of the coal to catch. The sign that the coal really is catching is that smoke starts to waft up and has a slight green tinge to it, possibly one reason it’s called green coal.
There are a couple of byproducts of the coal burning process other than the occasional blister: “coke”, a purer form of carbon, and “clinkers”, the byproduct of the impurities. Coke can be strategically moved to make a hotter fire and help impart carbon to iron (carbon+iron=steel) or to help start a fire (coke+lighter fluid =fire). Clinkers kind of look like coke, they are mostly black, clumpy things, which will actually choke a fire if not removed. They do make a clinking noise when struck due to the amalgam of carcinogens and metal-like residue.
As shown here I grab a rather thick piece of steel and trying to get the right amount of steel in the right amount of fire. They tell you not to wear gloves when blacksmithing so that you get used to not burning yourselve. Believing that I also can’t really burn myself while wearing gloves, check out the wisp of smoke that comes off them while I am talking and touching the hot metal. Too much focusing on my video diatribe.
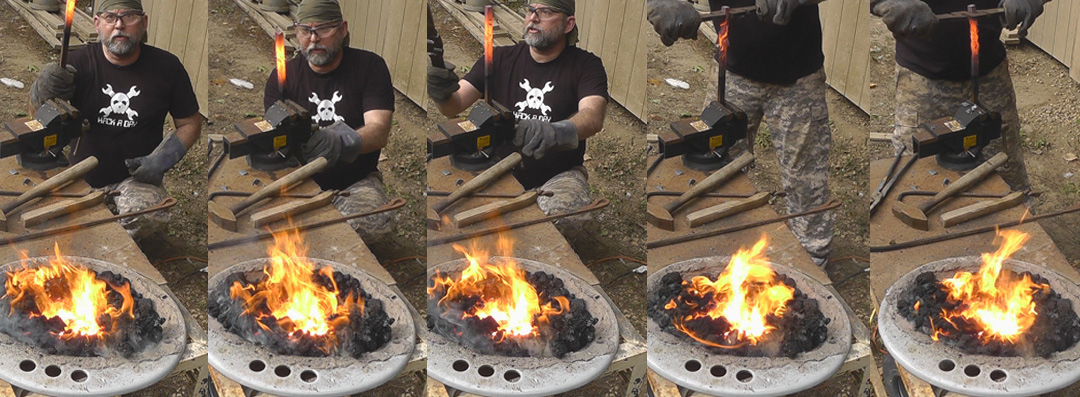
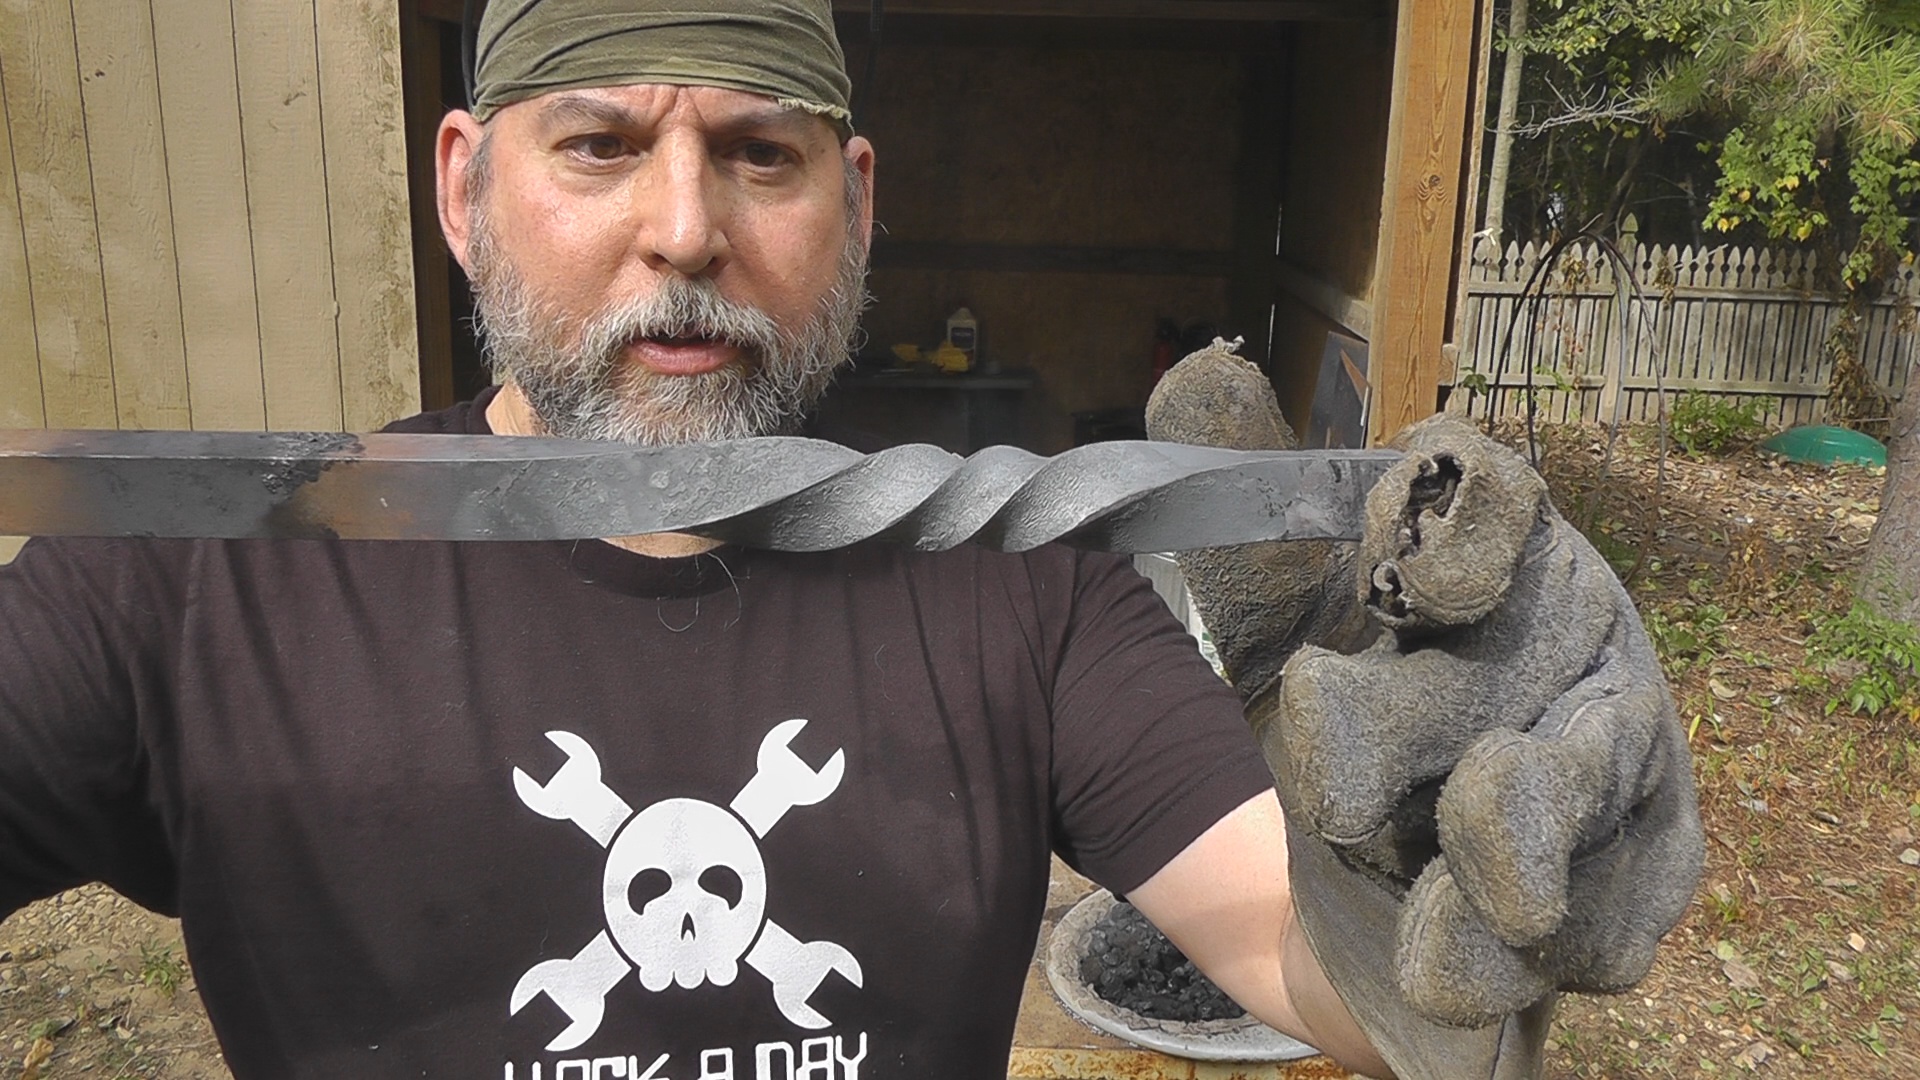
Here you can see the steel after I gave it a good twist. It took very little effort especially compared to any chance of twisting the metal while cold. I also demonstrate that all metal is hot even though it looks cold, wearing the gloves paid off since I would not normally tap a freshly heated piece of metal while talking.
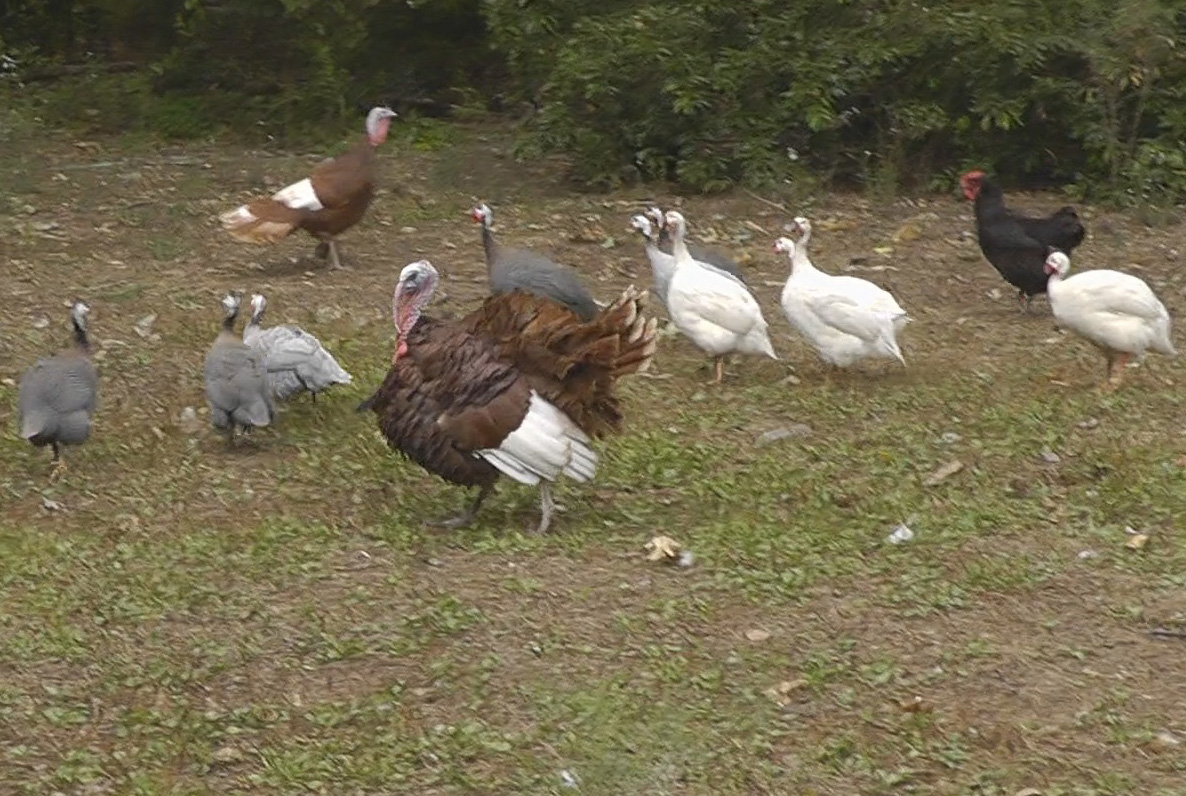
Meanwhile the peanut gallery, taking a break from tick eating, looks on.
If I had a pond and a creek in my back yard like I did while working at Commodore in the ‘80s I would probably be fishing instead of banging hot metal in my spare time. I live in New Jersey however and the water here is referred to as “cedar water” meaning it’s not something you want to get on you (I stained a shirt permanently when I fell in one time) and any fish that can survive in it tastes like pine needle sap. Since giant tick wrangling ain’t really my thing either, I opted for burning metal. Anyone interested in a video on MIG/TIG welding let me know.
If bending real metal instead of that semi-conductor transition metal stuff sounds interesting you can find lots of online resources and books including abana.org (Artist-Blacksmith’s Association of North America). Heck I did it with a bathroom sink and an aquarium stand.


“Anyone interested in a video on MIG/TIG welding let me know.”
Actually, while I know there’s a lot of stuff on youtube/web-in-general about it, if you can manage a comprehensive overview of welding then I’d much appreciate it. I’ve been wanting to get in to welding metal but spend more time researching options before walking away from the subject swamped with sources.
Blacksmithing has also been something I’ve wondered about (maybe more home-forge) but I think being skilled and equipped for welding would be more useful for me short-term :-)
Yeah I could show MIG, TIG, Plasma, and Acetylene, I just don’t have a stick burner. I don’t have near as much time on TIG but I can weld holes closed on sheet metal with MIG…. which I had to learn to do after making the holes in the first place.
MIG would be awesome. I’ve tried my hand at TIG and for me it was a lot easier to learn (considering I still can’t do anything but burn holes with a MIG) but TIG’s are $$$ were as you can pick a MIG up for next to nothing.
That would be a pretty excellent overview if you could Bil, thanks.
Much like your forging writeup, I’m less concerned over perfect technique and really just what’s possible with what (the classic “what tool should I buy first?” :-). Most of what I’ve read (found on the web) seems more focussed around the “right tools for the right materials” which one is usually not thinking about when wanting to hack something together.
So any insight would be most appreciated (even if it’s what tools are best at making holes, burning off ticks, scaring birds..)
This is so awesome. You’ve convinced me that I have to take the plunge and build a forge in my yard, Bil. Going to have to swing by the junk station and find some parts.
As far as casting goes, could I put a crucible in the forge and use it to cast other metals too?
My experience with castings is you really need a gas fired enclosed oven-like furnace, there are tones of plans online and I have a book also. In my metal shop class in the ’70s we had a casting furnace for casting aluminum and would make greensoil molds. The lid to the furnace was about 20″ round and had a 6 inch round whole in the top that roared with exhaust when the fire was going. One day one of the students turned the gas on first and then waited too long to hit the ignition switch, the lid lifted about a foot in the air and cracked in half when it landed. (still worked, as the lid lifter thing held the pieces together)
In a coal or charcoal forge/hearth you’re pretty much restricted to aluminum. If you’re just messing around you can melt aluminum in an old soup can or piece of iron pipe (not galvanized, you’ll get sick). For anything other than art you really need a clay/graphite crucible to keep aluminum from dissolving the crucible and changing your alloy.
In addition to the dedicated foundry plans floating around the net (from 5-55 gallons), you can buy a few firebricks and stack them around the crucible. Filling the gaps with solid fuel.
you can also melt it with just a crucible and a stick welder, i don’t remember where i saw the video, but use an aluminum rod, and a graphite crucible, and that’s about all there is too it.
AvE has a few videos on youtube like that.
Take the plunge. Full respect, but the video could give better information. An old cast iron brake drum with a 12 volt fan made a lot of money for many farriers in the day, and probably now. Good coal, get the clinker(nasty sulphur bases aglomerations that plug the airflow through the tuyeere [maybe SIC] and use some PPE and learn a new skill. Anvil Shaped Objects used to be rocks in the days of Viking voyages.
You can also use an old brake drum from a largish truck (think Mack size). The brake drum approach is probably a bit more preferable because the sides can be notched, allowing you to lay long bar-stock in the fire and heat the middle.
Had a setup very similar to this when I was younger. The notching part took forever with a side-grinder and about 15 cutoff wheels, but hey.. it got the job done. ;)
… though I do like the ‘old sink’ approach. That’s far better than my first attempt of using an old #10 coffee can full of charcoal hung out of a 10′ section of 10″ flue pipe.
Yup, also some BBQ and even Directv dishes depending on what you are doing and how permanent. I use a disc break as a bending jig for making big round arcs. :)
Electric blowers tend to way over-stoke a fire. Those old Buffalo geared hand-crank blowers really are absolutely marvelous, since you could dial in just as much air as you want, when you want, and then you don’t need ant AC lines present to do your forging.
I wonder if any Chinese companies have made replicas of them? Someone (me? nah) really should sit down some day and just design one that can be made out of McMaster/Misumi/other catalog parts, with a housing and vanes that can be made to order at any local welding shop.
A lot of people recommend the hand crank to control the fire and not waste coal. Mine is one a dimmer but the truth is I waste some coal that way, but then I have limited time so I would rather putter while hearing.
You can still get the hand cranked forge blowers on eBay, if you look for black smithing tools.
Article insinuates coke is an accidental byproduct of coal fire, when it is in fact the point to a blacksmith fire. After the fire is started an hot, you wet the burning coal and it will steam out the impurities and make it coke. THEN you start heating your metal and working. You may get away with some smithing without coking your coal, but why? It critical for forgw welding, and it makes the fire alot more pleasant after all the sulfurs gone.
Pretty sure you can just buy coke, I know my Grandad did, back in the days when people had coal fires. Actually it was the 1970s and 80s, he was just tight with money. Had an old range cooker too, people pay a fortune for those nowadays. My Nana would’ve killed for a gas cooker!
It was my Grandad who gave me the great piece of financial advice that so many people seem not to be aware of. You can’t make a profit by selling your home. Because however much the value has gone up, the prices of all the others houses have gone up too. You still need somewhere to live.
I think coke was sold for use in towns where there were emissions rules over smoke, coke burns with little smoke, since it’s mostly pure carbon. It’s produced just by heating coal with no air, similar to how you make charcoal from wood. I think some blacksmiths use charcoal too sometimes. It’s not something I know a lot about, the steam method is surprising, wouldn’t have thought it would work so quickly, or using water. I knew coke burns hotter though, and with less flame.
Yeah, you dump the water in the fire and a huge plume of yellow sulfur smoke gets released instantly. I don’t know how it happens so fast, but it does! It’s real bad stinky for a minute, then gets pretty clean…I use WV coal from local mines cause it was available, pain in the ass cause you want homogenous size peices, so you gotta break it up, but after its coked its fine though, but you do have to check for clinkers often with it.
Centaur Forge for example has coke for sale near the same price as coal.
I would watch a MIG/TIG video, Bill!
When you first build a coal smithing fire, after its hot, you need to wet the coal. This will cause the sulfur and other impurities to “steam” out. You will be left with clean, hot burning coke. You blacksmith from a coke fire, not coal. It’s hotter, cleaner, and much more pleasant after the sulfurs gone. You may get away with smithing from a coal fire, but it is critical for forge welding.
Yup.
From the post: Coke can be strategically moved to make a hotter fire and help impart carbon to iron (carbon+iron=steel) or to help start a fire (coke+lighter fluid =fire)
The wetting of the burning coal is the catalyst to make most of it coke. The whole point of my post was to share the proper coal fire technique of using water to create coke, which was NOT in the article. BTW I have studied pattern welded steel under the late mastersmith Bill Fiorini, and while I am terrible at it bladesmithing, I know how to coke a fire.
AH, sorry, the post I wrote about was about taking an old bathroom sink and making something hot enough to bend metal out and have some fun in the process, I wasn’t trying to say anything about proper anything, other than a flock of birds help keeps the tick population down.
How does the carbon get into the steel? How do you control it?
It chemically sticks and merges due to the high heat. Just on the outside. In fact, a way to “case harden” steel is to put a piece into a small metal box filled with coke, surrounding the knife or whatever and you heat the whole box.
As far as I know you don’t really control it, it won’t get to hard or brittle because its just the outter layer that gets hard(to hold on edge better) but the core will stay softer and less prone to shatter. It’s a different take on the same idea of a hamon line In A katana. They temper the edge very hard and leave to spine softer. At first, a chip would cause the whole brittle edge to “peel” away from the softer sword body, then they started making the line a pattern that went to the edge every inch or so, so a chip would only peel to the little soft bit. Most crappy stainless steel katanas have a “simulated hamon” that looks like triangles, the tips of the triangles going to the blade edge to provide this chip “firewall”.
So the carbon gets in from the steel physically touching the coal? Not through carbon monoxide or dioxide or whatever? Suppose it takes a while? Do you need to make sure the coals touch every part of the steel?
Dude! Thank you! For a while I’d been wondering about the consequences of differential hardness on knives and swords. Obviously if you have a soft spine and a contiguous hard edge, you’re going to have surface cracking issues if the blade flexes, and at that point you might as well just harden the whole thing. I thought that perhaps you could harden the edge in “pieces”, but it never occurred to me that uneven hardening like a hamon would prevent cracks from propagating.
So long as your fire is burning rich, all the heat will cause carbon to dissolve into the iron. Too lean a fire and you burn out carbon, and eventually the iron itself. The white sparks coming off a piece when you’ve heated too hot (in the fire bowl) trying to forge weld, is bits of iron burning off. Controlling C% in a forge is difficult. This is what drove the creation of pattern (Damascus) steel initially. Though it is is beautiful the prime goal was to blend pig iron (or similar) and steel thereby improving material properties.
@Trevor
The hamon isn’t so much a difference in C% as it is a difference in crystal structure and steel phase. Period katanas were coated in refractory everywhere except the blade edge to help slow heating/cooling. This in turn helps control the temper, so what you’re seeing is in reality the difference in crystal structure of different phases of ‘steel’ and varying concentrations of martensite, austenite, ferrite, pearlite, and/or cementite. Faster cooling = more martensite. As steel is heated the carbon moves around the structure, quenching freezes it in place, whereas tempering allows carbon to drift depending on the tempering temperature and steel alloy. Thus more or less of one phase of steel is prevalent on either side of the hamon.
I mean the concept is similar, but a different take, aka method of making it happen. Both result in a harder edge to hold the…well edge better, and softer core to flex and not shatter.
As a member of the New Jersey Blacksmithing Association I highly recommend you go to their “open forge nights”, it is where I learned to blacksmith. Last time I checked it was only $20 FOR THE YEAR, and they have all the equipment you could ever want.
Having grown up in NJ you should also check out the blacksmith of trenton (https://www.youtube.com/watch?v=PRPSrrVQDJw) the next time you are in the area.
Also, not to nitpick your article, but you don’t melt metal in a forge, you melt metal in a furnace. In blacksmithing you want to heat metal until it is in its plastic state and then hit it. Also, (and this is a personal preference) you should “soak” the metal (let it rest in the fire to ensure the same heat throughout) before twisting, that way you will get an even twist.
Hi John,
Yes the original content had some humor about making a fire hot enough to melt metal in a container made of metal, and so I was using an artistic overstatement in general that probably got lost. Also more content about scars and sharp metal I have known >:)
Yeah I worried more about the camera shot, whether the sound would work, the wind picking up, the damm turkey wondering underfoot, and not setting fire to anything, I also normally build the fire up higher so that I can lay the material in level instead of just poked downhill. The decision to war gloves was a good one for these same reasons as your mind is on so may things the fact the metal was hot fell off the list. (hence the smoke, you can see me laugh). I also had just attached the vise to the table just for the shoots so I could get the twist on camera, I actually bent the piece over more than I usually do which is why I had to run to the anvil.
I just exchanged emails with Larry B as I was trying to find your website but the IBANA link was to the defunct NJ chapter, so I settled for mentioning ABANA in general.
Bil
The New Jersey Blacksmiths site is njblacksmiths.org
ABANA-Chapter went down and we got a different server and web address
Larry Brown
Thanksgiving is coming Turkeys!
This was highly entertaining. Especially like the humor!
Bill, luv your vids. When I was an apprentice boilermaker/welder I had to spend six months with the blacksmith. A very enjoyable time. Forges are easy enough to make and anvils can be anything from a solid piece of steel to a small length of railway line. Once you have tried it (making steel hooks, centre punch/pop, steel wedges etc), and enjoy it investment in more refined equipment maybe required.
A forge can be used to cast aluminium, but I suggest making some tongs first.
TIP: If you burn your finger (hot metal, iron, kettle, soldering iron) put the burnt finger on your ear lobe and use the thumb to apply gentle pressure. The burning will stop.
Ross
I always wondered what Vulcan thought about while on the can.
This is too funny. I just built a forge here in philly a few days ago out of an old steel fire pit and now there is a video on one of my favorite blogs about blacksmithing! Just need an aso and I can fire it up!
To start with I thought the article was good but “make a clinking noise when struck due to the amalgam of carcinogens” is one of the worst sentences that I have ever read in my life.
Clinks because of carcinogens… Shame on you.
Its a joke.
I use insulating firebrick for the body, and heavy(fireplace) firebrick for the floor of my forge. Then fire the whole thing with propane. Much cleaner.
https://picasaweb.google.com/112607452244074089536/Forge?authuser=0&feat=directlink
if the purpose is solely to heat metal then a propane forge can be extremely practical but often the chemistry of a carbon fire allows for some interesting techniques.
Yea, all I do is decorative work. In theory I can make the fire chamber smaller to get it up to welding temp, but I haven’t tried.
FYI,
I picked up a nice squirrel cage/blower (and IIRC, the electric motor for it) from a local HVAC repair place. Free!
Thanks for inspiring.
Again and again I am positively surprised by HaD’s graphic artist’s work. It really adds a lot of originality to the content. Thanks a lot, mate, great job!
An example of the best HaD has to offer. Very edutaining. Just the kind of balance of knowledge, enthusiasm and humour all teachers should aspire to have.
Cool video, though slightly puzzled as to why hes basically using a simple firepit, would’ve thought the heat coming from the fire needs to be maintained in the area (read; there should be some sort of top half too it) to get too the needed tempratures
As someone who normally only comes here to gripe about typos and grammar: This is the most well-written article I have read on HaD in a long, long time.
I’ve always heard tuyere pronounced ‘TWEE’…
hello could you do this with a clay sink
Even if it didn’t break from thermal shock, a clay sink would break just from having work and tools accidentally dropped on it. Blacksmithing isn’t a delicate process, stuff gets dropped constantly.
This is some really good information about making your own blacksmith tools. I would have never thought about making a little forge out of a bathroom sink. I would if you could use something like that to heat up a melting crucible. It seems like that would be a really easy thing to set up.
I wore sneakers instead of my steel toed shoes into our shop one Sunday because I was in a hurry. I won’t do that again.
My girlfriend at the time wore open toed shoes while running a drag solder machine and dropped a gob of molten solder on her toes. She said the same thing you did. :)