When Is Damascus Steel Not From Damascus?

If you grow up around a working blacksmith’s forge, there are a few subjects related to metalwork on which you’ll occasionally have a heated discussion. Probably the best known is the topic of wrought iron, a subject I’ve covered here in the past, and which comes from the name of a particular material being confused with a catch-all term of all blacksmith-made items. I’ve come to realise over recent years that there may be another term in general use which is a little jarring to metalwork pedants, so-called Damascus steel. Why the Syrian capital should pop up in this way is a fascinating story of medieval metalworking, which can easily consume many days of research.

Damascus? Where’s That?

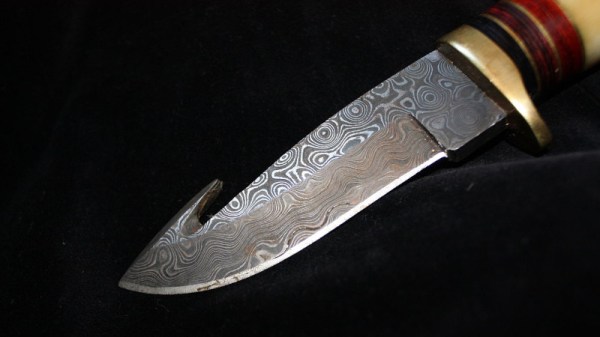
A section of a knife blade with various silver grey and black layered patterns in the metal.
The banded pattern of the laminate formed from pattern welded layers of differing steels in a modern Damascus steel knife. “DamaszenerKlinge” by Soerfm

The Damascus steel you’ll see in YouTube videos, TV shows, and elsewhere is a steel with complex bands and striations on its surface. It’s often used in knife blades, and it will usually have been chemically treated to enhance the appearance of the patterns. It’s a laminate material made by pattern welding layers of different steels together, and it will usually have been worked and folded many times to produce a huge number of very thin layers of those steels. Sometimes it’s not made from sheets or ingots of steel but from manufactured steel products such as chains, in an attempt to produce a result with more unusual patterns. Continue reading “When Is Damascus Steel Not From Damascus?”

DIY Furnace Smelts Magnetite Sand Into An Impressive Chef’s Knife

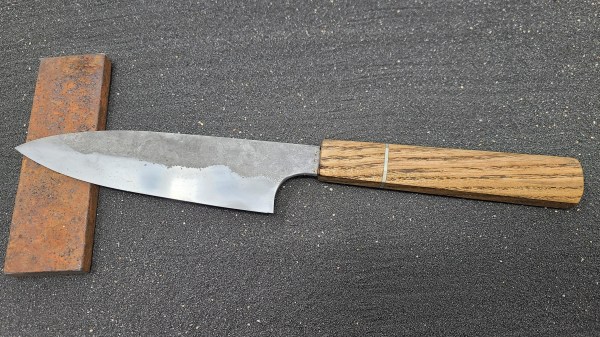
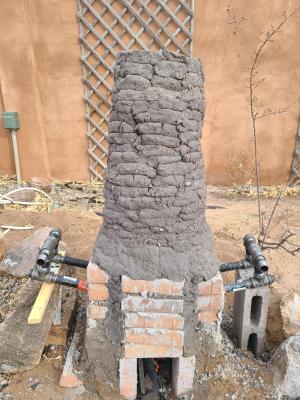
Some people order their raw materials from a factory, missing out on 99% of the fun… or suffering, we’re not sure which. To make that call, you need to look in on the process [IllyriaD] used to collect magnetite sand and turn it into a wicked-looking chef’s knife.

This began by collecting 150 pounds (!) of magnetic dirt from dry lake beds while hiking using a magnet pickup tool with release lever that he got from Harbor Freight. Several repeated magnetic refining passes separated the black ore from non-metallic sands ready for the furnace that he built. That is used to fire up the raw materials using 150 pounds of charcoal, changing the chemical composition by adding carbon and resulting in a gnarly lump of iron known as a bloom.
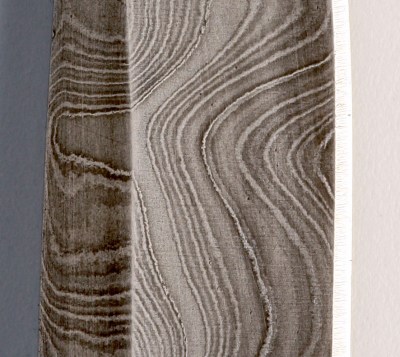
From there, it’s just a matter of beating the iron bloom into submission over at the anvil. [IllyriaD] details the process of flattening it out to a bar shape, then folding it over. Seven total folds are made for 128 layers, and in the gallery there’s a fantastic image that captures the striation when viewed on end. After being sharpened and polished, you can see where the bevel descends through those layers.

It’s delightful to see people working through the old ways and proving you don’t need a factory, as long as your true goal is to explore the process itself. Does this leave you wanting even more? [IllyriaD] left some insight about the process in the comments of the reddit thread. You probably also want to check out the tile-roofed hut built by [PrimitiveTechnology] without any modern tools.

Giant Blacksmith Vise From Start To Finish

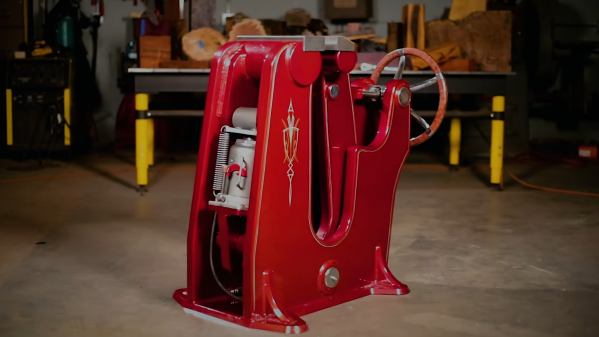
In any proper workshop you want to be able to securely hold a workpiece, whether it’s a tiny PCB or a heavy piece of forged steel. [Jason Marburger] from Fireball Tool needed a really large heavy-duty vise, so he built himself a massive 1490 lbs / 676 kg floor-standing blacksmith vise from scratch.

Blacksmith vises are designed to take a lot of heavy abuse, such as holding heavy pieces of steel that are being hammered. [Jason]’s vise stands about 3 feet tall, and the main frame components were cut from 1 5/8 inch (41.3 mm) steel with a water jet cutter. The jaws are operated with a large hand wheel connected to a lead screw. Bearings on the lead screw allow the hand wheel to be spun like a flywheel, allowing it to be quickly opened and closed. The weight of the moving jaw keeps the lead screw under tension, eliminating any backlash. This allows for really fine control over the holding force, which [Jason] demonstrates by carefully clamping a tiny screw. With the hand wheel alone the vise can exert 12880 lb / 5800 kg, but a hydraulic lift was also added, boosting the force to 30000 lbs. The deep throat allows a large object to be clamped, and the jaws can also be offset to clamp something to the side of the vise.

The vise was beautifully finished with powder coating and pin striping, which will no doubt wear over time if it’s properly used, but the vise itself should last a few lifetimes. While this isn’t something you can really build in a home workshop, it is always inspiring to see what is possible with a bit more tools, knowledge and skill. The build is documented in a 4 part series (link in first paragraph), but we’ve added a short highlights reel below for your viewing pleasure.

Continue reading “Giant Blacksmith Vise From Start To Finish”

Blacksmithing For The Uninitiated: Let’s Talk About Anvils

When you grow up with something as the constant backdrop to your life, it’s easy to forget as an adult that not everyone else shares your instinctive knowledge of the subject. My dad is a blacksmith, he’s now retired, but as I was growing up his very active forge was in a workshop next to our house. This is the second part of a series based upon that experience, exploring blacksmithing for people who have maybe always fancied a go at the anvil but have little idea where to start.

The Most Obvious Blacksmithing Tool: The Anvil

Having considered the hearth in our previous outing, it’s time to turn our attention to what is the signature piece of blacksmithing equipment: the anvil. This has the function of providing a high-mass hardened working surface against which metal can be forged, and it has a distinctive shape with various parts for particular metalworking tasks. There are many minor and major variations of anvil design depending upon where in the world your anvil hails from, but since my experience comes from the English counties, the anvil I will be describing is the pattern you’ll find in the British Isles.

Continue reading “Blacksmithing For The Uninitiated: Let’s Talk About Anvils”

A Ruined Saw Blade Becomes A Bowl

Every workshop generates waste, whether it be wood shavings, scrap metal, or fabric scraps, and sometimes that waste seems too good to throw away. [Igor Nikolic]’s hackerspace had a ruined circular saw blade in the trash, and rather than let it go to waste he took it to the forge and fashioned a bowl from it. Then because another blade came his way and he wasn’t quite happy with the first one, he made another.

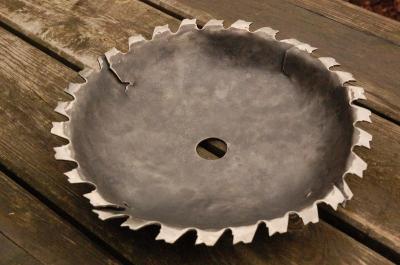
The second of the two bowls, in its finished state.

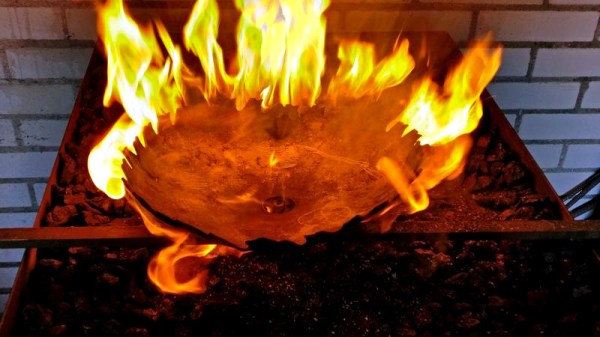
Saw blades are not promising material for forge work, being made of a very high-quality hardened steel they do not take well to hammering even when hot. So his first task was to anneal his blade in a kiln, heating it up and then letting it cool slowly to soften it.

Working the blade into a bowl shape was done on a home-made ball anvil. The blade was marked to provide guide rings as an aid to forming, and the bowl shape was progressively built out from the center. The first bowl was a little irregular, in his second try he’d got into his stride. Both bowls were mounted, one on a cut acrylic base, the other on a set of feet.

A project such as this can only be done with a huge amount of work, for which owners of larger forges will typically use a power hammer. [Igor] admits that a swage block (a specialized anvil for forming such curved shapes) would have made his life easier, but we think he’s done a pretty good job.

If you’ve been paying attention to recent Hackaday articles you may have noticed the start of our series on blacksmithing. We’re indebted to [Igor] for the genesis of that piece, for he was operating the portable forge that features in it.

Blacksmithing For The Uninitiated: What Is A Forge?

Blacksmiths were the high technologists of fabrication up until the industrial revolution gained momentum. At its core, this is the art and science of making any needed tool or mechanism out of metal. Are you using the correct metal? Is the tool strong where it needs to be? And how can you finish a project quickly, efficiently, and beautifully? These are lessons Blacksmiths feel in their bones and it’s well worth exploring the field yourself to appreciate the knowledge base that exists at any well-used forge.

I had an unexpected experience a few days ago at the Hacker Hotel weekend hacker camp in the Netherlands. At the side of the hotel our friends at RevSpace in The Hague had set up a portable forge. There was the evocative coal fire smell of burning coke from the hearth, an anvil, and the sound of hammering. This is intensely familiar to me, because I grew up around it. He may be retired now, but my dad is a blacksmith whose work lay mostly in high-end architectural ironwork.

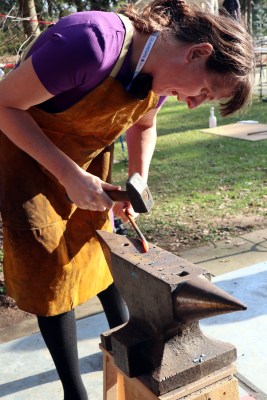
Working the RevSpace forge at Hacker Hotel, in not the most appropriate clothing for the job.

The trouble is, despite all that upbringing, I don’t consider myself to be a blacksmith. Sure, I am very familiar with forge work and can bash metal with the best of them, but I know blacksmiths. I can’t do everything my dad could, and there are people we’d encounter who are artists with metal. They can bend and shape it to their will in the way I can mould words or casually solder a tiny surface-mount component, and produce beautiful things in doing so. My enthusiastic metal-bashing may bear the mark of some experience at the anvil but I am not one of them.

It was a bit of a surprise then to see the RevSpace forge, and I found myself borrowing a blacksmith’s apron to protect my smart officewear and grabbing a bit of rebar. I set to and made a pretty simple standard of the dilletante blacksmith, a poker with a ring on one end. Hammer one end of the rebar down to a point, square off the other end for just over 3 times the diameter of the ring, then bend a right angle and form the ring on the pointy end of the anvil. Ten minutes or so of fun in the Dutch sunshine. Working a forge unexpectedly brought with it a bit of a revelation. I may not be a smith of a high standard, but I have a set of skills by virtue of my upbringing that I had to some extent ignored.

Where others might have put effort into learning them, they’re things I just know. It had perhaps never occurred to me that maybe all my friends in this community didn’t learn how to do this by hanging round the forge next to the house they grew up in. If I have this knowledge merely by virtue of my upbringing, perhaps I should share some of it in a series of articles for those in our community who’ve always fancied a go at a forge but have no idea where to start.

Continue reading “Blacksmithing For The Uninitiated: What Is A Forge?”

Hackaday Podcast 005: Undead Lightbulbs, Home Chemistry, And The Strength Of 3D Printing

Catch up on interesting hacks from the past week with Hackaday Editors Mike Szczys and Elliot Williams. This week we discuss the story behind falling lifetime ratings for LED bulbs, look at finite element analysis to strengthen 3D printed parts, admire the beauty of blacksmithing, and marvel at open source Lidar development. We delve into great reader suggestions for Blue Pill projects sparked by last week’s podcast, discuss some history of the V2 rocket, and cover Chromecast control hardware, glowing home chemistry, K40 laser cutter add-ons, and more.

Links for all discussed on the show are found below. As always, join in the comments below as we’ll be watching those as we work on next week’s episode!

Take a look at the links below if you want to follow along, and as always, tell us what you think about this episode in the comments!

Direct download (60 MB or so.)

Continue reading “Hackaday Podcast 005: Undead Lightbulbs, Home Chemistry, And The Strength Of 3D Printing”