When I first started getting into 3D printed projects that would require final assembly from multiple parts, I wanted to make sure I had an adhesive that would really hold up. I couldn’t imagine anything worse than spending 10’s of hours printing and assembling something, only to have it fall apart because my adhesive wasn’t up to the task. So I spent a lot of time trolling 3D printing message boards and communities trying to find the best way of gluing PLA. It should come as no surprise that, like everything else in the world, there are a ridiculous number of opinions on the subject.
If you’re printing with ABS, the general wisdom is that solvent welding with acetone is the best bet. You put some acetone on the printed parts, rub them together, and the plastic fuses together. This happens because the ABS melts slightly when exposed to the acetone, so they end up essentially melding into one piece. This sounded like exactly what I wanted, but unfortunately, acetone doesn’t have this same effect on PLA.
After some more research I found people suggesting Weld-On #16, an acrylic adhesive that will actually melt PLA. A little of this applied to the parts, they said, and you can solvent weld PLA just like acetone on ABS. Sure enough, the stuff works great and I’ve used it to put together nearly everything I’ve printed in PLA over the last few years. Only problem is, this stuff is a bit nasty, takes 24 hours to fully cure, and nobody has it locally.
So as an experiment I thought I’d take a look at a few adhesives sold at the local big box retailer and see if I couldn’t find something comparable. Do I need to keep ordering this nasty goop online every time, or can I pick something up off the shelf? More to the point, is solvent welding PLA really any better than just gluing it?
Testing Procedure
To test the different glues, I came up with a simple testing procedure. It’s perhaps not the most scientific of setups, but I think gives me enough information given the relatively stress-free life a 3D printed part lives.


The test setup consists of two rectangles, printed at fairly typical settings (0.2 mm layers, 30% infill), which are glued together at 90 degrees of each other. Through each rectangle is run a metal rod: one of the rods is inserted into two eye hooks installed in an overhead beam, and the other rod is attached to a luggage scale with a short length of chain.
Pulling down on the luggage scale allows me to put tensional force on the two glued pieces, with two possible outcomes: either the printed piece breaks, or the glue releases. For my purposes, I will consider the printed part breaking before the glue releases to be an automatic “win”. Remember, my goal here is only to find if the glue is strong enough to be used for typical 3D printing applications; not an attempt to find the ultimate strength of the bond.
The Glues
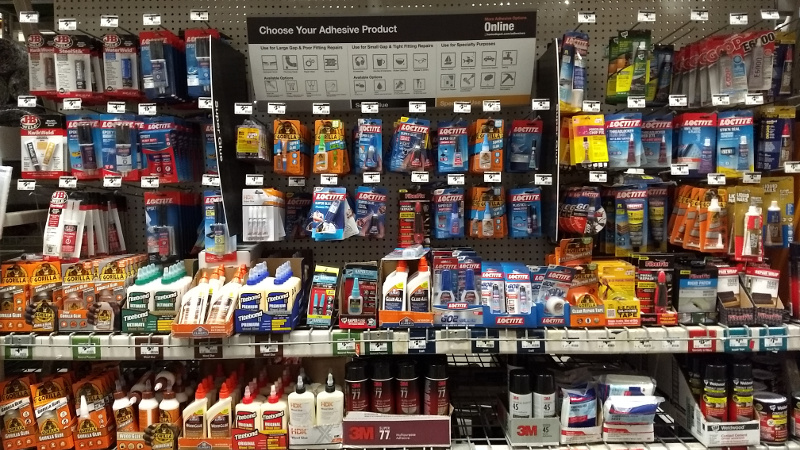
I went to the adhesive section of Home Depot and selected a number of glues that advertised they would work on plastics. I avoided anything that cost more than $10 USD, as at that price, I might as well just stick with the Weld-On #16 from Amazon.
For each glue, a pair of rectangles was printed and sanded on the mating surfaces with an 80 grit sanding block. The pieces were then glued as per the instructions, and held together with clamps for the recommended cure time.
Weld-On #16: Designed for PLA Adhesion
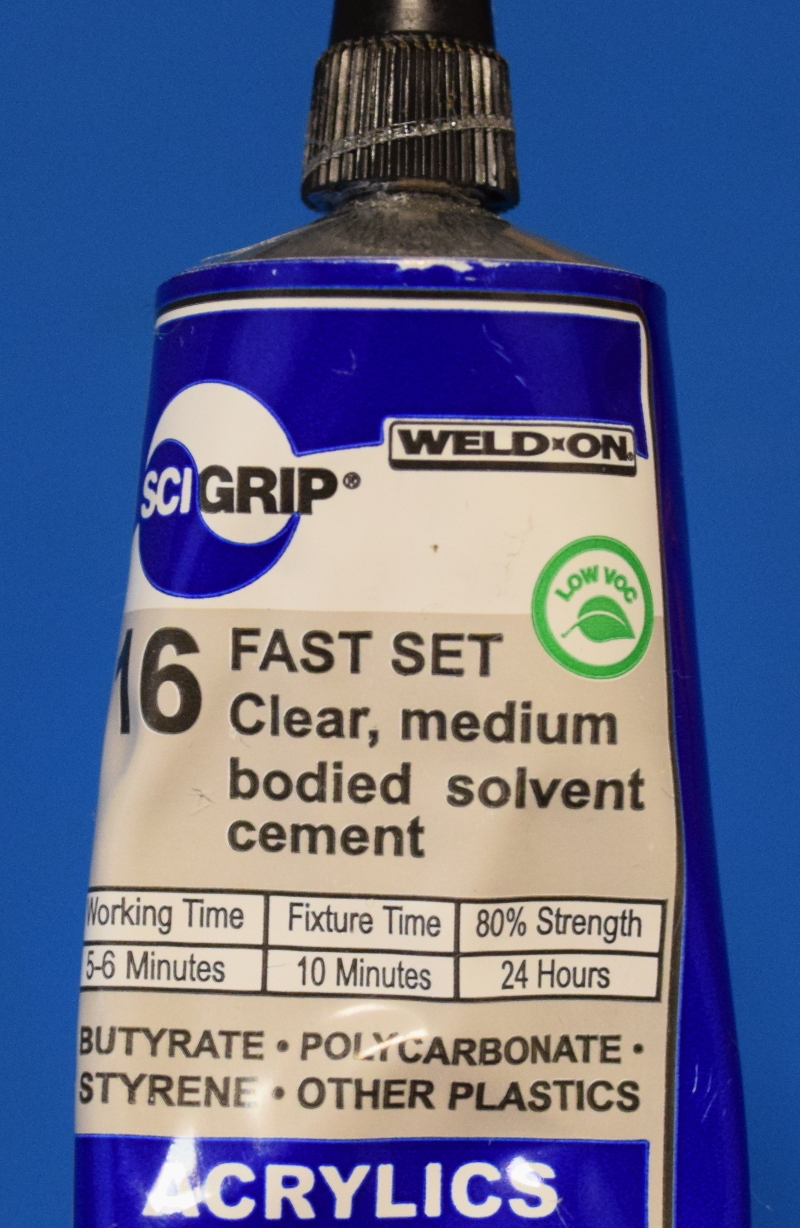 As mentioned previously, Weld-On #16 has been my go-to PLA adhesive for years. It has a thick consistency that doesn’t run which is very nice, but it does have that strong chemical smell that acrylic glues tend to have.
Once you apply it to the parts, you can see the top layers of PLA start to melt and get tacky. I usually push the pieces together, rub them back and forth a bit, and then put the part into clamps until everything solidifies. Unfortunately, that’s about 24 hours.
The work time with Weld-On #16 is around 5 minutes, during which time you can reposition the parts easily. This is a big help when trying to line up printed parts that don’t have any pins or features to help keep them oriented correctly.
As expected, this glue preformed very well. The luggage scale maxed out (100 lb), and shortly after that one of the rectangles broke.
Loctite Super Glue Gel: Strong and Fast
 This has been my day-to-day cyanoacrylate for awhile now, so I was interested to see how it would work on printed parts. I really like the hard plastic bottle this comes in, as the side mounted “triggers” give you exceptionally fine control over the pressure you put on the internal tube. Combined with the long thin spout, it’s very easy to get this glue down into tight spots.
Being a gel, this glue doesn’t really run once applied. That makes it great for working on vertical surfaces or other hard to reach places. Unfortunately, the gel makes the printed parts extremely slippery. This combined with the roughly 30 second work time makes it difficult to get proper alignment before it sets.
When tested under load, the Loctite Super Glue Gel survived past the breaking point of my test pieces just like Weld-On #16. I’ll admit I was very surprised by this, as I had assumed none of the glues would have been as strong as the solvent welded pieces.
Gorilla Super Glue: Reasonably Strong But Hard to Apply
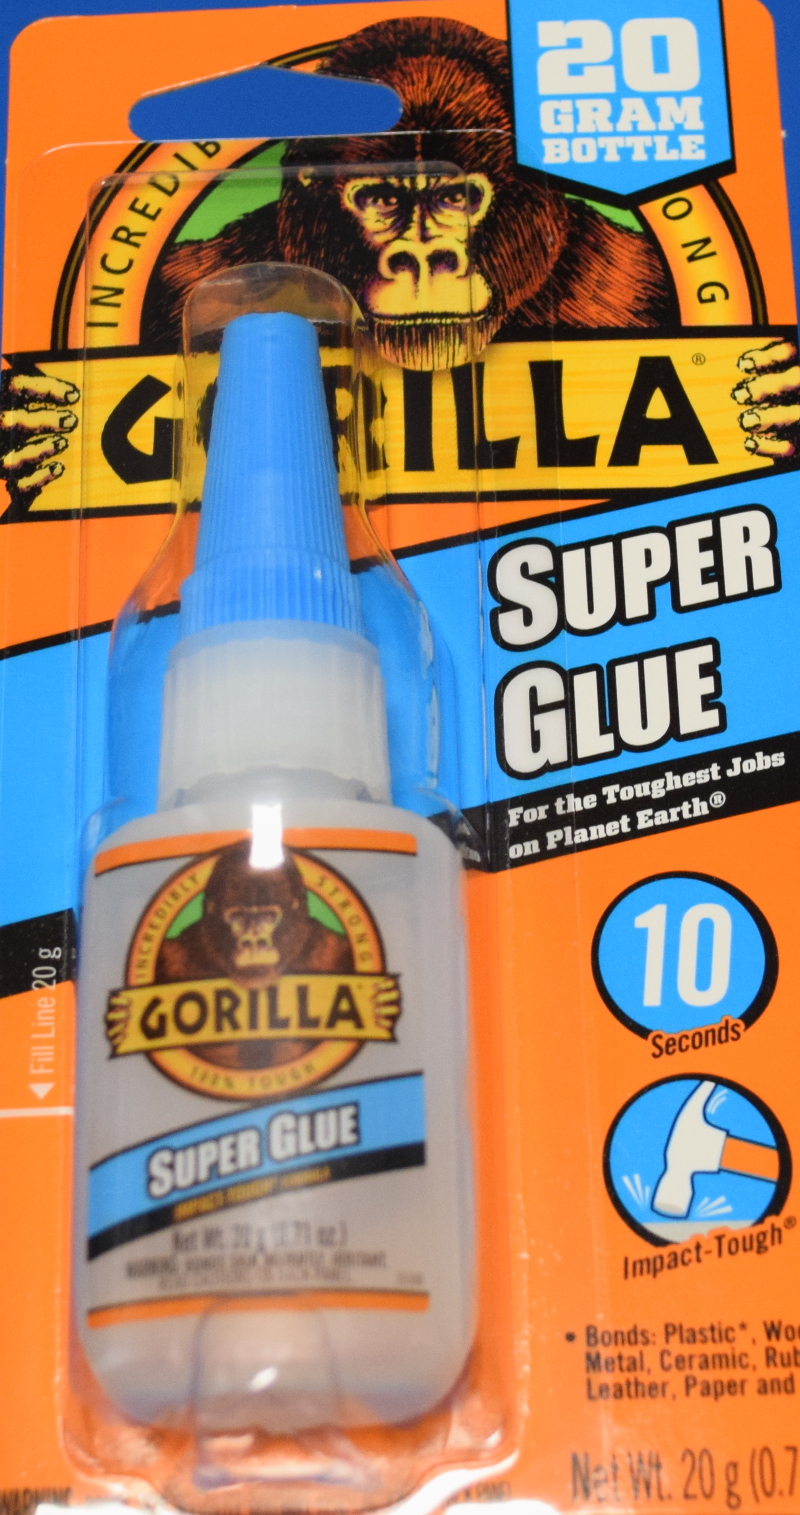 Truth be told, I actually bought this as a mistake. Originally I thought it was more like the traditional Gorilla glue, and only realized after I got it home that this was yet another cyanoacrylate formula. You’d think I would have noticed that the stuff isn’t brown, but clearly not.
This glue is a little on the watery side, but not too bad. Working time was quite long, on the order of 2 minutes. The instructions don’t call for clamping, but given the long work time I kept it clamped for about 5 minutes to be sure everything had hardened up.
I know it isn’t the most important aspect of this test, but for the sake of completeness I do want to note that the bottle design is a bit annoying. While the spout is the longest out of the all the glues tested, it’s so thick that accurate application is unnecessarily difficult in tight spaces. The nozzle opening is also very wide, so forget about putting this stuff on small pieces.
In the load test, Gorilla Super Glue did quite well, breaking at 87 lb. Even though this glue didn’t end up being the strongest of those tested, the long work time is extremely handy and makes it stand out from the others.
Loctite Plastics Bonding System: Not For PLA
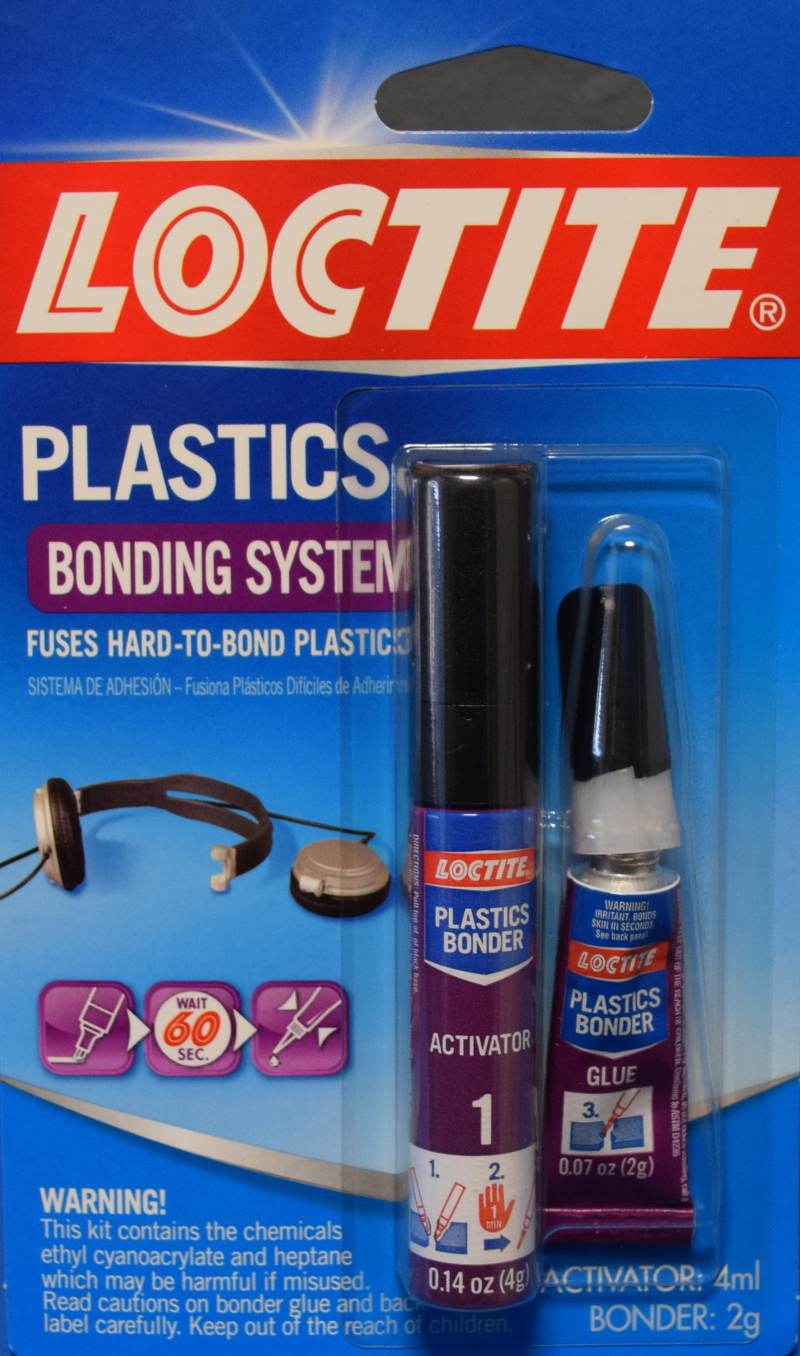 This one is rather interesting, as it is specially formulated for hard to glue plastics and comes in two parts. You first use the “Activator” on the plastic, wait a minute for it to dry, and then apply the glue and clamp the pieces. This seemed a little gimicky to me when I saw it in the store, but figured it was worth a try.
The “Activator” goes on with a felt-tip applicator, and judging by the smell and way it evaporated off the pieces, I’m fairly sure it’s largely isopropyl alcohol. The glue itself is a relatively thick gel and has a working time of about 30 seconds. I was able to reposition the pieces without trouble.
Performance in the load test was the poorest out of all the glues, the bond broke at only 50 lb. To be fair there might be other types of plastic that this product works well on, but PLA is certainly not one of them.
DAP Rapid Fuse: Weak But Longer Working Time
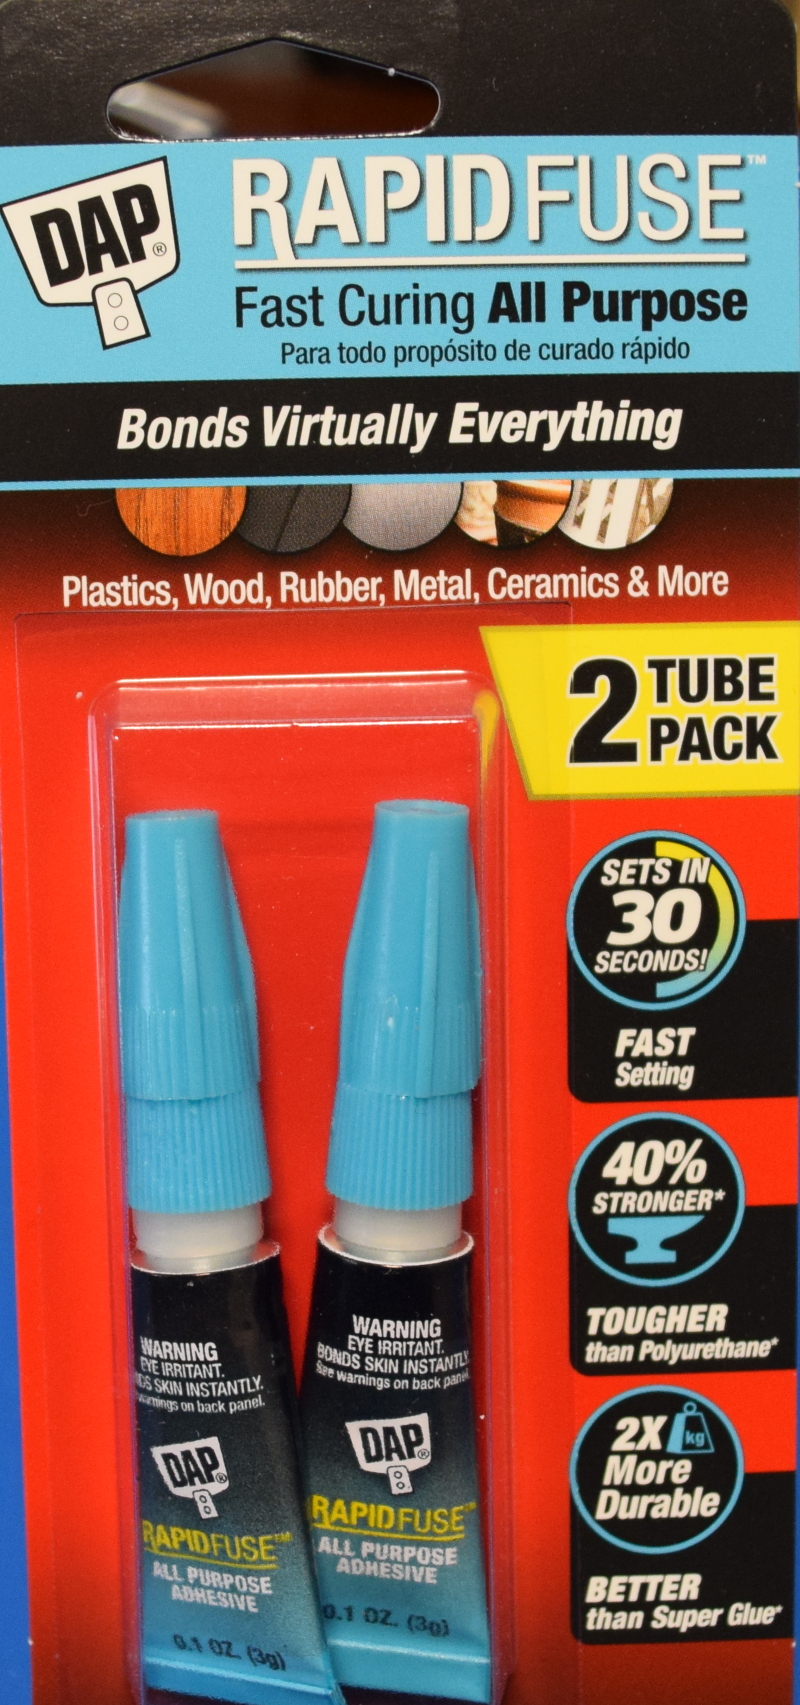 This is a pretty run of the mill “All Purpose” glue that is advertised to be stronger than cyanoacrylate. Unlike most of the other glues tested, this one calls for a half hour of clamp time before reaching full strength.
This turned out to be one of the thicker glues tested, and the claimed 30 seconds work time seems to be a considerable underestimate. In fact, this glue didn’t really start to “stick” until about 2 minutes in. Such a long work time is very forgiving and would make this glue perfect for putting together fiddly little parts.
Unfortunately, DAP Rapid Fuse didn’t do well on the load test. It broke at only 57 lb, the second lowest result. I was particularly disappointed with this one, as I’ve seen this glue specifically mentioned online as being a good choice for PLA parts.
HDX Super Glue: Extremely Strong and (Too) Fast
 This is the store-brand cyanoacrylate “Super Glue” from the Home Depot. I got this one because it was very cheap (50 cents per tube, in the 4 pack) and because I thought it would be interesting to test a straight cyanoacrylate glue that wasn’t advertising some special features or formulations.
It’s extremely watery, to the point of literally behaving like water when you put it on the surface to be glued. You need to be very careful about making sure this stuff doesn’t go where you don’t want it. I thought the warning on the back about protecting the work area from spills was odd at first, but not anymore.
The worst part about this glue though is the nearly instantaneous bond. I understand that’s desirable in some situations, but when working with parts that need careful alignment it’s a nightmare. Even for my test pieces, I wasn’t able to get them properly aligned at 90 degrees before the glue had set up and couldn’t be moved. Had this been a multi-part print I was assembling, this could have been a disaster.
In what was probably the biggest surprise of this test however, the basic HDX Super Glue did not fail under the load test. The printed test pieces broke before the bond released, making this an automatic “win”. Working with it is kind of terrible, but credit due on the strength of the bond.
Final Thoughts
Overall, I still think that Weld-On #16 is the best PLA adhesive I’ve personally used. The long work time combined with the high strength bond is simply an ideal combination. Online-only availability, long cure time, and the fact it smells like a chemical factory are bummers to be sure, but not deal-breakers if you want to make absolutely sure your project isn’t going to fail on account of the adhesive used.
That being said, the performance of the Loctite Super Glue Gel really surprised me. Truth be told, I feel a little foolish having used this glue for so long in other applications and only now trying to use it on printed parts. There’s probably a lesson to be learned there about getting stuck in your ways. The work time is a bit short, but otherwise it’s an extremely close alternative to Weld-On #16; close enough that I’ll be using it for most of my PLA gluing from here on out.
Unless I’ve missed something even better? What are you using? Let us know in the comments about your favorite PLA-compatible adhesive. Do we need another round of this PLA adhesive slug fest?


You could try a little weak acid to inhibit the cheap cyanoacrylate, and isopropanol or even just water to speed it up.
Try misting the part with a little white vinegar first, then use the glue, then mist with water.
I’ve not tried any of this, so its just my random opinion based on the fact that I vaguely remember that weak acids are used to inhibit the stuff, and acetone will dissolve it from your fingers (or the lavatory seat I believe, if you happen to be attached to one as a result of sharing your university accommodation with the primitive drunken savages known as undergraduates).
I really don’t think isopropyl/rubbing alcohol works as an accelerator – I use it for almost everything including cleaning surfaces to be super glued and have seen no such properties. Maybe it’s used as a part of an accelerator given the nice properties it have as a fast evaporating solvent?
I’ve used the exact same Loctite Super Glue Gel (blue bottle) countless times and put my models through the test of rocketry (that means I launched them). They work great, but the surface is the key. If the glue has little surface to grab on to, it will stick but not hold up to much pressure. I have also cheated using another technique: PLA! Using a flat tipped soldering iron, a piece of PLA filament in the seam, heated carefully will fuse 2 parts together. After that it’s back to sanding and smoothing to get it seamless. I have to say that this is a very tedious process and I use it only for seams that are long, consistent and largely flat. Another trick I use is to make paste out of the super glue by using PLA filings (just sand down some old piece with a fine file and get a mount of powder). First I put the gel in and then pour on the powder. Push it down into the gap really tight and let it cure completely. Then, again, file and sand flat. Great for filling gaps. I find that a coat of XTC3D afterwards adds a layer of resin sufficient to make it a totally solid piece. Granted all this is outside the scope of your original experiment, but that’s what I do. Much of what I am doing is not just static models (though those need to gaps cleaned up thoroughly), but also static structures (frames) and of course the inevitable model rocket. Sometimes I combine multiple techniques just because one might go most of the way, but leave a hairline crack that can be handled by another (typically XTC3D fills gaps like that very nicely.
Tom you are my new hero. I am putting out commercial proto-type 3D printed box and need to glue it haven’t gotten to that yet. You saved me research time. This is what HAD is all about.
THANKS!
I’m most in need of fusing PP I fear and I think only friction welding will do it.
PP is often used in those cases where you need a plastic that is non-stick and durable, but the flaw is that whenever it breaks you got a broken piece that is a bit critical.
Maybe try plastic welding? Eg. soldering iron + plastic, swirl pattern like TIG welding. I’ve done this for quite a few repairs and it works better than any adhesive I’ve ever tried: joint aesthetics depend strongly on skill though.
With ABS I just chuck a small piece of 3mm filament in a drill and friction weld with that as my “rod”
When I was a kid, I had a model-building kit that worked this way. It included grey or green plastic rods that you inserted in a drill-like device and spun the plastic at a high enough rate that the friction melted it. The fumes stunk up the living room so Mom chased me outdoors with it. Then I burned myself after touching the still-molten “weld” bead, and eventually ran out of filament.
Just the right balance of danger and fun. I can’t imagine such a toy in today’s safety-conscious world.
Thanks, but the first part with epoxy I know to be absolutely not working.
And yep, welding seem the only viable option, apart from straight replacing
Or you can just drill holes and hold the two sides together with a brace, but then it’s no longer watertight of course, although I suppose you could put a ‘shield’ inside over the brace in some circumstances, or some ducttape of course.
Thanks for the testing. I just ordered some of the Loctite gel to try. With what I am doing, the fast set time will actually help. I appreciate your having done these tests.
Bonus: that gel CA glue does a great job of 3D printed PLA to plywood bonding as well (great for mounting things to the plywood).
Do you have any experience with the “as seen on TV” UV-cured bonding systems? I have not tried any of them, but I see more and more of them, and I wonder how that might work. Presumably, you have a fair amount of working time until you cure it with the UV?
It works well for some things, but the UV light can’t really get into cracks. In my experience it’s best for things that don’t show where you can blob it on and zap-cure. I sometimes use it for bonding down wiring inside project boxes. It’s nice in that it doesn’t have any fumes (like cyano + zipkicker), and it’s not hot (hot glue), and it cures quickly (unlike silicone).
I used it for fixing a glass candlestick holder that was in two parts but glued together. The glue wore down over time and it came apart. Used the UV-curing glue and it worked amazingly well. It was liquid until I used the UV light and it hardened almost immediately. No idea on strength or longevity but that was a few years ago and it’s still holding.
Would seem like this kind of stuff only works for surface work on account of the UV light? Unless it will still cure without it?
Amazingly helpful review and tests. And, no glue review is complete without the obligatory mention of the greatest website ever for adhesives.. http://www.thistothat.com/
Some additional input from Naomi Wu (sexy cyborg) here: https://www.youtube.com/watch?v=XNL_tJxbexI
I don’t do this myself, so I have no idea, but I’d recently happened on this one.
Great article and nice to see some good testing methods with data to back up your opinions. I think that there are many more options to consider if you can get past the disappointment about long cure times. If you truly want strength, easy use, and decent work time, there are a tremendous amount of options available if you don’t mind a 24 hour cure time.
In regards to the Loctite Plastics Bonding System, and this comment:
The “Activator” goes on with a felt-tip applicator, and judging by the smell and way it evaporated off the pieces, I’m fairly sure it’s largely isopropyl alcohol.
A simple check of the SDS sheet will show you that it is basically Heptane. Also, the technical data sheet states that the activator is:
Note: The activator is only recommended for difficult to bond substrates such as polyethylene, polypropylene, polytetrafluoroethylene (PTFE) and thermoplastic rubber materials. Other substrates do not require activator.
So, with PLA being a polyester based upon vegetable starches, it would not require the activator.
On a related note, if I was to add one thing to your article, it would be to make reference to technical data sheets and safety data sheets (TDS and SDS) for any adhesive people use. You would be surprised at how often people use the wrong adhesive for common materials.
Great info, great ideas, worth pursuing with a vengeance :-)
Hmm,
I wonder how one goes with HDPE re 3D printing and gluing, feels a lot like
teflon though its not :-(
THanks
How many minuters did you use Clamps, when you did the test with Loclite Super Glue?
Chloroform is a good solvent for PLA. Use it like aceton
And that’s exactly the solvent in Weld-On #16.
Okay, so I just dab it on a rag like this and jklsdfgggggggggggggggggggggg
More than a year later and I’m still laughing.
My entire 3D-Printed R2-D2 (on the left https://www.instagram.com/p/Be03DiShuau/ ) is held together with this stuff:
https://www.amazon.com/Insta-cure-filling-Bob-Smith-Ind/dp/B0000DD1QQ/
Surprised nobody mentioned that the best way of using the store-brand CA is probably to fixture the pieces into alignment, then add the glue and let capillary action suck it into the joint.
This is a great article. I even sent a link to a coworker, as we are soon to be getting a 3D printer in-house.
Need to try that. Thanks.
Have you considered leaving the confines of the local big-box hardware store and trolling the isles of the hobby/craft stores? Besides having the ol’ standby Testors model cement they have an interesting assortment of adhesives. So do the auto parts stores, and these tend to be a little more of the industrial-strength variety of adhesives. I think the hardware stores tend to limit the variety of adhesives to those that barely work in most cases, so having alternate sources for adhesives and other things is pretty mandatory for the average HaD aficionado.
Very nice research!
Good point, most of us live in range of those options for sure. I personally love Permatex weatherstrip adhesive. It’s not great for assembling a nice, precise, seamless model. But as far as having stretchy, tendon-like tenacity, trying to take apart something glued with weatherstrip adhesive is like trying to pull off a dog’s leg. Don’t worry, that’s just an expression. It prefers to stick flush and firm with the surface you glue it to, but if it gets wrenched off somehow it leaves lots of tethers to prevent it from completely detaching. Great for ad-hoc automotive repairs to last until a real repair is made. You won’t lose that piece on the highway somewhere. I use it to glue 3d prints (and most anything else) that need structural soundness more than cosmetic perfection.
It also sticks to everything under the sun, especially your fingers. Even glossy paint and chrome. Sticks like a sonuvabitch. You gotta work quick though, it rapidly develops a kind of superficial skin when exposed to air which won’t stick to anything well unless you scrape it off and re-agitate it.
Most mechanics know it as Gorilla Snot. Great stuff.
I’ve been using PVC glue, commonly available, doesn’t dry too fast, transparent, and not to hard to clean up the final finish. Also works great for ABS.
I’ve always used the cheapy cyanoacrylate that’s packaged as 8 tubes on a card backed blister pack in the pound shop (dollar store if you’re from over there). Could have told you for free that it’s stronger than the PLA.
Top tip: always print some locating features into models you plan to glue together. A slanted mating face is usually enough to make it trivial.
Really appreciate you doing the testing though; now we all know for sure.
Oh, and as others have said, water makes it set instantly. If you don’t mind it going cloudy-white try breathing on it once you have it in position.
And less is more. Don’t flood it or it’ll be rubbish.
And I don’t file things first. Seems to work even better when the surfaces are smooth and you flow a really thin layer between them.
https://www.dollartree.com/0-12-oz-Tubes-of-The-Original-Super-Glue-Gel-2-ct-Packs/p341086/index.pro
This is what I use… it might be more expensive per gram but it’s easier to use without wasting any. I wonder how it compares to the Loctite (also available at the Dollar Tree https://www.dollartree.com/Loctite-Super-Glue-Gel-07-oz-Tubes/p368904/index.pro but more expensive as you get much less).
Your standard-issue two-part epoxy in a double syringe works pretty darn well, if you can deal with the set time. I printed a cube-shaped object in six pieces, epoxied it together, and I can stand on the finished product (and I am not a small human).
Yep. Araldite is _never_ coming apart – but, as you say, it takes a while to cure/set.
I checked out Thistothat and in one search the first hit was for Goop. What I found is interesting. The first tube of goop I used had phenomenal grip, maybe ten years ago. Bonds made then are still stuck today. Later tubes were peal-happy and worthless as glue. Bingo! On Thistothat, they note that Goop in Canada has the good stuff (cancer) because toluene US (safe) is too flammable. It’s all about these solvents that makes or breaks good glue for plastics. What has made matters worse is huffing and the good stuff’s availability. Thomas Dolby’s lyric “I can smell the chemicals” is a sign the stuff really works. There is a lot of wimped out stuff out there. I will have to try #16.
How about the various solvents available in the big box stores?
PVC Primer is basicly Acetone and a touch of MEK…
The good stuff has Tetrahydrofuran
I’ve had good luck with Oatey Multipurpose Cement (PCV, CPVC, ABS). The fumes mean it should be used outside or with good ventilation.Best of all is a piece of 3mm filament chucked in a Dremel. With a little practice this makes great welds!
I’m surprised plain old PVA glue wasn’t mentioned. It’s not waterproof, sure, but I’ve found it works quite well for PLA and it’s both universally available and above all, cheap! I have also used yellow aliphatic resin.
I’ve also had good success with polyurethane glue for PLA, but I have a love-hate relationship with that adhesive. On the one hand it really sticks well, is gap-filling, and waterproof. On the other, it foams up and the parts MUST be clamped so the joint only has a very thin unfoamed layer. And it requires solvent to clean it off your hands.
Welding, yes, smoothing, no.
https://www.youtube.com/watch?v=VZUfq0yrtv4
Came here to say this.
The article mentions acetone not working with PLA, yet here I am, using acetone to weld all my PLA prints together, and it worked with all brands that I have tried so far…
The only downside is that it sets very quickly, you only have a couple of seconds to work with it.
I think it depends on the specific blend of PLA. Some have different additives than others.
How about testing PVC primer-cleaner with THF in it? Tetrahydrofuran
DCM (Dichloromethane) is the one you want, keep it cool as it evaporates at 30 degrees, but you can make slurry out of it like acetone-ABS and its only £12 a liter on eBay in the UK. Its good stuff!
Also, melding?
“the ABS melts slightly when exposed to the acetone”
“you can see the top layers of PLA start to melt and get tacky”
Please do not use “melt” in place of “dissolve”.
Friction welding with filament chucked in a rotary tool is melting.
Welding plastics with a soldering iron is melting.
Solvent welding is not melting.
Seems like nasty stuff?
The Material Safety Data Sheet (MSDS) For “WELD-ON 16 for Acrylic” says that the primary solvent (30-60%) is Methylene Chloride. I wonder if that is sufficient to dissolve PLA. Other possibly included solvents are Methyl Acetate (0-35%) and Methyl Ethyl Ketone (0-40%). They add 5-20% “Synthetic Acrylic Resin”, possibly to thicken it or to help it fill gaps.
The above Loctite Ultra Gel product is a Lepage Ultra Gel product in Canada … same item ..
We print tons of stuff for engineering students, and the glue question has been huge. After reading all these comments, I dug in my flammables cabinet and pulled out a can of IPS Corporation’s SCIGRIP (R) Weld-On #4 Fast Set Acrylic adhesive, designed for “butyrate, polycarbonate,styrene”. I grabbed a couple of old PLA test prints – a robot and an grand piano – and splashed some on there. It is watery and evaporates VERY VERY QUICKLY. But oh my gosh – it welds the PLA. In maybe a minute of set time, never going to get those pieces separated again. Main ingredient is dichlormethane, also some methylene chloride, trichlorethylene, and methyl methacrylate monomer. Needless to say SUPER nasty fumes. They also sell the same product in their #16 Fast Set formulation, which is like a gel, in a tube, about six bucks a pop.
Super helpful write-up. I’m working on a similar test using ABS parts my work includes in our games.
Thanks for the tip. I did not recognize the #16 Weld-on until you showed the picture. Once I saw that I realized it is the stuff for gluing Plexiglass or Lexan acrylic. Another common solvent for that is Methylene Chloride. Both of these items should be available from your local plastic shop. I tried the Methylene Chloride and it does melt the plastic as expected. You WILL need the applicator for it though as it is thinner than water. Basically put the pieces together first, then apply the solvent. It flashes off VERY quickly on the surface but will require a bit more time to complete the bond internally. I am sure recommended times and procedures are available from the Google. Thanks again.
I’ve had good results using Spackle, it is easy to apply and does what it needs to. It can make seams disappear
I would use a cheap 3D Pen with PLA filament of the same color to weld the seams of the PLA printed pieces.
I have on order Gorilla Super Glue Gel, reviews state it works good on PLA with advertised short curing time of 30 seconds.
The active ingredient in acrylic solvent cements is methylene chloride, which is found in a lot of paint strippers. You need to pay attention to the ingredients, though. Methylene chloride is a possible human carcinogen, so many newer products have been developed that are methylene chloride free. More traditional paint strippers should include it, though. They may be worth a try if you can get a small quantity for a cheap price and you may be able to find some at a big box store. Current research is not clear as to what levels may be carcinogenic, but I’d avoid using it indoors and without gloves and let it cure somewhere away from living spaces, like a garage or workshop.
The pull-strength is only one kind of test – shear or torsion (twisting the blocks) as well as shock strength are also important. Superglues usually perform poorly in shear strength. I’m finding the acrylic #16 glue the best for my current application – but-joint gluing the wings onto a PLA glider.
The “thin” CA glues set the fastest. If you pre-coat one surface with CA kicker it’s even faster. When they cure, the make heat. The super-fast cure releases the heat quickly – it may even have a welding effect on the PLA.
The Methylene chloride in acrylic glues can dissolve nitrile gloves and penetrates latex quickly. Butyl rubber gloves is your best bet for health concerns if you can’t avoid contact. Good ventilation is wise.
CA glue cures nearly instantly with… baking soda (not a joke!). end bond is very strong, and solid enough to be sanded. it also has a nice property of filling bigger gaps, when needed. i barely ever use anything else nowadays. :)