Digital photo frames these days require you to manage the photos stored on it or the cloud-based service tied to the frame’s manufacturer. [Henric Andersson] realized that he and his wife take a lot of photos but find little time to go through them — like photo albums of days past — and add them to any photo frame-like appliance or service. Since Google photos can do a lot of the sorting for them, he decided to incorporate that into a digital photo frame.
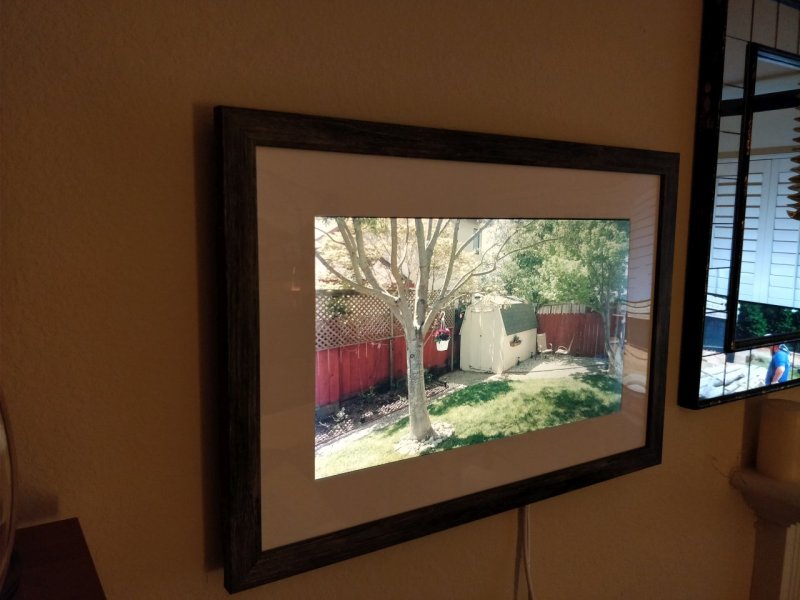
Using his wife’s old Viewsonic 24” 1080p monitor, he cracked it open and incorporated the screen into a 24×16 distressed wood frame — reinforcing it to account for the bulky, built-in power supply with pieces of HDF and a lot of glue. The brains behind this digital photo frame is a Raspberry Pi 3 he received from a friend. To turn the whole on/off, he built a small circuit but it turned out it wasn’t strictly necessary since everything started just fine without it.
While functionally complete, it needed one more addition. A little thing called ‘color temperature calibration’ — aka white balance.
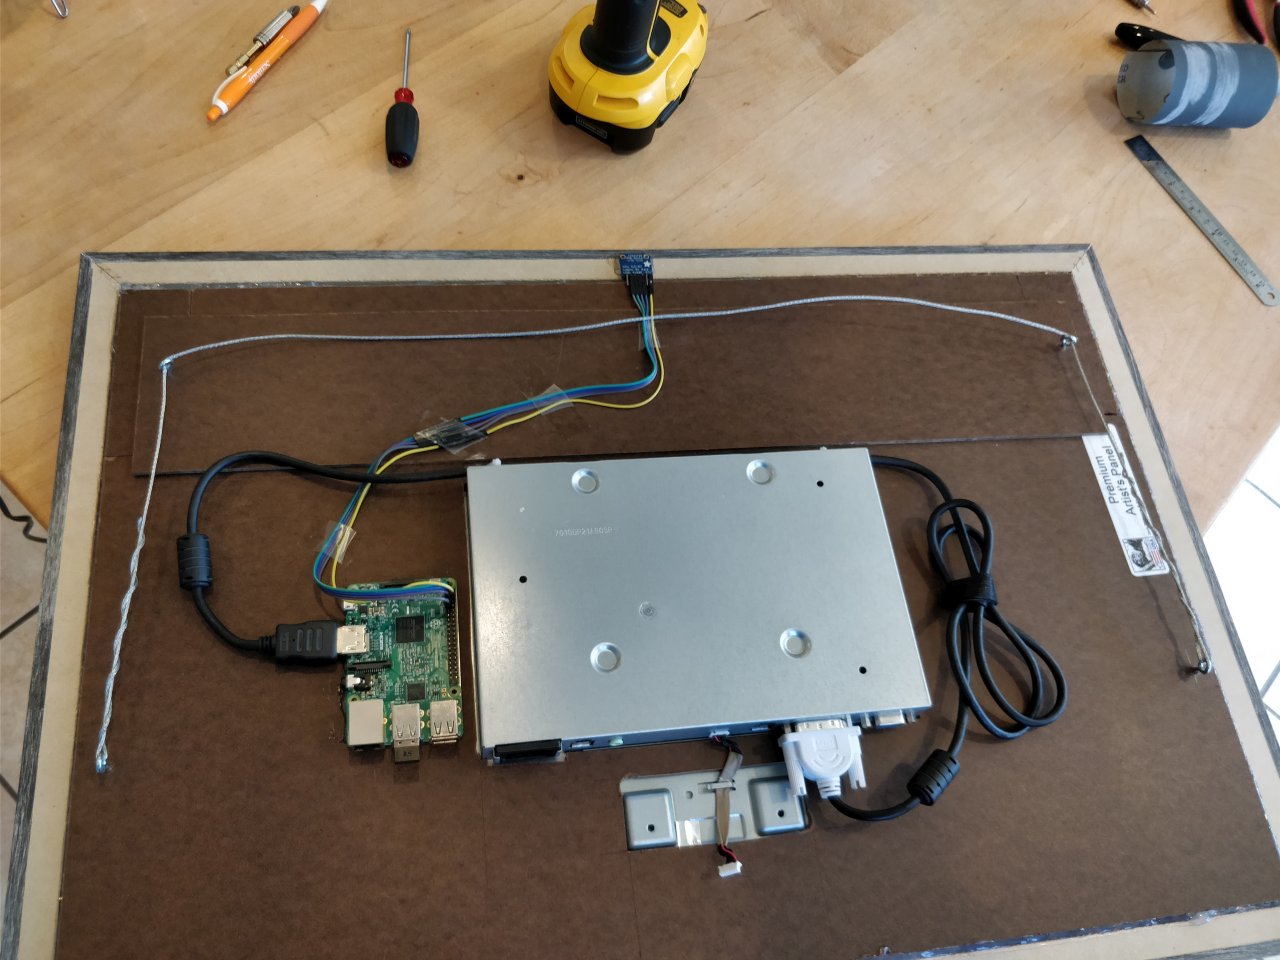
Finding the TCS34725 RGB color sensor by Adafruit — and readily available code for easy integration — [Andersson] puzzled over how to add it to the frame. To disguise it while retaining its effectiveness, he had to glue it to the rear of the frame after drilling a hole in the top piece and sticking a plastic stick through the hole to let light through to the sensor.
To get the photos to display, [Henric Andersson] says all he did was add a few queries to Google Photos and it will display all your relevant photos that have been synced to the service. For a breakdown of that side of this hack, check out his other post with the details.
While Google Photos deftly displays photos of various orientations, sizes, and aspect ratios, we’ve featured a digital photo frame that handles the task a little differently.


One time The Cloud™ is good for something.
Until they withdraw the service for business reasons.
It would make a great artificial window if you install a camera on the other side of the wall
As long as you stand and look at it from one spot.
Great artificial window… Terrible window window.
B^)
Excellent idea! Also, when it is dreary (rain, fog, snow, etc) outside you could have a photo of your yard in the summer to brighten up the mood in the room, ha ha.
Resolution and DPI needs to be higher for that “Window” feeling.
It would also have to track your eye point.
To make it look more like a real window.
Wouldn’t it be better to not have them on the cloud and just add a little memory so they are in the device itself? Maybe add a usb so you could swap thumb drives to change the photo slideshow? I just don’t think I would like having my photos on the cloud. Very nice build though, it looks great!
It would be if The Cloud™ was just about storage. In this case it’s additional functionality that local doesn’t have.
And that can’t be done locally?
$ echo `grep -A 2 ‘why’ README.md`
why use this as opposed to buying one?
Unlike most other frames out there, this one will automatically refresh and grab content from your photo collection, making it super simple to have a nice photo frame. Also uses keywords so you can make sure the relevant photos are shown and not the reciepts for your expense report.
The first paragraph explains the reasoning.
What I read is that he is just letting Google do the sorting. Seems to me that is not enough of a trade off for me to use the cloud but, to each his/her own I suppose.
I like this project, kudos to the designer. I also feel the same way as Pirate lab – For safety/security/privacy I don’t put anything up on “the cloud”. no facebook photos, google pics, any of those online storage places. I don’t trust them. I would make this though, and just have it pull from local storage, or as mentioned from a sharable folder on the pi itself :) Nice idea for an old monitor though for sure! I wish there was more info on the frame itself – Was it made from scratch, bought and modified? And the color calibrator? Why that and not a brightness sensor? Isn’t that what it’s doing, adjusting for day/night situations?
Frame was bought of amazon ( https://www.amazon.com/gp/product/B0049OBT2Q ). The color sensor can do brightness too (you get RGB and overall brightness), but since it’s a LCD, it isn’t that great for dimming using blackness (OLED would be awesome for this). Instead I wanted it to adjust for the ambient color of the room so it melds in better with the surroundings, since we have both daylight, incandescent and LEDs lighting the room. I do plan to experiment with brightness too, but it was less priority than the color matching.
The frame was purchased from amazon (B0049OBT2Q).
The color sensor can also do brightness, but since it’s an LCD, it hard to easily control brightness. If I had an OLED, I could simply apply darkness to the image. However, whitebalance (color temperature) is more feasible and also makes it blend better with the surrounding light (which varies from daylight to florescent to incandescent and LEDs). It makes it blend so much better with the room light so you don’t see it as a glaring display.
I might end up playing with brightness too since it’s definitely something which would help it fit better.
The colour sensor is imho what sets this apart from many other photo frames that have gone before.
I came across those sensors the other day and thought hmm, cheap, what can I use that for.
And now you’ve given me a use for enhancing my frame.
Thanks !
Cool idea just make sure your wife’s nudes don’t end up on display during the dinner party!
Maybe it’s a “birthday” party? :-D
When our daughter was about 4 or 5, she took 3 pictures of my wife stepping out of the shower!
Those pics were quickly deleted!
Depends on the party… Some people are into that. ;-)
Maybe have it randomly grab unprotected IP cameras from Google. And have it mocked up to look like an alien portal like doorway.
Great project for your Luddite parents. Those are the technophobes in our families and would love to just look up to the wall and see your latest family photos without any interaction. Also you can send brief messages to gramps by photo’ing your short handwritten note and put it in the “cloud” too. A photo frame mfg had one of these and used a USB wi-fi dongle which was hard-coded to an older cloud web target. The trick is to find a way to redirect the web call to your own online website. Somehow you could do this in your router to redirect websites like in a DNS or local HOSTS file scenario or something. Something like a parental control scenario to stop your kids from getting to porn sites – redirects them to a tamer site. Not sure about any “handshaking” the device does with the host.
Are you thinking of the Ceiva photo frame?
Ren – yes that’s the one. You saved my lazy butt a trip to the lab to get the company name off the box. I’ve yet to get it to work, but I haven’t tried very hard. I think all one needs to do is put a line in the HOSTS file on the C:\ to redirect the web call to your own website. I think it is a PICASSO url. I think they are out of biz.
“old Viewsonic 24″ monitor”
I’m getting old. I remember viewing with awe the several-thousand-dollar color 16″ monitor attached to my wife’s boss’s Mac II, and thinking how incredibly huge it was.
Nice hack, this…