E-Ink Photo Frame Is A Simple, Pleasing Design

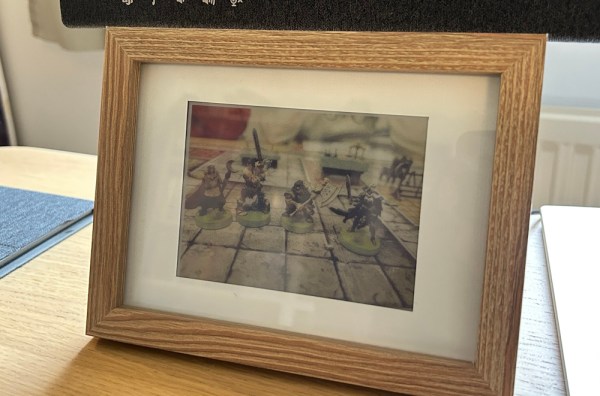
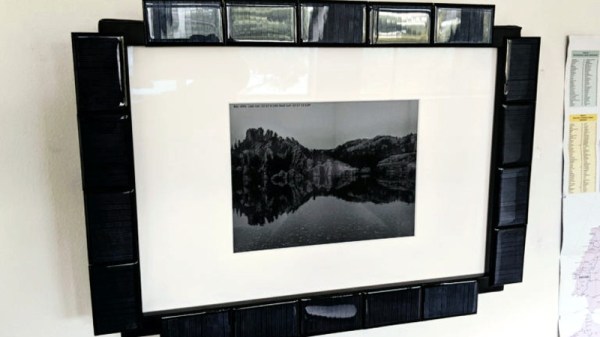
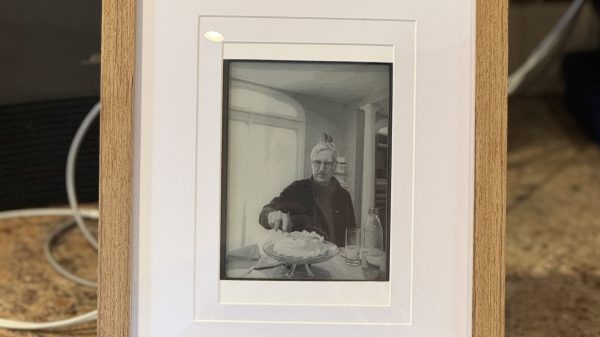
Regular photo frames are good, but they tend to only display a single photo unless you pull them to bits and swap out what’s inside. [Ben] decided to make a digital photo frame using an e-ink display to change things up, and unlike some commercial versions we’ve seen, it’s actually pretty tasteful!

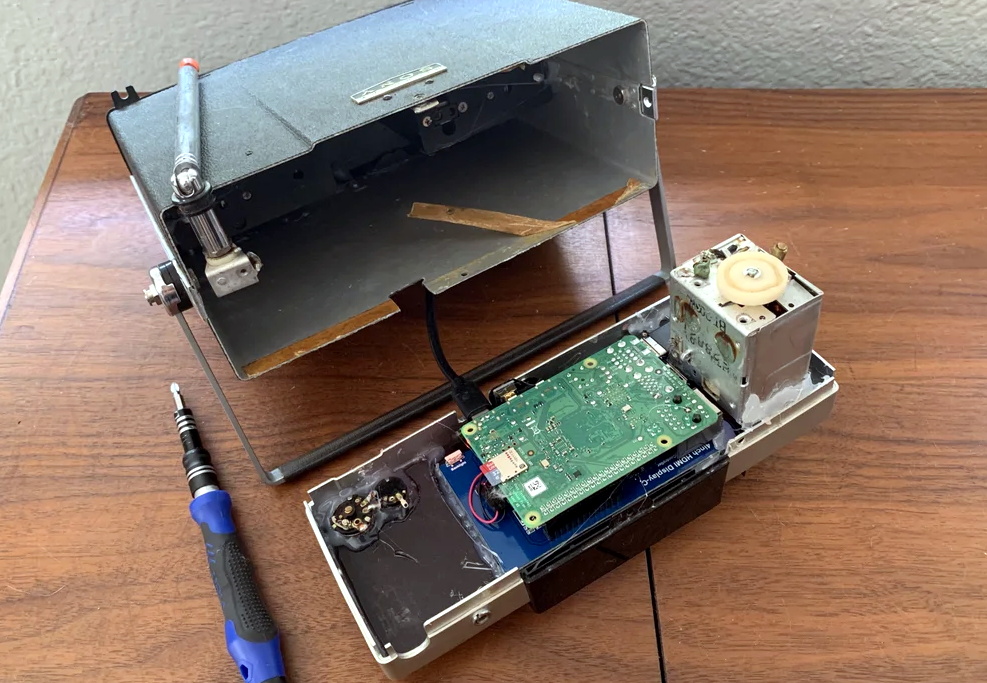
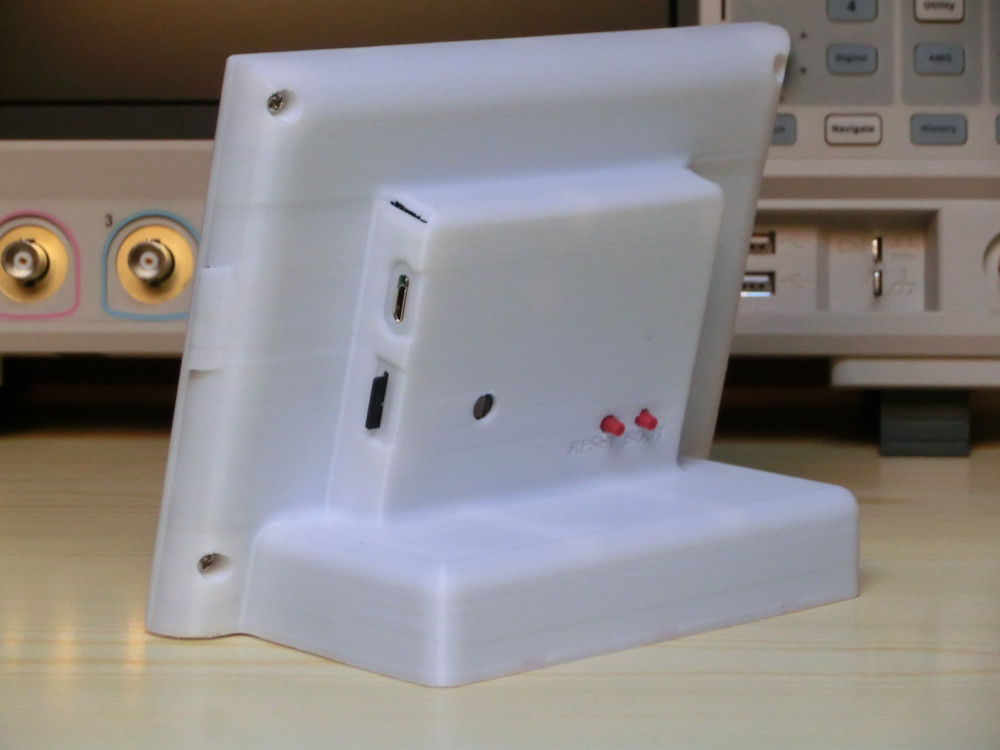
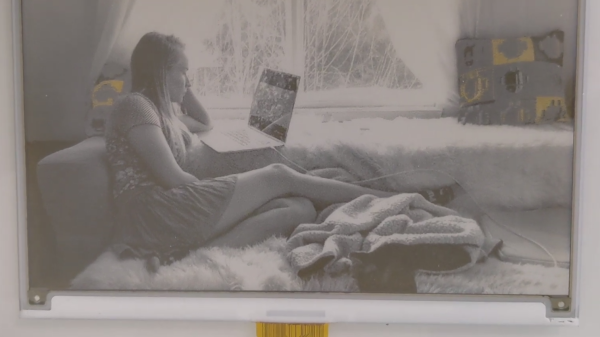
The build is based on a Nook Simple Touch Reader, which can be had pretty cheaply on the used market. It was chosen for the fact it runs Android, which makes it comparatively easy to hack and customize compared to some other e-readers on the market. Once it’s running a custom Android brew, it can be set to run an app called Electric Sign which simply shows a given website fullscreen and updates it at regular intervals. That turns the Nook into a remotely updateable photo frame in one fell swoop. From there, it just took a little trickery to access an iCloud album to update the frame with fresh pics. Then [Ben] just had to customize a nice photo frame to neatly mount the e-reader with room for the cable to subtly snake out the back.

It’s a simple build that relies on some existing tools already laying around the Internet. That’s nice, because it makes it easy for anyone to replicate themselves at home given the same materials. We’ve seen some other great digital photo frames before, too. If you’ve built your own neat and creative way to display your pics, don’t hesitate to drop us a line!

A brown, wooden picture frame with a white matte holds a slightly pixelated photo of gaming miniatures. It is sitting on a wooden table.

A Colorful Take On The E-Ink Photo Frame

Everyone loves sharing photos, and with most pictures being taken on smartphones now, digital frames are more convenient than finding a photo printer. [Wolfgang Ziegler] used an e-ink screen to create a colorful digital picture frame.

Starting with a seven color e-ink HAT he’d forgotten he had, a spare Pi Zero, and analog photo frame, he pieced the parts together into a pretty slick, sunlight readable photo frame. [Ziegler] details how he set up the frame to display new images using the Pimoroni inky library. He set a fifteen minute refresh interval since the color e-ink display takes 30 seconds to refresh to keep it from looking weird too often.

With the holidays coming up, this might make a perfect gift for family that wants to see the latest from your travels without blasting it to the whole internet. We’ve covered a few different options from a lightweight ESP8266 build, to this one that can rotate, and even issues with some of the commercial options.

Retro TV Shows Off Family Memories With Raspberry Pi

Fascinated by the look and feel of vintage electronics, [Democracity] decided to turn an old Sony Micro TV into a digital picture frame that would cycle through old family photos in style. You’d think the modern IPS widescreen display would stick out like a sore thumb, but thanks to the clever application of a 1/16″ black acrylic bezel and the original glass still installed in the front panel, the new hardware blends in exceptionally well.

Driving the new display is a Raspberry Pi 4, which might sound overkill, but considering the front-end is being provided by DAKboard through Chromium, we can understand the desire for some extra horsepower and RAM. If it were us we’d probably have gone with a less powerful board and a few Python scripts, and of course there are a few turn-key open source solutions out there, though we’ll admit that this is probably faster and easier to setup.

[Democracity] provides some general information on how he took apart the TV and grafted in the new gear, but of course the exact steps will vary a bit depending on which old TV you end up sending to the big parts bin in the sky. We did like that he made sure to keep all the mechanisms for the buttons and knobs intact, so even if they don’t do anything, you can still fiddle around with them.

Otherwise, his steps for setting up a headless Chromium instance are probably more widely applicable. As are the tips about setting up this particular LCD module and getting the display rotated into the proper orientation. If you just follow along for that part of the guide, you can spin up your own stand-alone Raspberry Pi DAKboard endpoint to take the service for a test drive.

It probably won’t come as much of a surprise to hear that this isn’t the first time [Democracity] has upgraded a piece of vintage hardware. Back in 2017, we covered this gorgeous art deco speaker that he outfitted with RGB LEDs and an Amazon Echo Dot. As with the previous post, it’s likely some commenters will be upset that a vintage piece of gear has been gutted for this project. But we’d counter that by saying his family is going to get a lot more enjoyment out of this beautiful piece of hardware now than they would have if it was still collecting dust in a closet.

Incredibly Slow Films, Now Playing In Dazzling Color

Back in 2018 we covered a project that would break a video down into its individual frames and slowly cycle through them on an e-paper screen. With a new image pushed out every three minutes or so, it would take thousands of hours to “watch” a feature length film. Of course, that was never the point. The idea was to turn your favorite movie into an artistic conversation piece; a constantly evolving portrait you could hang on the wall.

[Manuel Tosone] was recently inspired to build his own version of this concept, and now thanks to several years of e-paper development, he was even able to do it in color. Ever the perfectionist, he decided to drive the seven-color 5.65 inch Waveshare panel with a custom STM32 board that he estimates can wring nearly 300 days of runtime out of six standard AA batteries, and wrap everything up in a very professional looking 3D printed enclosure. The end result is a one-of-a-kind Video Frame that any hacker would be proud to display on their mantle.

The Hackaday.IO page for this project contains a meticulously curated collection of information, covering everything from the ffmpeg commands used to process the video file into a directory full of cropped and enhanced images, to flash memory lifetime estimates and energy consumption analyses. If you’ve ever considered setting up an e-paper display that needs to run for long stretches of time, regardless of what’s actually being shown on the screen, there’s an excellent chance that you’ll find some useful nuggets in the fantastic documentation [Manuel] has provided.

We always love to hear about people being inspired by a project they saw on Hackaday, especially when we get to bring things full circle and feature their own take on the idea. Who knows, perhaps the next version of the e-paper video frame to grace these pages will be your own.

Continue reading “Incredibly Slow Films, Now Playing In Dazzling Color”

A Deep Dive Into E-Ink Tag Hacking

Over the last decade or so, e-ink price tags have become more and more ubiquitous, and they’ve now reached the point where surplus devices can be found inexpensively on various websites. [Dmitry Grinberg] found a few of these at bargain-basement prices and decided to reverse engineer and hack them into monochrome digital picture frames.

Often, the most difficult thing about repurposing surplus hardware is the potential lack of documentation. In the two tags [Dmitry] hacked, not only are the labels not documented at all, one even has an almost-undocumented SoC controlling it. After some poking around and some guesswork, he was able to find connections for both a UART and an SWD debugging interface. Fortunately, the manufacturers left the firmware unprotected, so dumping it was trivial.

Even with the firmware dumped, code for controlling peripherals (especially wireless devices) is often inscrutable. [Dmitry] overcomes this with a technique he calls “Librarification” in which he turns the manufacturer’s firmware into libraries for his custom code. Once he was able to implement his custom firmware, [Dmitry] developed his own code to wirelessly download and display both gray-scale and two-color images.

Even if you’re not interested in hacking e-ink tags, this is an incredible walk-through of how to approach reverse-engineering an embedded or IoT device. By hacking two different tags with completely different designs, [Dmitry] shows how to get into these systems with intuition, guesswork, and some sheer persistence.

If you’d like to see some more of [Dmitry]’s excellent reverse-engineering work, take a look at his reverse-engineering and ROM dump of the PokeWalker. If you’re interested in seeing what else e-ink tags can be made to do, take a look at this weather station made from the same 7.4″ e-ink tag.

Solar Pi Zero E-Paper Photo Frame Waits For The Right Moment

One of the biggest advantages of electronic paper is that it doesn’t require a constant power source to display a static image. Depending on the application, this can lead to a massive energy savings compared to more traditional display technologies. Of course, the electronics that actually drive the display are another story entirely. You need to reduce the energy requirements of the whole system if you really want to stretch your battery life.

So when [Giacomo Miceli] wanted to put together this solar powered e-paper photo frame, he had to come up with some creative ways to curb the energy consumption of the Raspberry Pi Zero that runs the show. While the 10.3 inch 1872 × 1404 panel would only require the occasional burst of power to flick over to a new image, the Pi would be a constant drain on the internal battery pack. Considering he wanted the frame to recharge from ambient light with an array of small solar panels, that simply wouldn’t do.

The solution came in the form of a PiJuice HAT and some scripts that decide how often the Pi is to be powered on based on the current battery level. If there’s enough power, it might be every hour or so. But the lower the charge, the longer the delay. When the energy situation is particularly dire, the Pi might only be turned on every couple of days. With the Pi off and the e-paper not drawing any power, all of the energy produced by the solar panels can be devoted to recharging the frame’s 1,000 mAh battery.

When the Pi does get booted up, it quickly connects to a server to download a new image and update the display. After that, it ascertains the current battery level and determines how long the PiJuice should wait before turning it back on. After these tasks are complete, it will turn itself off until the next scheduled event. All told, [Giacomo] says the Pi is only up and running for about a minute each time the image is refreshed on the e-paper. He says the system has been running for six weeks now, with the battery level occasionally dipping down to 40% or so before it climbs back up.

Admittedly the energy consumption of the frame could be cut drastically by replacing the Raspberry Pi with a simple microcontroller, but we appreciate the creativity. Besides, the power and flexibility afforded by the Pi means this frame could be taught quite a few new tricks with some updated software.

A Minimal ESP8266 Digital Picture Frame

Over the last few years, the price of a good digital picture frame has dropped to the point that we don’t often see DIY versions anymore. As much as we might hate to admit it, it’s hard to justify building something yourself when the economies of scale have made it so you can buy the final product for less than the cost of the parts themselves. But of course, there are always fringe cases where building it might be the only way to get what you need.

Granted we’re not sure that [Tony Liu] actually needs a 1.8-inch digital picture frame, but we’re sure somebody out there does. The ST7735R display used in this project is a real TFT, so the color and refresh rate is pretty good; but with a resolution of just 128×160, we’d recommend keeping your expectations low in regards to visual fidelity.

What’s really interesting about this project is how low the part count is. All you need is the ST7735R display and the ESP8266 itself (or the development board of your choice, naturally). Even the 3D printed frame is technically optional. The display is driven by SPI, so with the power added in, that’s only eight wires that need to be soldered between the two devices. If you’re looking for an easy way to add a photo slideshow to a small device, say a conference badge, this is about as easy as it gets.

But where are the images coming from? You might think SPIFFS, but in this case [Tony] has converted the images to bitmaps and is loading them into the Arduino Sketch as a header file with PROGMEM. Helpfully, he provides the link for the tool he uses to convert the images into an array the graphics library can understand. This makes adding new images slightly time consuming, but we imagine if you have the need for something like this, it’s probably only showing a pretty specific set of images anyway.

If you’re looking for something bigger, or maybe just an excuse to put that dusty Raspberry Pi to use, you might be interested in one of the more substantial builds we’ve seen over the years.

Continue reading “A Minimal ESP8266 Digital Picture Frame”