
When I began programming microcontrollers in 2003, I had picked up the Atmel STK-500 and learned assembler for their ATtiny and ATmega lines. At the time I thought it was great – the emulator and development boards were good, and I could add a microcontroller permanently to a project for a dollar. Then the ESP8266 came out.
I was pretty blown away by its features, switched platforms, except for timing-sensitive applications, and it’s been my chip of choice for a few years. A short while ago, a friend gave me an ESP32, the much faster, dual core version of the ESP8266. As I rarely used much of the computing power on the ESP8266, none of the features looked like game changers, and it remained a ‘desk ornament’ for a while.
About seven weeks ago, support for the libSodium Elliptic Curve Cryptography library was added. Cryptography is not the strongest feature of IoT devices, and some of the methods I’ve used on the ESP8266 were less than ideal. Being able to more easily perform public-private key encryption would be enough for me to consider switching hardware for some projects.
However, my preferred automated build tool for NodeMCU wasn’t available on the ESP32 yet. Compiling the firmware was required – this turned out to be a surprisingly user-friendly experience, so I thought I’d share it with you. If I had known it would be so quick, this chip wouldn’t have sat on my desk unused quite so long!
Config and Compile
The easiest way to begin is to have Linux running either as your primary operating system or in a virtual machine like VirtualBox, with Git and Make installed. Our workflow will be cloning the NodeMCU ESP32 development branch, configuring the required compile options, saving the config, compiling, and flashing.
First, we clone the ESP32 git repository with git clone --branch dev-esp32 --recurse-submodules https://github.com/nodemcu/nodemcu-firmware.git nodemcu-firmware-esp32. This will copy over the source code required to build the NodeMCU firmware and all modules. Then make menuconfig will launch a simple menu-driven interface where you select the compile options and included modules. To conserve space and memory, it’s not recommended to select more modules than you need for a particular project.
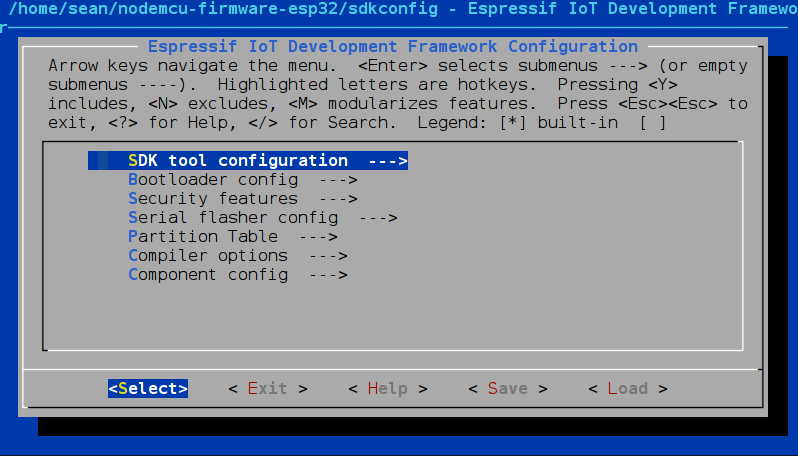
The menu contains familiar options such as the default serial port, baud rate, flash memory details and so on. Notably you can set the CPU speed here, configure external RAM, and define how WiFi and Bluetooth will function. While most options can be left at their default values, there are a lot of interesting features worth exploring in the menus. You’ll almost certainly want to enter ‘component config → NodeMCU Modules’ and enable the high level features required for your project:
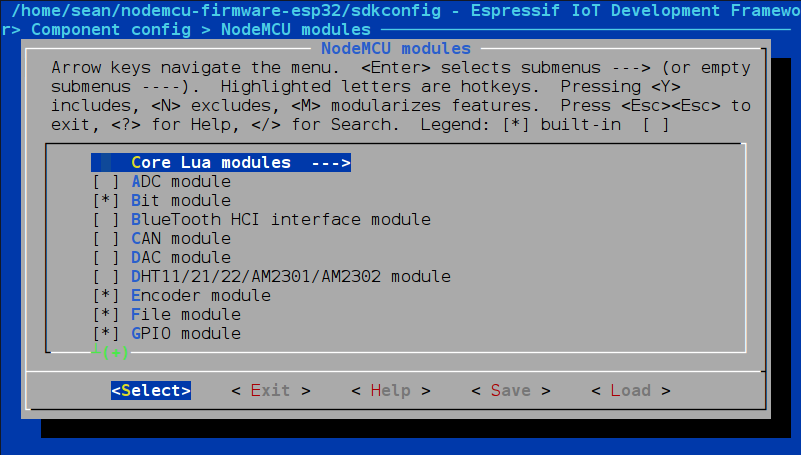
If enabling the libSodium module there, you may also want to enter the mbedTLS and libSodium menu entries under ‘component config’ and make sure it’s set up the way you expect.
Once we’re done, I recommend saving the configuration as something descriptive; I often find myself using the same groups of features and having a few frequently used configurations handy allows me to get working faster when I have an idea or want to do a quick demo. Better still, put it in version control with the rest of your code so that you know what it depends on.
Note that this means before compiling, you’ll need to run a command to copy your configuration of interest to a file named sdkconfig. Then run ‘make’ to compile. cp yourfilename sdkconfig && make
Once completed, plug in your ESP32 and run ‘make flash’ in the terminal. If your ESP32 is connected to ttyUSB0, it will detect your device and load the compiled firmware, otherwise set it right in the makefile. I found this last feature a real time saver – I expected it to return a file that I would than have to load to the ESP32 using another tool.
To test, I prefer to use ESPlorer. Run it, open the serial port, and hit the reset button on your device or in the GUI – with a little luck you’ll see the terminal output the result of a successful boot.
Stepping into Sodium
That’s it for flashing the firmware with libSodium built in. Let’s play around with the cryptography library a little by benchmarking it with a primitive proof-of-work algorithm. There are simpler benchmarks, but they were a little boring and I don’t require exact numbers:
-- Set difficulty (number of leading zeroes) and start WiFi (needed for cryptography), then generate a public and private key and print it
difficulty = 2
wifi.start()
public_key, secret_key = sodium.crypto_box.keypair()
print ("Public key for this session: " .. encoder.toHex(public_key))

function pause()
    -- Take a short break for the ESP32 to handle other processes
    tmr.create():alarm(500, tmr.ALARM_SINGLE, mine)
end

function mine()
    i=0
    while i < 60 do
        -- Generate a large nonce by concatenating 3 numbers from the PRNG. Not sure how fast it generates entropy, check this another day.
        i = i+1
        x = sodium.random.random()
        y = sodium.random.random()
        z = sodium.random.random()
        n = x .. y .. z
        -- encrypt the nonce using the public key defined in setup
        a = sodium.crypto_box.seal(n, public_key)
        b = encoder.toHex(a)

        -- If there are a number of leading zeroes equal or greater to difficulty, decrypt and print the nonce
        if tonumber(string.sub(b,1,difficulty)) == 0 then
            print ("Valid nonce found! " .. sodium.crypto_box.seal_open(a, public_key, secret_key))
        end
    end
pause()
end

mine()
This algorithm turns on the WiFi (required for cryptographic applications on the ESP32), and generates a key pair. Then it generates a single use random number, a nonce, with about 8 x 1028 possibilities, encrypts it with the public key, and checks if it starts with two leading zeroes. If it does, it decrypts with the private key and returns the original nonce. After 60 tries, it pauses for 500 milliseconds to allow other background functions to complete, otherwise it crashes. On the ESP8266, I might periodically reset the watchdog timer to let this run uninterrupted, but this was good enough for now.
Results come through at somewhere near three per minute, indicating we can try somewhere around thirteen nonces per second:

It did brownout and reset once in a rare while, which never happened to me with a similar algorithm running on an ESP8266. It also got fairly warm, so it appears I need a better power supply if I’m going to run this much computation on the ESP32! However, it’s certainly fast enough for the applications I had in mind, so while I might stay with the inexpensive ESP8266 for the majority of my projects, the ESP32 has more than earned itself a place on my workbench now that I know how to compile custom NodeMCU firmware for it.


Long time lurker, first time commentor and enjoyed reading this so much I am compelled to break my silence. Outstanding article, the content is well balanced, providing enough detail to be usable and pique the reader’s curiosity while not bogging you down with unnecessary history or edge-case narrative.
To the OP: please continue to share your projects, usage examples and tutorials. Assuming all of your communications are this clear and concise I believe all of us will benefit.
Thanks Scott! I’m hoping to (eventually) cover basic topics in AI this way. It’s been on my ‘to-learn’ list for years now, and past all the media hype I’m hoping to find something I can use and share.
Interesting. No public key verification was a deal breaker for me to use uPython on the ESPs. Glad they are getting serious about this.
Is this a typo?
while i < 60 do
Shouldn’t it be:
while i < 60 do
Dang security filters changed my comment so that both lines are identical :-) But in the code it is
while i & l t ; 60 do
When I think it should be
while i < 60 do
had me wondering if I was losing it there. kept going back and forth… they’re both the same???!!!
Thanks, fixed. The original code was correctly ‘where i < 60 do', at some stage it got converted to the HTML-safe encoding (& l t)
same, desk ornament still