It’s no secret that I rather enjoy connecting things to the Internet for fun and profit. One of the tricks I’ve learned along the way is to spin up simple APIs that can be used when prototyping a project. It’s easy to do, and simple to understand so I’m happy to share what has worked for me, using Web2Py as the example (with guest appearances from ESP8266 and NodeMCU).
Barring the times I’m just being silly, there are two reasons I might do this. Most commonly I’ll need to collect data from a device, typically to be stored for later analysis but occasionally to trigger some action on a server in the cloud. Less commonly, I’ll need a device to change its behavior based on instructions received via the Internet.
In the former case, my first option has always been to use IoT frameworks like Thingsboard or Ubidots to receive and display data. They have the advantage of being easy to use, and have rich features. They can even react to data and send instruction back to devices. In the latter case, I usually find myself using an application programming interface (API) – some service open on the Internet that my device can easily request data from, for example the weather, blockchain transactions, or new email notifications.
Occasionally, I end up with a type of data that requires processing or is not well structured for storage on these services, or else I need a device to request data that is private or that no one is presently offering. Most commonly, I need to change some parameter in a few connected devices without the trouble of finding them, opening all the cases, and reprogramming them all.
At these times it’s useful to be able to build simple, short-lived services that fill in these gaps during prototyping. Far from being a secure or consumer-ready product, we just need something we can try out to see if an idea is worth developing further. There are many valid ways to do this, but my first choice is Web2Py, a relatively easy to use open-source framework for developing web applications in Python. It supports both Python 2.7 and 3.0, although we’ll be using Python 3 today.
Initial Setup: Spin Up a Linux Server
Before we begin, we’ll need 2 things: a Google Cloud Compute VM or equivalent server running Ubuntu or Debian, and a domain name. Presently Google offers a free tier as well as a fair amount of free credit, and either will provide enough resources for what we’re doing today. A domain name will cost you around USD 10 and can be obtained from any domain registrar. In this article, we’ll call that ‘yourdomain.com’.
Once you have that, point the A record of your domain name to your server through whatever interface your registrar provides. Then log in to your server over SSH or equivalent, and create a self-signed certificate to enable HTTPS later on:
$openssl genrsa -out server.key 2048
$openssl req -new -key server.key -out server.csr
$openssl x509 -req -days 365 -in server.csr -signkey server.key -out server.crt
We’ll need HTTPS enabled as Web2Py will not allow remote administrator login without it. Next, we’ll install the packages we’ll need to run Web2Py with Python 3. A virtual environment for Python 3 is possibly a better way to do this, but in my case I didn’t really require it.
$sudo apt-get update
$sudo apt-get install python3-setuptools
$sudo easy_install3 pip
$sudo apt-get install python3-dev
Then we set up Web2Py itself by downloading the source code here, unzipping the file, and running it with:
$python3 web2py.py -a 'youradminpassword’ -c /path/to/server.crt -k /path/to/server.key -i 0.0.0.0 -p 8000
We’ll be using port 8000 for Web2Py in this example, so as a final step in our setup, we’ll need to make sure that port is open to TCP traffic. In Google Cloud you can do this under network–>VPC Network–>Firewall rules.
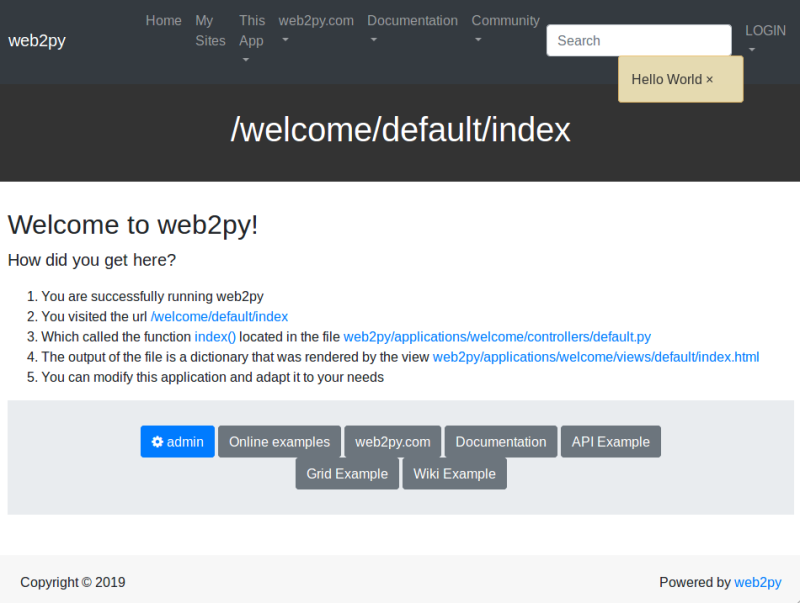
If visiting https://www.yourdomain.com:8000 results in a welcome page, everything is working.
You may want to keep Web2Py running after you close your SSH session, in this case I recommend using tmux.
Storing Data From Your Devices
Now that we have a working environment, we’ll begin setting up our first system – one that lets us store data from devices. Web2Py uses a Model-View-Controller architecture. When we create a new application called ‘rxdata’, it will already have a default model called db.py, a default controller called default.py, and a default view called default/index.html.
We’ll begin by defining a simple SQLite database model to store our data. We open up db.py and add the following to the end of the file:
service = Service()
db.define_table('mydata',
    Field('device', type='string', length=30, default=None,required=False, unique=False),
    Field('rxtime', type='string', length=30, default=None,required=True, unique=False),
    Field('datastore','text',label=T('Device Data'),requires = [IS_NOT_EMPTY(error_message='Data Field is Required')]))
This gives us three fields – one to identify where the data is from, another for when it was received, and finally a field to contain the data itself.
Now, we save that file and open the controller default.py to define how our data will be accessed and handled by users. Web2Py has a neat feature called a smartgrid that gives us a simple GUI that handles creating, reading, updating, and deleting data (CRUD). Note that I’ve purposely disabled user authentication here by adding ‘user_signature=False’ – you’ll probably want to enable that when you’re done testing.
import time
import datetime
def index():
    response.view = 'generic.html' # use a generic view
    grid = SQLFORM.smartgrid(db.mydata, deletable=True, editable=True, user_signature=False)
return dict(grid=grid)
Next, we need to define a service that allows our Internet of Things devices to insert data into the database. Note that I haven’t included any authentication or encryption here for brevity, but it would not be too difficult to apply some of the techniques I’ve outlined in a previous article to HTTPS rather than MQTT.
@service.run
def receive(chipid,newdata):
    time = str(datetime.datetime.now()).split('.')[0]
    ins = db.mydata.validate_and_insert(device=chipid,rxtime=time,datastore=newdata)
return newdata

def call():
    session.forget()
    return service()
With this service, you can take data passed through an HTTPS request into the database. The function ‘rxdata’ takes two parameters, chipid and newdata. There are two formats to provide these parameters, either by accessing https://www.yourdomain.com:8000/rxdata/default/call/run/receive/chipid/newdata
or with:
https://www.yourdomain.com:8000/rxdata/default/call/run/receive?chipid=chipid&newdata=newdata
Lets look at how we might do that on an ESP8266 running NodeMCU using the latter format. Note that you’ll need to compile with TLS support to allow HTTPS for this to work:
function senddata()
    chipid = node.chipid()
    data = “This is the data you are sending”
    print(data)
    url = "https://yourdomain.com:8000/rxdata/default/call/run/receive?chipid=" .. chipid .. "&newdata=" .. data
    print(url)
    http.get(url, nil, function(code, data)
    if (code < 0) then
        print("HTTP request failed")
        function_if_failed()
    else
        print(code, data)
        function_if_successful()
    end
    end)
end
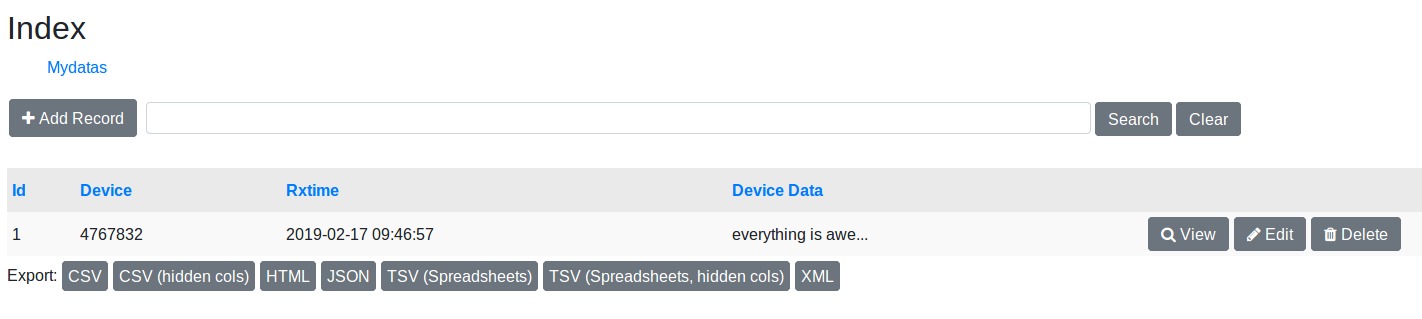
Since the service returns the parameter ‘newdata’, when we’re looking at the ESP8266 console we ought to see a confirmation that looks something like ‘200 <same data we sent>’, along with some new entries in our database when accessed at https://www.yourdomain.com:8000/rxdata:
Controlling Devices Is A Simple Tweak
A moment ago, we sent data from a device by requesting a URL containing the data we wanted to send, and received a response from the website echoing back the data. What if we were requesting commands rather than sending data? It turns out a simple implementation only requires a slightly different service defined in our default.py controller:
@service.run
def command():
    command = 1
    return command

def call():
    session.forget()
    return service()
When a device accesses https://www.yourdomain.com:8000/rxdata/default/call/run/command, it will receive the command ‘1’. We might implement this as follows:
function startup()
url = "https://www.yourdomain.com:8000/rxdata/default/call/run/chan"
http.get(url, nil, function(code, data)
if (code &amp;amp;amp;amp;amp;amp;amp;lt; 0) then
print("HTTP request failed. Retrying.")
else
print(code, data)
command = data
carry_on()
end
end)
end
Also on the device end, I typically configure a few modes of operation depending on what command is received, or allow the command to set the value of some parameter such as the sampling rates, authorized users, deep sleep times, or anything else I’m likely to have to frequently change in a prototype that will one day have a more complete backend.
I should mention that this lets me connect my toaster to even more things, because that’s regrettably the way my sense of humor works. That might be a story for another day, so… brace yourselves.


have a look at plotly’s dash and daq-dashboard libraries. They allow one to build a very fancy web dashboard purely in python
Thanks, I’ll take a look! I’m also looking at using Flask for this sort of thing, it looks sort of fun.
Good article and I’m going to try this as the steps are well explained. However, shouldn’t the function name referred to in:
“The function ‘rxdata’ takes two parameters, chipid and newdata.”
Be “receive”?
Usually rx indicates the receive chanel of a protocol so they are equivalent. The function name still states its intent.
Wrong. What he means is that in the code, the function is named as “receive”. But in the text it is called “rxdata” Just an oversigh in writing the article, probably.
I tried to do something like this for my beestalker project.
It turned out that the only feasible way to get a manageable system was the use of client authentication, websockets, json.
73