Ink! No matter the printer you’ve got, whether it be inkjet, laser or otherwise, it’s the consumables that will send you broke. At times, the cost of Hewlett-Packard black ink has exceeded the price per volume of human blood, and shareholders around the world have rejoiced.
As a retrocomputing reprobate, I have a personal dilection for printers of the vintage persuasion. My previous dalliances have involved fully fledged office copiers, but lately I’ve found myself tinkering with dot matrixes of a 1980s vintage. These workhorses are now reaching middle age, and as you’d expect, their ribbons are a little worse for wear after all this time.
Replacements are cheap enough for the most common printers, but shipping takes weeks and hackers are an impatient bunch. Plus, if you’ve got one of the more obscure models, it’s unlikely you’ll find a fresh cart just sitting on the shelf. It was these factors that spurred my good friend [Cosmos2000] and I into action.
Nothing Ventured, Nothing Gained
In a former life, I was blessed with the job of signwriter for a local hardware store. This involved the hand writing of large A4 and A3 price tickets using big rectangular brushes dipped in a large ink bucket. Over a few months, the ink in the bucket would begin to grow thick and gluggy, making my work difficult. This could be remedied somewhat by using methylated spirits as a solvent to freshen up the ink. It was never as good as using a new pot fresh out of the box, but it got me thinking about inks and how they work.
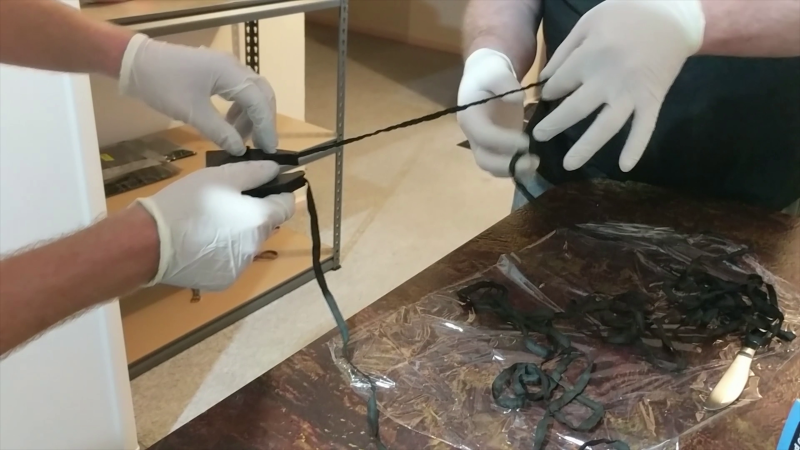
My first attempt at reinking the dot matrix ribbons was based on this prior experience, but we needed a source of ink. Permanent markers have liquid ink contained in the marker’s main body, soaked into a fabric carrier to deliver it to the tip. This seemed like a prime target for hacking. We chopped open a marker and squeezed the ink out into a bowl. We then mixed this with methylated spirits, hoping it would act as a solvent to slightly thin out the ink and also re-wet any remaining ink still on the ribbon.
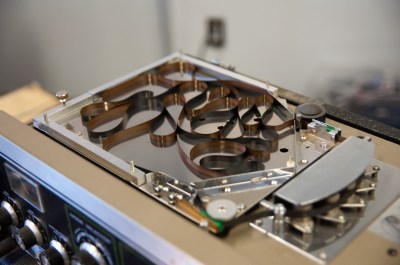
The process of actually applying this ink to the ribbon was, in a word, fun. We were working with a ribbon from an Epson GX-80, which is approximately 2 meters long and coiled up inside the cartridge in a rather Kafkaesque fashion. We disassembled the housing, being careful not to break any of the locating lugs, and dunked the entire ribbon in our ink and solvent mixture.
Reassembly was fraught with danger, as we slowly used the manual winder to reload the ribbon and tried to avoid getting ink on literally every surface of the kitchen and lounge room.
Results were terrible. By using too much solvent, we’d over-diluted our fresh ink and essentially washed the ribbon clean at the same time. Of course, with an old printer on the table and beer still in the fridge, we weren’t ready to give up just yet.
If at First You Don’t Succeed…
We set out on a second attempt, determined to learn from our mistakes. It was paramount to avoid disassembling the cartridge again, as we’d already broken half the locating lugs the first time. We also wanted to ensure we put fresh ink on the ribbon rather than washing it away again.
Another marker found its way to the chopping block, and its soft polyester reservoir was removed. This time, we squeezed the reservoir directly onto the ribbon itself, watching the ink transfer from one to the other. We could easily see the ribbon blackening as we wound the ribbon around to cover the whole length.
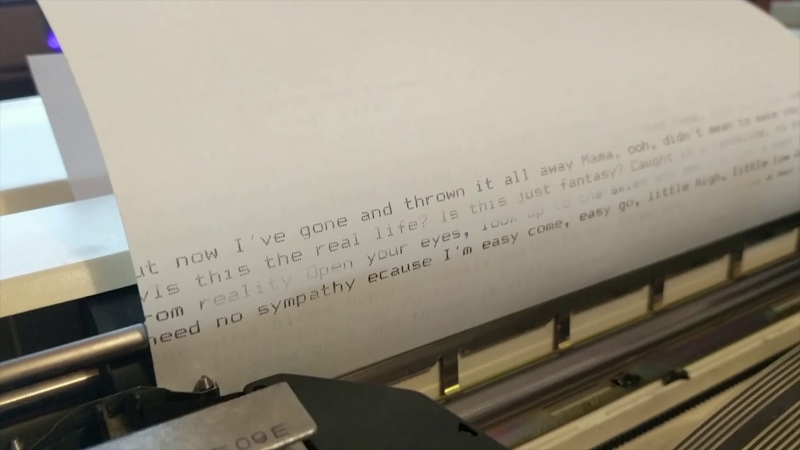
After many minutes of winding, we reloaded the cart into the printer. The print job was fired off while we watched with bated breath. We were crestfallen as the first lines came out faint and unreadable… and then elated as there were splashes of rich, dark text further down the document. There was much whooping and hollering, as there often is when a dot matrix printer screams into life in a suburban household. We were getting closer, but we needed just a little more.
The Taste of Success
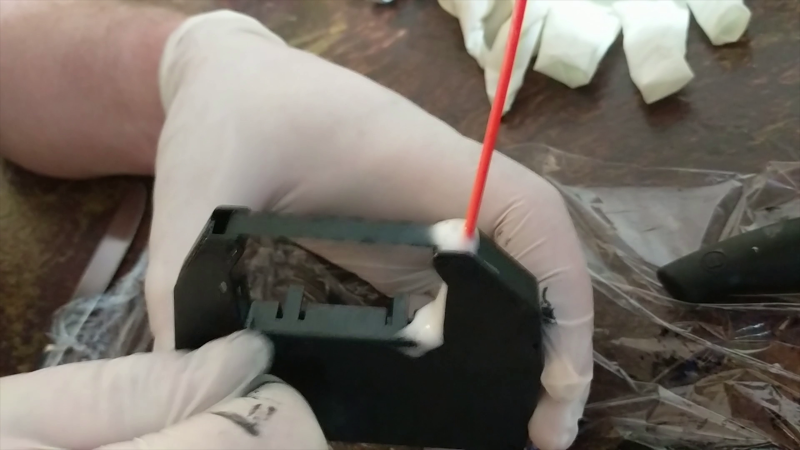
We were now well aware that parts of the ribbon were freshly inked, but the consistency simply wasn’t there. At this point, prior research came to the fore. [Cosmos2000] was familiar with the experiments of other enthusiasts, who had success in the early 2000s by applying WD40 to freshen up old ribbons. It seemed like an odd choice, but we decided to press on.
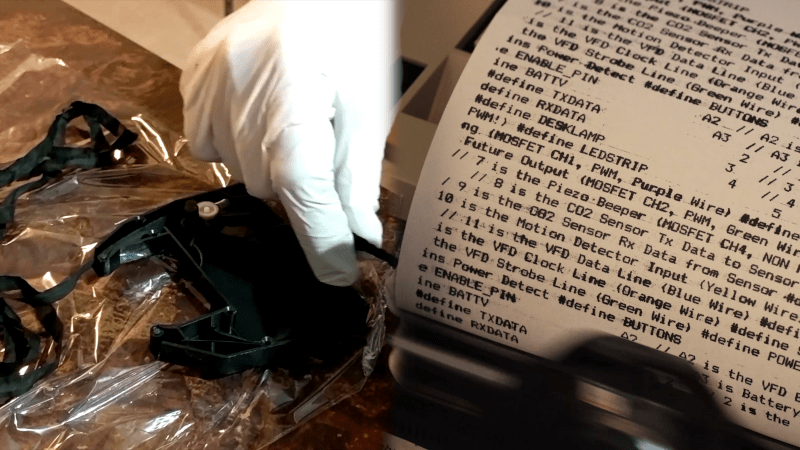
Digging out an old blue can of the good stuff, we gave a few hearty squirts into the ribbon cavity. The idea was that the WD40 would act as a solvent, spreading the ink more evenly along the ribbon. It’s a messy business, and one where the latex gloves come in handy.
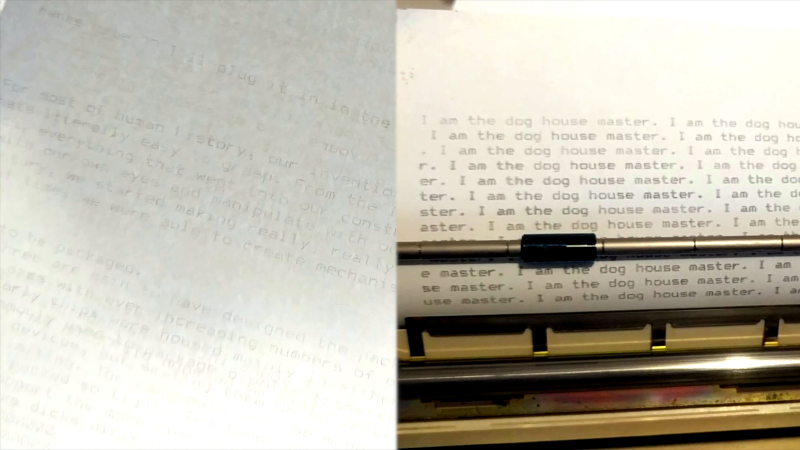
With a satisfying click, we reloaded the Epson once more. The pins roared to life, and the paper came forth. After a few blurry lines, we were blown away. We had dark, black ink flowing smoothly and consistently, line after line. Further tests with images were similarly successful. It was an excellent win, even if it did keep us up till 2 am on a Sunday morning.
Final Notes
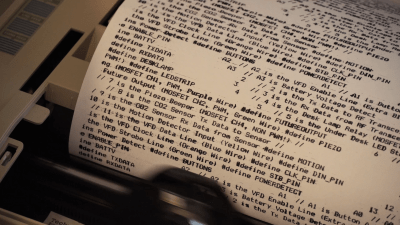
We were initially reserved about our success, suspecting that it wouldn’t hold up over time. We were pleasantly proven wrong, however. Four months on, the GX-80 continues to print beautifully. The replacement ribbon eventually shipped, yet remains in its packaging, still waiting for its time to shine. Further experiments on other printers have proven fruitful, too. Our Commodore MPS-1230 is now churning out pages with the best of them, after some initially blurry results when we got a little too excited with the WD40.
Overall, we learned a few valuable lessons. It’s possible, and preferable, to reink without disassembly. Most ribbons have a manual winder that allow the full length to be replenished easily. It’s also key to avoid over-diluting the ink, and washing out the ribbon. We’ve also been tempted to experiment with using actual bottled ink, rather than harvesting the guts of poor defenceless stationary — but that’s an experiment for another day.
Hopefully this guide helps other enthusiasts to get their dot matrixes up and running again, screaming away as they hammer out the pages. Until next time, happy printing!



Back in the day the WD40 trick was well known….That was when I was printing my high school book reports on a Gemini 10x printer (https://www.computerhistory.org/collections/catalog/102622175).
Later my EPSON LX-810 made this much easier by keeping the ribbons in a nice cartridge instead of spools.
I don’t miss those days. My laser printer does a better job, it is cheaper, and faster. Most especially, I do not miss fan-fold paper and tearing the tractor feed holes off the side.
I like a good laser printer too, but I miss the days of dumb printer cartridges. Now you can’t refill the toner in printer cartridges without either hacking the printer firmware, replacing the page counter eeprom chip in the cartridge, or doing some sort of a MITM attack on the communication between the printer and the cartridge.
I’ve had no trouble using cheap ($15 – 20 each, usually) toner cartridges from Amazon on any of the my HP laser printers. On the other hand, I had trouble with other brands, making me want to stick with HP (they’ve also proven to be more reliable over the years in my experience).
Yup, love our old laserjet… and those reman carts that go for 5000+ pages for $20… any time I’m in bestbuy or an office store near the printers and get salesdroid pounced, I’m casually all “Got anything that prints at less than 2 cents a page?” and they are all.. “2 cents??? That’s impossible!” and I’ll be “Well I pay under half a cent a page, just seeing if you’re getting anywhere close yet…”
That’s why at work we switched to Brother laser printers. There are no chips, just a reset gear on the cartridge and (on the multi-function machines) a button sequence to reset the toner counter. They aren’t as dodgy as HP on the software side either; Scan to PC from the printer’s display actually works every time without having to start the software, run to the printer and load the docs, run back to the PC to hit “Scan”, and run back to the printer to catch any jams like we did with HPs.
I still think that fanfold paper has a certain charm to it. Especially the old “green bar” stuff. You just can’t beat it.
Lol, that reminds me of why 132 column fan form paper wasn’t the best choice for machine code disassembly.
in my past i had a Citizen GSX 190. To refill the black ribbon i simply opened the lid of the cartridge and dipped a few drops of CHINESE INK in the sponge and the ribbon, (for Rotring-Pelican drawing pens) that is really cheap and worked like charm. it is really important not to oversaturate the cloth of the ribbon or it will be a mess.
I used the WD-40 trick with my ribbon cartridges back in the late ’80’s and early ’90s. I usually got 2 extra runs through the ribbon before the ink was too faded for general use.
My high school had a motorized device to turn the ribbon and a bottle of ink that was applied to a wheel of sorts to re-ink ribbons. It was a bit messy and the ink was slightly purplish-blue rather than black but it worked well enough and saved the school money until the dot matrix printers we’re replaced with inkjet and lasers (yes, they refilled both of those kinds too)
> motorized device to turn the ribbon
for DIY-ing this, you could probably mount that green wheel in a hand drill chuck.
A second use for the WD40: dismount the print head carefully from the printer, put the print head upside down,’nose’ first, into a wad of paper towel, and spray the WD40 into the head just behind the ‘nose’ – this will dissolve and loosen the old ‘gummy’ ink that keeps the needles from moving properly and makes the printing more consistent.
Yeah, this is important especially when you start using re-inked or WD40’d ribbons, where the ink may be considerably more mobile than original, and thus it’s prone to wicking up the pins into the guide-ways.
I always just perched mine on tongue-depressor scaffolding above a shallow dish, then poured paint thinner into the dish until it touched the face. Your technique sounds better, though, using dry paper towel to “draw” the solvent forward in the direction you want the ink to move. I’ll remember that next time I drag out the old Epson!
When I was in grade school, we were not allowed to use ball point pens, so we used fountain pens.
The Scriptos we used had a disposable plastic tube reservoir. I often refilled mine with blue food coloring.
Later, some friends asked where I got the “green” ink, as it slowly faded to green as it dried.
I have no idea if the refill was economical, as I never compared the price of a box of refills with what my mother paid for a box of food coloring.
I remember those too, early ’60’s. Leaks, ooh! I think I put something maybe lemon juice into one of the refills, making invisible ink. Nuns and scolding on the way to hold it. Cramped me for life. We must have had the ball point ban too. Politics and Palmer Penmanship, thanks but largely gone for good. Were they worried about tiny indentations made into desktops?
“Were they worried about tiny indentations made into desktops?”
I think so, but considering that a lot of ball point pens leaked back then, and the ink was permanent, that might have been another consideration.
It was also believed (and there’s some truth) that using a fountain pen promotes better penmanship.
Although it can be messy I love writing with a fountain pen, it just feels better and it does write better and make you write better.
Cool old-printer factoid: Since the pins on the print-head often only impacted half the height of the ribbon, someone got the bright idea to make the ribbon loop into a Mobius strip, and thus use more of the area of the ribbon for printing.
One thing to check out for old ribbons: On some cartridges, the ribbon-pushing wheel was covered with a small foam cylinder which would help redistribute ink on the ribbon. On old cartridges, the foam would disintegrate, and thus the wheel could no longer advance the ribbon. If you turn the knob to advance the ribbon and it doesn’t advance, this could be the problem.
So, how well does WD-40 work on multi-colo[u]red ribbons?
B^)
The colors no longer squeak.
If you can evenly apply it so it doesn’t inter-seep, and wind the ribbon so the colours dont overlap – just fine!
Let’s see. What color do you get when you mix a lot of red ink with a little black ink???
No two line will be the same exact shade of mud.
[Lewin Day]
On the right side of the banner photo, there appears to some “ghosting” on the page.
Was the page re-used from an early (almost blank) failure?
Could also be dark print from the reverse side bleeding through.
Possibly was yeah, that or it’s just smudging from the first few lines of printing post-refill.
Hmm. markers. good idea. I first used stamp ink, but that is water based. then i bought a (very) expensive small bottle of oil based ink for cash registers and number printing staps and that worked quite ok. lastly i bought a 4 color reink set for a certain kind of epson printer using a non water based ink. I still have to test it, as the ribbon for my huge Epson DFX-5000 had the deteriorated foam rollers. I found that out after applying the red ink… Oh well. need to cut new rollers…
What a beast the DFX-5000 and DFX-7000 were.
It should have been called a BFP-500.
I recall having to service these and swap them out when they failed in a former life.
They were used for billing and pretty much ran for 12hrs a day straight.
I remember them being rather heavy and unwiedly, espeically having to carry them one manned up stairs.
But they were amazing to watch in action which made it worth it.
Thank goodness for youtube so people can see just what beasts they were.
Kind of funny people say beasts. I remember a early color laser in the shop. About the dimensions of a wooden pallet, and weighed enough two people were needed.
I remember re-inking an Epson MX-100 printer cartridge. That was the original one, provided with the printer. This one was genius, in that it had an easy clip on both sides so you can open and close the cover without damaging anything. The case was a metal one, not the cheapo plastic ones that would break if re-inking them. Opening the case was not required to re-ink the ribbon, but useful is the ribbon was jamming. I also remember some kits for re-inking the ribbons. You only had to attach this device to the re-entering end of the cartridge, and roll the roller that was easy to use from outside the cartridge. Those printer cartridge were made to last many decades. Like the printers too. We had this MX-100 for over 10 years.
I re-inked ribbons for an Epson LX-800 and Star NX-MultiType. The lids on the ribbons were held by a bunch of pins friction fit into holes in the base so they could be pried open without breaking anything.
The first couple of times I’d give them a few spritz of WD-40, put the lid back on then turn the winding knob to cycle the ribbon through until it was uniformly black again.
The third time there wasn’t much ink left in the ribbon so I dribbled stamp pad ink across the wadded up ribbon inside its case, then some WD-40. Re-assemble and turn turn turn that knob until the ink was fully distributed.
Do I miss those days? No, I do not!
BTW, the Star printer was a better LX-800 than the real LX-800. I had some software that had support for the Epson but with some settings the real Epson did not work how it was supposed to. The Star in LX-800 emulation mode did. Apparently the authors of the software followed the technical information in the LX-800 manual – but Epson had perhaps made some changes to the firmware and failed to update the manual. One of the programs was TI Artist for the 99/4A. It had a function to create a ‘panorama’ by printing three pictures in a row, butted together. On the real LX-800 it had the opposite effect, they printed farther apart than the standard three in a row option. Print on the Star in LX-800 mode produced the correct output. There were some other things in TI Artist that only worked right on the Star printer.
I know there were some issues with some CP/M and DOS software with the real Epson, that had no problem on the Star, but I don’t recall specifics.
This takes me back. I first used an Epson MX-100 printer. Epson once told me that the print heads for that model were discontinued before the ribbons. I was buying third party ones for a while. I now use an Epson WF2450 unit, and it works best using Linux then with Windows.
I believe the larger stationary stores still carry stamp pad ink, I’d have been inclined to try that.
I imagine that’d be a great choice. Much less messy :P
Maybe it was an “old domestic spouse’s tale”,
but IIRC, stamp pad ink had an abrasive in it.
I rarely need hard copies any more when I do I go to the library to print. While I don’t understand how the business model works, as long as new printer from Walmart is comparable in cost to two ink cartridges, I’ll buy a new printer. I didn’t create the current status quo, but jumping through hoops to avoid it, is unlikely to change anything. This approach has limited scope, and limitted lifetime, but I’m not here to discourage anyone from this, just saying you are basing your action on limited resource pool.
Some manufacturers like HP have caught onto that trick, and include “trial” cartridges in the printer. They’re good for a small amount of pages, and then you have to fork over the money for the real cartridges not long after.
I hate HP printers with a passion. They’ve found a way to scrounge every penny from their customers possible.
Rarely need to print colour. So we bought a $60 BW laser printer. Yes this truely is a thing.
The toner will last far longer than ink and tbh having it handy means we print more than we would have done around the home.
I have an old HP LaserJet 4100DTN on my home network. Holds a lot of paper.
ink replacements for a Canon i860/i960 are super cheap and can be gotten for pennies on the dollar. if you’re going to be using bottled ink, consider using bubblejet-type replacement cartridges instead, since these are generally a lot cheaper and come in 20 packs of CMYK. this’d allow you to wash out ribbons and make them cyan/magenta/yellow and get some funky art going on printers that wouldn’t have otherwise had a color option to begin with.
I had an Epson LQ-500 and later a Star LC-10. I used to drill a small hole on the top of the cartridges. Then I dropped a few drops of black stamp ink every now and then. It worked fine and I didn’t have to manually wind the ribbon. The ink diffused for capillarity over the whole loop of ribbon and the results were satisfying (for the standards of the time).
I didn’t know about the WD-40 trick. Maybe I’ll test it if these printers return one day.
thanks for the report! i have a typewriter i don’t use very often, so i’m hesitant to invest in a new ribbon, or even to squirt WD40 on an upstairs tool, because i figured either way it wouldn’t be any good by the next time i needed it. but if the wd40 trick lasts for 4 months, it’s worth it to me!
I had a hand me down Okidata Microline 80, I believe made in 1979, same year I was born. I got it in the mid 80’s, but kept using it through High School when I graduated in the mid 90’s, The best thing about it was that it used standard typewriter ribbons that I could just pick up at a pharmacy or corner store back then.
I remember those because (back in the day) the university bought a bunch of them for students to print out program listings. They were rated for 120 characters/sec, and they were hooked up to 1200 baud serial ports, and, of course, they couldn’t keep up, since the rated speed doesn’t account for line feeds or carriage returns. They had to buy a bunch of serial buffer boxes to make that work out.
I remember how the ribbon would feed through this bar that had fork slots at either end for the ribbon to pass through. Near each end of the ribbon is a rivet going through the fabric. When a rivet hits the fork part, it causes the bar to move as well, and this causes the ribbon feed to reverse direction.
advantage of dot matrix printers is that they dont waste ink cleaning the cartridge.
and they are not bound to to today’s copyright and anti counterfeiting laws thereby it is up to the software to enforce that.
The reason why the WD40 trick works is because the ink is oil based. Alcohol may dissolve it, but it dries out too quickly and the ink won’t transfer. The WD40 has two different oils – a light oil and a heavy oil, and when the light oil evaporates away it leaves the heavy oil with the ink suspended in the ribbon.
The same effect can be had with paraffin oil in acetone.
Point being that the ribbon only works as long as the ink on it is slightly “greasy”. If it’s dry, it won’t transfer. The lighter oil will spread the ink evenly, but will evaporate eventually – the heavy oil keeps the ink moist so it transfers over to the paper.
Alcohols like isopropanol (rubbing alcohol) washes away the oils and the ink, and they may make the ink temporarily mobile, but once the alcohol evaporates the effect is lost.
Heavy part of WD-40 though is only stuff similar to mineral spirits or varsol, will still evaporate eventually. However, drips of those might be favorable for those who don’t want to be hosing explosive quantities of aromatics around in tight indoor spaces.
Cool method!, I used to have a Typewritter with the same kind of cartridges, but i couldn’t re-ink them, they where some sort of plastic that got transfered onto the paper
Those were supposedly the high quality ribbons, where the inky tape ones left slightly fuzzy edges. Some printers, word processors and typewriters had both kinds available.
Why not just use the tried-and-true method pioneered by Raven Systems of Oakland (tho, they were in NJ)? Since they are no long around, the source of ink you want is oil-based stamp pad ink. The oil acts as a lubricant for the printhead. If your ribbon has a reinking wheel inside of it already (Like some Panasonic and Oki printers), just pop the cover off, drill 3’ish holes above the reinking wheel (usually it’s round, and spins, sometimes it’s a rectangle) and you can drop ink thru the cover to keep it saturated. I use a cordless screwdriver to run the ribbon until it’s at the desired darkness. It will usually keep it inked uniformly. If your ribbon does not have a built-in reinker, then you can use the alternate method. On the Star NX-1000 printers, you can install a small felt pad on the return side of the ribbon, and keep it saturated with ink.
http://www.doppleganger.org/nx1000reink.jpg
Something like that. Make sure it’s on the return side, so it has a chance to disperse while the ribbon is bundled up inside the cartridge, so it’s more consistent. We’ve been reinking ribbons like this for 25 years. Never use water based ink, only oil based.
Heij
I´m terribly interested in the mentioned re ink machines. I was looking for a needle printer for my 1986 Voltcraft Digiscope Converter which´s main feature is to hardcopy the screen on an FX80 kind printer.
I ended up with an Epson LQ570+ and a dry ribbon but the printout worked- I was thrilled about that sounds and movement, as a kid I loved these things because of the sounds and sudden movement- a bit like a kitten goes after a laserpointer… I digress.
My first try was to use my Inkjet-ink and brush it on the ribbon with a piece of foam and a cordless drill to pull the ribbon thru, I left the cardridge together.
Certainly I used too much and tried to remedy that with kitchen towels- now I know that I most likely messed up the ink on the ribbon because I think what I put on was water based.
But it worked (for some time) and I was happy camper (did I mention I love these things)?
It is just like with my cat: I just love her so I put up with her sides that aren´t the nicest.
To me these paper prickers were pure magic.
But bach to the task at hand: using WD40 makes sense, I wasnt aware about the kind of ink used on these ribbonds. It makes perfect sense to use oil based stuff because of the lubricating effect on the needles (didn´t think of that `til I read this thread) and I can observe the wicking effect on a used spare printhead I got.
On the spare I can see the blue-ish ink and because it´s really grimey I´ll try flushing it with WD40.
Thank You all for Your efforts- I´ll post my outcomings. We all want to become more eco friendly but we shure won´t save Earth with Tesla`s but with keeping old stuff around and FIX IT, USE IT.
The platens on Your beloved laser toner thingys wear out eventually and by replacing that we generate way more waste than with an old ribbon cartridge.
And we can use these ribbons until they literally disentigrade. I even used an old Mac as my shop computer until I was forced to retire it because no browsers run on it anymore, the last project that provided a Fork Of Firefox quit 2-3 years ago.
If anyone knows about a browser that´s kinda safe and runs on an old Mac: please let me know, I´d like to keep using it in my shop.