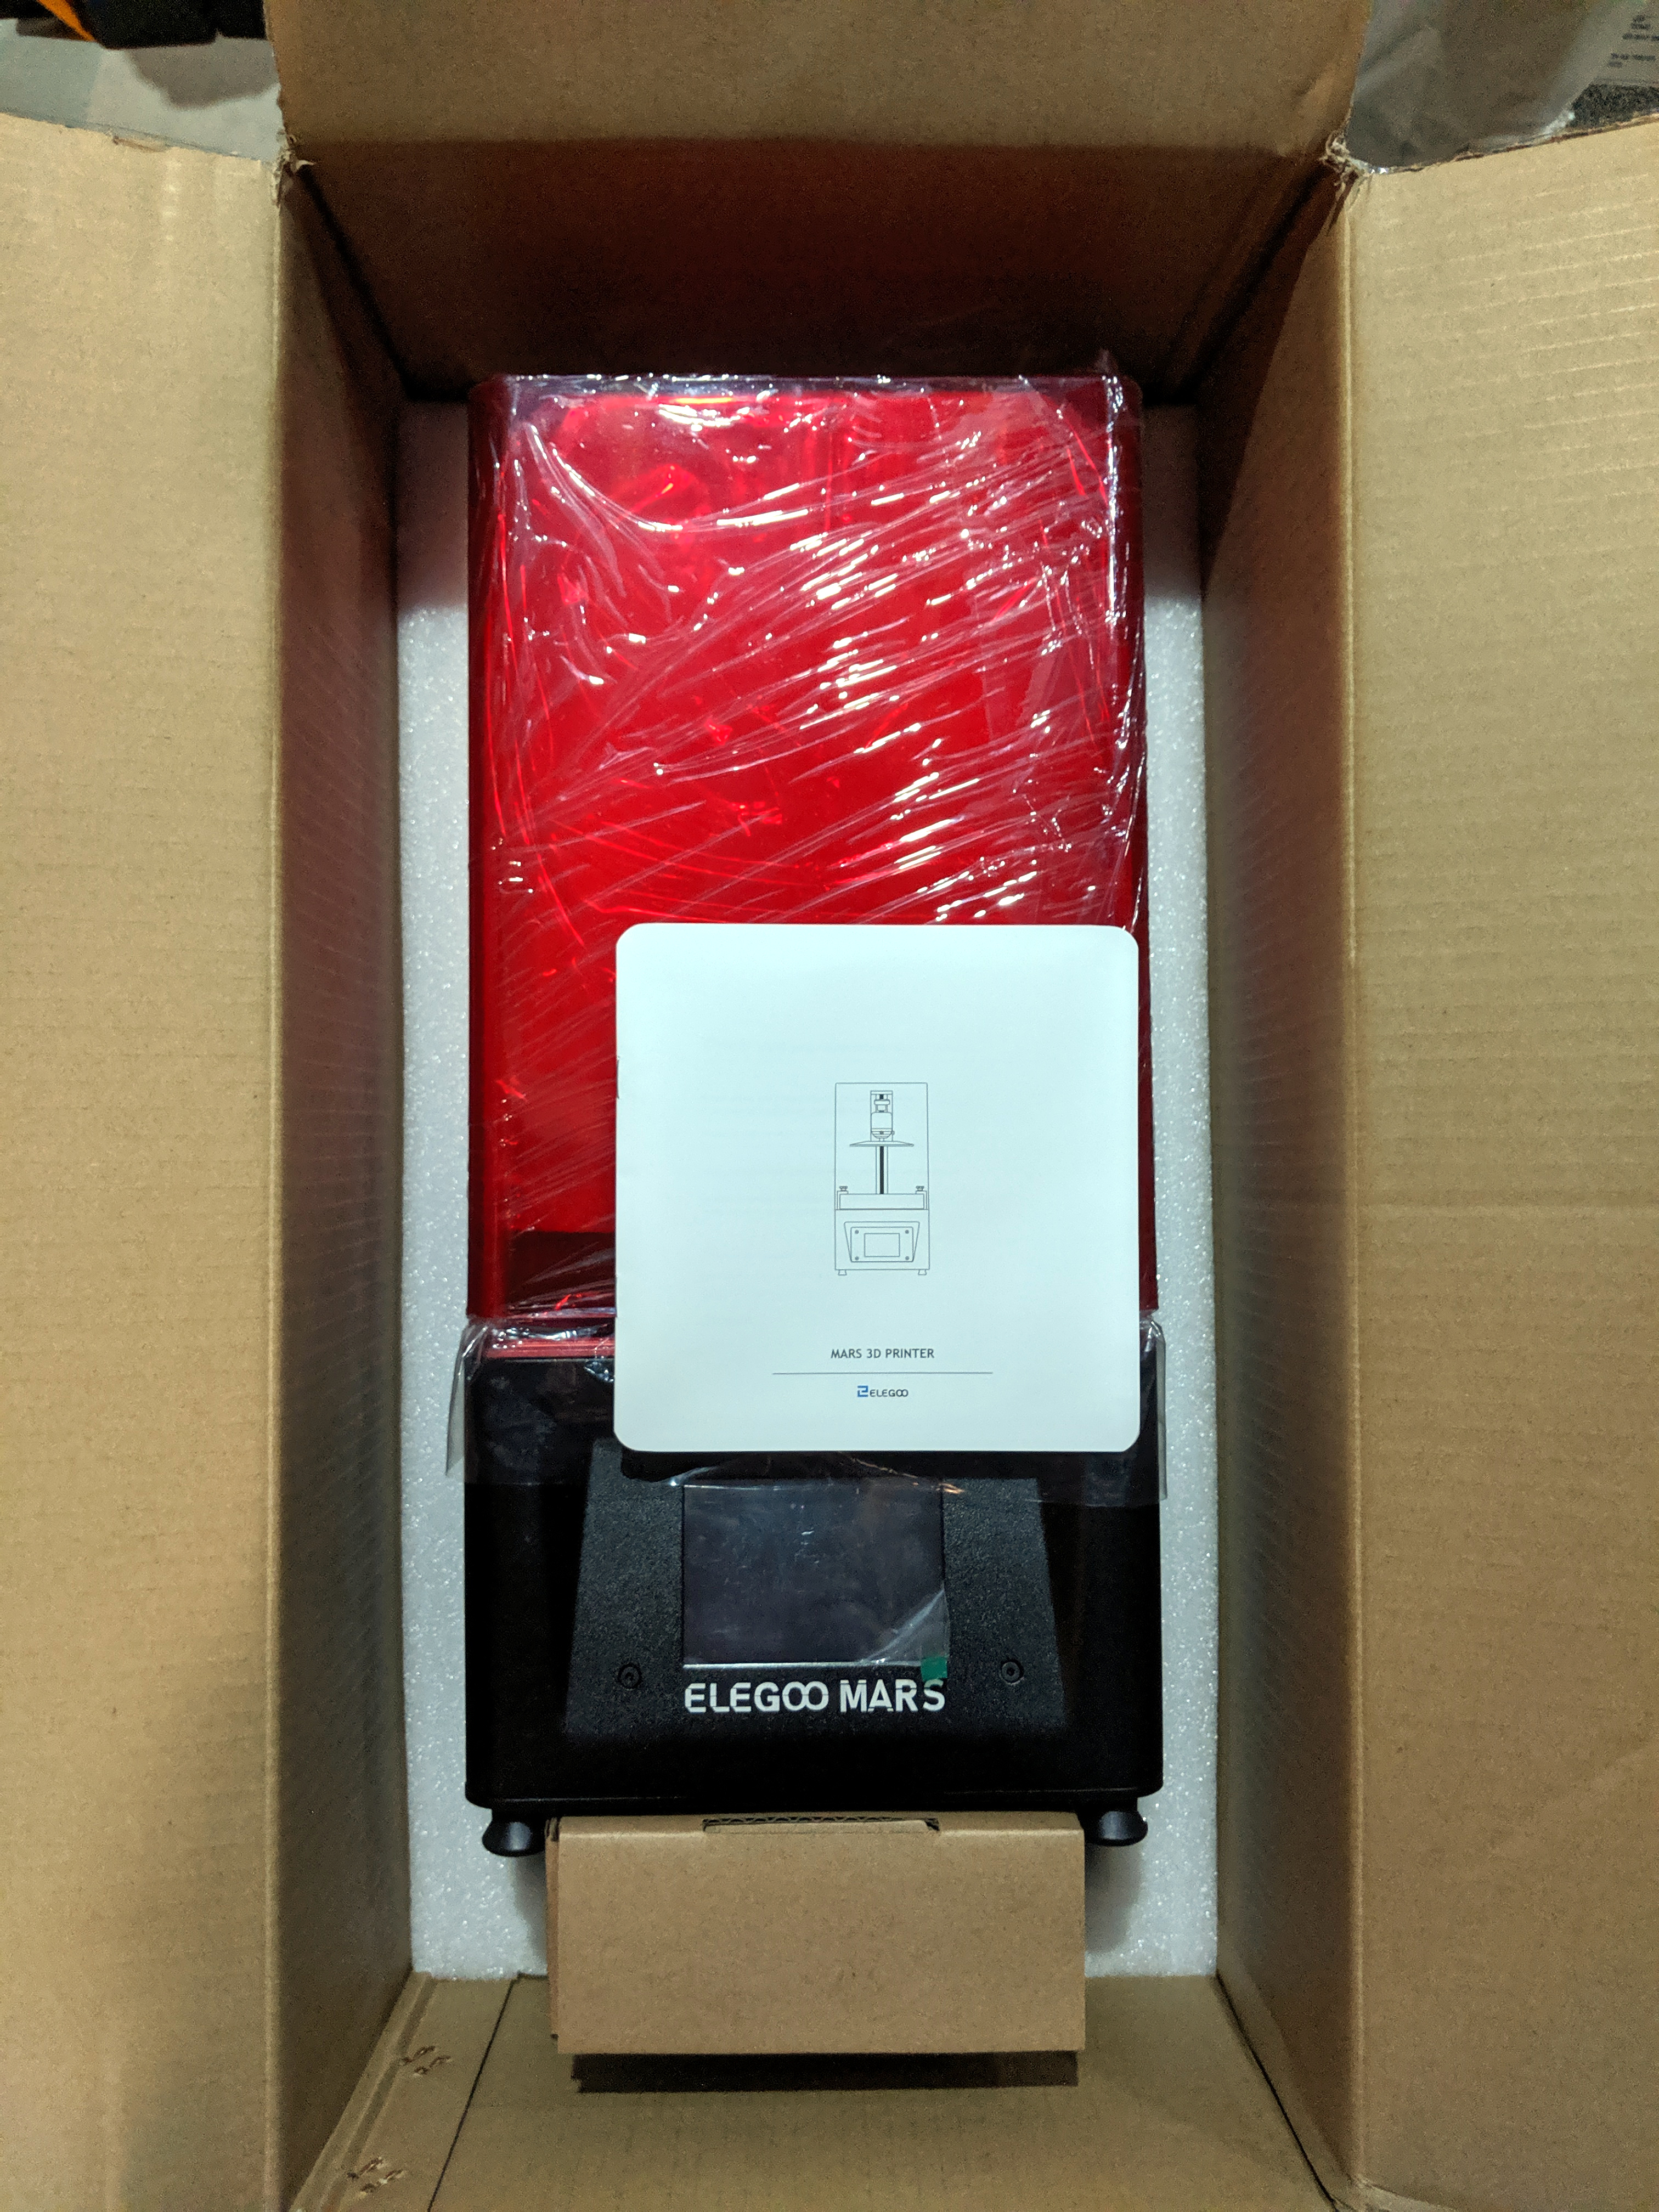
Resin-based 3D printers using digital light processing (DLP) and especially stereolithography (SLA) are getting more common and much more affordable. Prosumer-level options like Formlabs and the Prusa SL1 exist, but more economical printers like the Elegoo Mars, Anycubic Photon, and more can be had for a few hundred bucks. Many printers and resin types can even be ordered directly from Amazon, right at this moment.
Resin prints can look fantastic, so when does it make sense to move to one of these cheap resin printers? To know that, consider the following things:
- The printing process and output of resin printers is not the same as for filament-based printers. Design considerations, pre-processing, and post-processing are very different.
- Resin printing has a different workflow, with consumables and hidden costs beyond the price of resin refills.
Things may not be quite where fused deposition modeling (FDM) printers were just a few short years ago when we were extremely impressed with the quality of printer one could get for about $200, but it is undoubtedly far more accessible than ever before. Let’s look at how to inform a decision about whether to take the plunge.
The Right Print for the Job

FDM printers deposit molten plastic with a hot nozzle, while SLA/DLP printers use an ultraviolet light source to cure liquid UV resin into a solid. Both build a three dimensional object one layer at a time, always building the next layer on the foundation of the previous layer.
So far so same, but in practice they have very different workflows and produce different results, and are therefore good at different things.
This means that when it comes to good design, what’s intuitive for filament-based printers doesn’t necessarily carry over. For example, when 3D printing resin:
Print Sizes are Small
Compared to FDM printers, build platforms for resin may seem revoltingly small. The more economical SLA printers have build platforms that are roughly the size of a cell phone screen. Which, as it so happens, is exactly where their LCDs are coming from (with the addition of a UV backlight to cure the resin).
The Model is Under Stress Between Each Layer
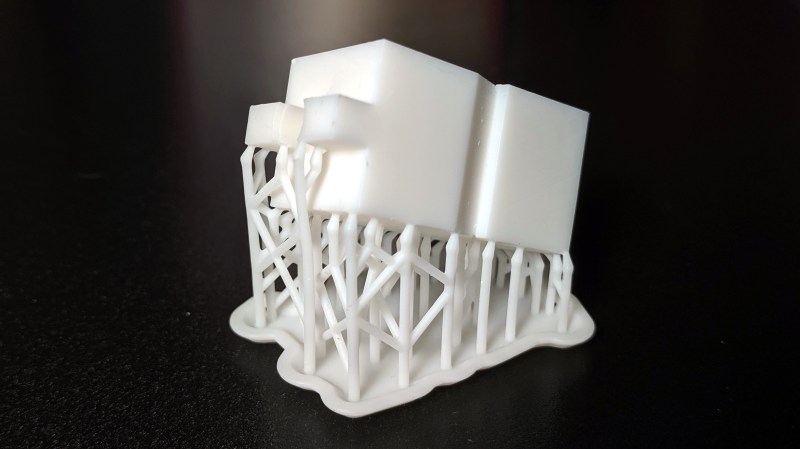
A “peel” process pulls the model off of the build surface after every layer, and the model must withstand this. Each new layer must be on a strong foundation, and the best way to ensure a good foundation is with supports. A model orientation that offers a minimal cross-section (and therefore minimal area per layer) will reduce peel forces.
Rafts and Multiple Supports are the Norm
With FDM printing supports are often avoidable, but not so with resin. Supports provide overall structure and strength to the model as it is subjected to forces that FDM prints don’t need to worry about. Rafts and supports are the norm, not the exception.
Virtually No Tolerance for Overhangs and Bridging
Compared to FDM printers, resin printing will seem as though it has virtually no tolerance for overhangs. With FDM, an unsupported overhang may result in a droopy edge or poor surface quality, but with resin printing that unsupported bit is likely to break or float away (or remain stuck to the build surface), contaminating the resin and interfering with the print. A part orientation that makes layer changes as gradual as possible will minimize the steepness of overhangs, and therefore minimize the need for supports.
Resin Prints Require More Extensive Post-processing
Prints must be rinsed free of uncured resin by washing in isopropyl alcohol and allowed to dry. After that, they may possibly require exposure to UV for additional curing (more on all that in a moment.)
Be Mindful of Cups and Islands When Orienting Prints
Cups are hollow parts of a model that can create a suction force against the build surface during the peel process. This suction can weaken or distort in-progress prints. Cups are avoided by ensuring drainage holes or other gaps exist to break any potential suction.
Islands are parts of a model that start separate from each other, but join up together later in the print. With resin printing it’s best to avoid them, especially if they are thin or long, or if the part has precise dimensional requirements. Tall or thin islands will lack the stable foundation of the rest of the model, and as they print and peel over and over again, they can shift slightly. By the time they join back up with the rest of the model, they may not be as precise as expected (assuming they don’t break off before then.)
Handle Resin (and Unrinsed Parts) with Gloves
All operations involving uncured resin should be done with gloves (and ideally eye protection.) If resin gets on skin, wash it off promptly with soap and water.
The majority of pre-print model tweaking will mainly consist of finding an optimal model orientation that balances the need for supports with the desire to minimize the post-processing burdens caused by a large forest of supports.
How is the Workflow Different From FDM?
Here are the general steps involved between IMPORT MODEL and RECEIVE PRINT that highlight the differences filament-based and resin printers:
Pre-Processing:
- Choose a model orientation that offers a good balance between a manageable number of supports, and providing enough structure to withstand peeling forces.
- Avoid cups, overhangs, unsupported bridges, and islands.
- Try to have details and presentation surfaces on the opposite face of supports as much as possible.
Printer Setup:
- Set up the build platform and build tank. If changing resin types, ensure both have been cleaned first.
- Pour in the resin. Avoid exposing the resin to light. Wear gloves and eye protection, and follow all safety precautions (which generally boil down to “don’t get it on your skin, and if you do, wash it off immediately.”)
- Avoid mixing resin types, which can have different properties and exposure time requirements.
Post-Printing:
- After printing, the part will resemble a hard plastic thing dripping with syrupy resin. Rinse the uncured resin away by washing the part in isopropyl alcohol, and allow the part to dry.
- Some resins require additional post-print curing. This can be done with a DIY cure box or by leaving the part in sunlight.
- Remove supports with flush cutters (or by snapping them off if the surface finish isn’t important) then proceed with other post-processing like sanding or painting. Dealing with supports — especially in delicate areas — is a big enough issue that I made a tool to make removing them easier.
I have two other observations related to the materials and general workflow: ventilation and temperature.
Ventilation is good for the printing and handling area, because some uncured resins have a prominent, acrid sort of plastic smell to them. (Though standard Formlabs resins do not, in my experience, have any particular odor. Nor do their standard resins require any additional post-print UV curing.)
Temperature has an effect on the cure time of resins. The cooler the resin, the slower it cures. Printers without temperature-controlled build tanks (i.e. all of the economical ones) will benefit from a work area that is kept at a stable room temperature for the most consistent results.
When Resin Printing Makes Sense
Mashing BUY on an economical resin printer from your favorite retailer absolutely makes sense if you are ready to accept or deal with each of the following:
- Build volume will limit you to small objects.
- Prep, maintenance, and handling can be messy and requires gloves. Ventilation is good due to the smell of some resins, and the need to wash finished prints in alcohol.
- Consumables include more than the resin and alcohol for part washing. The build surface of the tank must also be replaced periodically. For hobbyist printers, this is a thin plastic film like the skin of a drum. With Formlabs printers, it’s part of the build tank.
- The setup and cleanup process for resin must be done regardless of job size, so it’s more efficient to do prints in batches rather than one-offs that are few and far between. Resin also has a limited shelf life, so resin sitting in a build tank should be used sooner rather than later.
- There is a higher post-processing burden in the form of part washing, additional curing, and support removal.
 All of this means that there are hidden costs to resin printing beyond the price of the printer and a bottle of resin. If those things look acceptable, then by all means take advantage of the economical options available for desktop resin printing and start experimenting. Because when prints come out well, they can look fantastic.
Just keep in mind that a resin printer isn’t likely to replace your filament-based printer, because they are different tools that are good at different things.
Not ready to take the plunge? Prototyping with FDM and outsourcing a resin print is always an option. For those of you who have already gotten started, what are your experiences with resin printing? Any tips for the rest of us? Let us know in the comments!


I’ve had a few 3D printers, one was an SLA machine. For me now, I’m happy with one good FDM machine (Prussa) and sending off for HP-MJF prints when needed. Pro shops have good pricing now and it’s difficult for me to justify another machine and materials, etc. But you can’t get a better learning experience!
Agreed, I’ve found 3D printing services to be prohibitively expensive, with prices not dropping over time. I had Shapeways print a prototype about 3 years ago, and when I recently looked into having another printed, the price was MORE than I paid 3 years ago. I bought an Anycubic Photon last year to supplement a cheap FDM unit and can now handle nearly all of my printing needs.
3dhubs.com Anyone with a 3D printer (they also have CNC machining and other things) can join up with this site to sell their 3D printing and other fabrication services.
For 3D printing you locate someone close toy you with the sort of printer and materials you want used to make your item, then submit the STL and get a quote.
I’ve done this a couple of times to make master models for making RTV molds to cast resin. One was for the core piece to replicate the fancy 3 color shift knobs for Hudson cars. I cast the core, insert it with a threaded metal part (modified bolt) to form the threads into a second mold then cast the second color in and around the core. The knob is post cured in a dehydrator then screwed onto a bolt in a lathe for sanding then finished on a buffer with plastic polish. They end up looking just like the knobs from the 1940’s and 1950’s.
3dhubs went pro-only last year. Noone can join up and sell any services anymore.
Is there a replacement service that does the same thing they used to?
Also remember that the strength of SLA printed parts is usually much less – SLA resin tends to be brittle when cured.
That’s a good point, the plastics tend to be less forgiving of something like being dropped when compared to FDM. Some resins also bend or get soft at somewhat lower temperatures than FDM prints.
That being said, resins that are stronger or tougher or whatever do exist for making functional parts. But FDM prints are certainly more effortlessly “functional”.
That comment is so underrated. That’s exactly the problem. SLA prints from machines that people can afford for home use and the resins they can print have virtually zero practical robustness. They are brittle, break into thousands of glass-like shards, deform under stress, crack in heat or sunlight, contain toxic substances at their surfaces etc. I have both, FDM and SLA, but the SLA we really just use for very specialized tiny parts. Everything else goes on the FDM machine or on Shapeways. One thing they do excel at, however, and that is printing miniature figurines (if you can get the 3D models, that is).
There is at least one very affordable resin that is very strong. Look up Siraya tech Blu. It is almost as strong as ABS.
If you think the robustness of resins is lacking, you really have limited your options. I can print “ruber tires” all the way to minis that can survive a drop from a table with nothing more than a few drops of monocures flex resin mixed in with what ever main resin I am using. And if you are “getting” 3d models for mini’s it also sounds like you are not really that into the design to manufacturing process.
Well that requires a big *. Yes resin CAN be brittle and the cheapo resin you mostly get for the hobby printers are brittle. Though the professional printers offer a vast variety of resins, using resin as a all encompassing word is like taking, PLA, ABS, Nylon and TPE and calling it all just “plastic filament”.
Formlabs f.e. offers a large variety of higher end resins that vastly exceed the strength of any print produced on an FDM printer, especially thin walls can be much more rigid and less prone to breaking than the same part on an FDM no matter the material you chose, simply because layers are fused much better.
If I want something really strong and thing I always go with FDM, given the right resin. They are extremely expensive though, that’s something you have to always keep in mind. Those high end resins cost around 130-170€ a liter.
Peopoly sell a tough resin for around 1/3 of the price more than their standard grey resin. That stuff is impressively tough and can generally be thrown around (obviously topology dependant). I’ve used it, for example, to successully repair a hinge bushing on a refrigerator door which sees a fair amount of abuse.
And then there’s UV curable inkjet technology
https://mimaki.com/news/product/entry-265157.html
Stratasys also makes stuff like this, but this technology is too expensive for hobby use.
I wish someone would make an open source version of this. I would totally be willing to convert my ender 3 if I could somehow produce the injet head to attach to it.
Prusa SL1 is Prosumer? Why? Based on this comment I am unsure your qualified to be writing an article about this. It should very much be in the same category as the Mars and Photon, regardless of cost.
The Prusa SL1 sits in a slightly odd place. On one hand it’s a similar DLP design to the cheap printers, but it also has more features and functions (for example: temperature control, better peel process which also helps agitate/stir resin) as well as being far more expensive at well over a thousand US dollars just for the kit.
The SL1 is still pretty new, but the pricetag and features are what aim it more towards prosumer than curious hacker looking for an effective way to dive in to resin printing.
You gripe about being qualified when you can’t even use “your” properly.
“Prusa SL1 is Prosumer? Why?”
From the Prusa website: “PERFECT FOR BOTH NEWCOMERS AND PROFESSIONALS”
So it would seem that the market that Prusa is targeting is prosumer.
But please enlighten us on why you think that it should be in the same category as the Mars and the Photon.
Because, it’s a vague category?
And because when something costs 4 times more than the others it’s comparing against, they normally aren’t in the same category.
I hate articles like this because to me they are as different tools as a hammer and a torx screwdriver. yes both of these can put fasteners into wood but neither would be good use for the other. these printers IMHO have the same issues. There are just to many variations in what each does and what they can produce along with quality for them to be compared. are they both 3d printes, yes but really IMHO that’s about where they end as well.
Did you read the article? It was written that they’re good at different things. The article is a summary of how your torx screwdriver is different from your hammer.
Maybe he hates articles that 100% back up and say things he agrees strongly about…? ;)
I always thought, the original SLA process did projection from above, on the surface of the liquid resin and then th platform gets lowered one layer height. So you can do without any supports or stress on the half finished print.
I am completely wrong or do machines like this exist?
You might be thinking of SLS that uses a powder that is fused with a laser. It doesn’t need support because the printed items are supported by the surrounding un-sintered powder.
It is really expensive.
I have never seen or heard from such a machine, if you were to print like this you would need huge amounts of resin and a very large tank, that would increase costs tremendously.
I’m not sure if they’re still used any more, but I remember seeing one on TV about thirty years ago. IIRC they were being touted as the future of prototyping, which in retrospect was true, even if that particular printing technology was somewhat of a dead end.
(Some history here)
They do exist and they’re called top-down SLA printers. And in response to Prof. Fartsparkle, yes they do have huge resin vats and can be very expensive to fill, but a common workaround is to fill the bulk of the vat with glycerine and add a layer of resin which is much less dense and floats on top. The two supposedly stay well separated.
For anyone with twitchy fingers because of the low prices. If you have to remove a dust layer from your FDM every time you print, don’t buy an SLA printer, they are awesome but you will likely print 80% of your models on FDM even if you have an SLA printer. The maintenance and work involved in every print is huge compared to FDM, its a printer you can just have sit idly around and wipe the dust of when you need it. It require a lot of cleaning and all your tools around the printer will get sticky from resin, everything will be sticky..
Its a mess and absolutely nothing you should put into your home office/workspace. Unless you have a well ventilated room that is dedicated for really messy things like a proper workshop space where you don’t eat and sleep, go ahead, they are great for a lot of more specialized applications where FDM just completely sucks, like printing fine pitched threads and thin walls.
One of the few hobby niches that profit heavily from SLA are figurines. If you need functional engineering parts, you will want the expensive specialized resins for the professional printers like the Form and in this case you will want to shell out the 2-3k€ for the professional printer too.
My stuff isn’t sticky. The machine itself is a bit but nothing else. I keep it on a TV tray table in my basement for now (garage in the summer) with a small bag of supplies under the table. Takes up very little room.
Don, could you please stop calling Masked SLA (MSLA) printers “DLP printers”. They are not the same thing and are only as similar to each other as a cartesian printer is to a delta or CoreXY printer in that they use the same print materials. A DLP printer projects an image AND in itself is also the light source for curing the resin. An SLA printer uses a laser to cure the resin by tracing lines and an MSLA printer, like your Mars (Again your Mars Elegoo is NOT a DLP printer) uses an LCD screen that Masks the light being produced by a 405um LED to present each layer.
DLP printers are still quite expensive with the Wanhao Duplicator 7 being the lowest cost option ATM at $500.
All this matters because there are different concerns with DLP vs MSLA namely, leaks of resin from the vat are likely to be more catastrophic on an MSLA printer like your Mars than on a DLP or SLA printer.
I have never shat on HAD my many years of readership, even back when it was all about the hacks, once a day. But, this article really annoyed me from the first paragraph.
The SL1 is not a prosumer device. The key differentiator is the amount of support offered after purchase by the manufacturer vs the community. the Formlabs is a prosumer device,
“Things may not be quite where fused deposition modeling (FDM) printers were just a few short years ago when we were extremely impressed with the quality of printer one could get for about $200” What does that sentence even mean? Are you saying you are not as impressed with the quality of your couple-hundred-bucks SLA printer? Hell today $200 is the running average of FDM printers that only put out greatness after 40 hours worth of tweaking. How one could not be impressed at the relative effortless nature of resin printer is mind boggling.
“what’s intuitive for filament-based printers doesn’t necessarily carry over.”. Seriously, what?
I know what you are trying to say, but intuitive is not the right word. There is nothing intuitive about the process of levelling an FDM print bed or trouble shooting the first layer. With resin printing, the first layer is either because you didn’t level the build plate or your cure time for the first 3 layers or so isn’t high enough. You could print from day one with an resin printer and never encounter these issues. No way a person that’s $200 FDM printed has never encountered leveling issues. Also, if you seriously think that slicing, removing supports and sanding and filling and priming and painting an FDM print is some how less of a post process than slicing, printing, removing supports, curing for 10 minutes and painting for resin prints, i think you are crazy. Either that or trying to meet your minimum word count.
That’s it for my criticisms. I’ll post my practices in a separate post.
i have a Anycubic Photon.
1. An ultrasonic Cleaner is a must. You just fill with isopropyl alcohol place your part in for around 3 minutes and the entire thing is clean.
2. When curing, i’ve found it best to place in a glass jar or bag full of water. The water helps prevent trapped resin from running and curing on your part.
3. use as close to 100% IPA as possible. If 90% is the best you can find, put some in a jar with a few table spoons of salt. the salt will “dry” the IPA by bonding with the water and leaving the IPA to float above it. It’s a fun and visual process. Siply siphon the IPA from the top of the solution and you will have something damn close to 100% IPA.
4. reuse your IPA by curing leftover resin in solution. It will cure ad then you can use a fliter to re-use the IPA again.
5.Slicing couldn’t be simpler* but I recommend using Chitubox. My personaly workflow also includes Prusa SL1 Slicer for parts that need extra support.
6. Don’t waste print time by going for the finest layer height. A lot of times it’s barely noticeable. Especially don’t go for fine when the part is functional.
7. join a 3d printing group that can answer all your informed and “dumb” questions. I highley reccomend the photonsters group. The Photon,& Mars and some other printers are essentially the same with the same boards and EPAX quirks. you can find the group on FB by searching for “photonsters. or visit photonsters.org to view all the tools and tips that have been created.
“An ultrasonic Cleaner is a must.”
I bought one a few weeks ago for this exact purpose (I have a Form2) but found it too powerful, my parts left the bath with lots of tiny holes on the surface due to cavitation. Did you experience this issue?
“Don’t waste print time by going for the finest layer height. A lot of times it’s barely noticeable.”
I agree. I used to print at 50µm but I now go for 100µm by default, I can’t honestly tell the difference of layer height on place surfaces, only some sharp corners look a bit more rough. And it makes the lifespan of the build tank that much longer, because it’s half as many passes of the laser.
Another good reason to stick with the largest layer height that works is to get the most life out of your build surface. (And the Formlabs printer build tanks are not cheap)
Every layer degrades it a bit, and printing at 50µm instead of 100µm quite literally halves the lifetime of the tank because it’s printing twice the number of layers for the same object and therefore twice the wear & tear on the build surface. I totally agree with you about the value of defaulting to the large layer size unless the smaller one is really called for.
Yep. I just did an experiment where I used a medium layer height and the finest. My 3″ figure took 5 hours in one, 36 hours with the other and I could hardly tell the difference.
Several commenters have pointed out that I haven’t been as careful as I should with terminology in this article. They are entirely correct about that.
All of these resin printers are SLA, but there are different flavors of SLA that say more about how the printer works. In this article I used DLP (digital light processing) as a generic term for the printers that cure an entire layer at once (rather than drawing the layer out with a laser). But this is not really correct.
I should have reserved “DLP” for printers that project the layer as an image (like the B9 Creator) and used MSLA (masked SLA) for those that use something like an LCD screen right up against the build surface. Or just stick with “SLA” throughout. My mistake, I just plain goofed.
Did Texas Instruments send you a cease an desist order, or something?
I for one appreciate you addressing this.
Thanks, I’m only human.
I got my Anycubic Photon a couple of days ago. It was totally worth it! Got it from Photons Aliexpress store in some shopping spree for $320 including 5 l resin + 5 fep sheets. That makes the prize of the printer roughly $50…
I have also an FDM printer. I would say that you need both and I would choose FDM if I could have only only printer. FDM for large and bulky parts that needs to be strong and withstand the outside weather. mSLA for detailed parts with precise dimensions and round holes.
My FDM printer makes round holes.
Thanks for the article. I’ve been looking and temptinng at the some Proton printers from Ebay for quite sometimes.
I didn’t realize about the stress and didn’t understand why there were so many supports from all the image people post on forums. Now I understand. The significant increase in number of supports just means more clean up work and wasting more resin. So if we use a top down (the print grows toward the bottom of the tank rather pulling up from the tank) design, would we not need support at all (and thus not wasting resin and time to clean up)?
Thanks
A customer needed to manufacture small cases and brackets for prototypes, so I managed to swing a free Anycubic Photon in exchange for training their staff. I’m really pleased with it, even with the cheap resins. While they are brittle, I found that it’s possible to design around that pretty easily with sufficient wall thickness or some support structure. The main benefit for me is that the parts look injection moulded with minimal post-processing. Also it’s great for board game pieces.
One fine point I don’t see mentioned often is that even while wearing nitrile gloves, you need to be careful about getting the resin on your hands — at least during the daytime. The UV-curing process is rather exothermic, and I think that a small puddle of resin on your glove can probably burn you while curing, if you simply walk outside into bright sunlight. I tested this with a controlled amount, and it did get painfully hot very quickly — so now I warn employees not to let that happen. Note that I’m near the equator though!
Another thing is that while supports are critically important, there are techniques to build directly off the build plate, especially for medium-sized flat surfaces. Large ones will warp due to the mechanical stresses at the corners, and small ones are very hard to remove from the build plate — however there’s a range that is OK as long as you design a subtle notch on the part of the structure facing the build plate, so you can remove it. With testing, this can save quite a bit of material and time for flat items like lids. For some common items that I print a lot of, this cuts my build time by 50-75% and the material used by around 20% (something like 20 minutes per print instead of 40). I keep pre-sliced and tested files of multiples of parts that I commonly need, so I can get staff to comfortably output manage 40-80 units a day per printer when there’s demand. It’s all boring stuff like mounting points, DIN rail adapters, and so on… but I can do runs in the low hundreds with a single printer which is quite neat.
These low cost resin printers like Mars and Photon, even Prusa SL1, are not DLP printers. They are LCD based printers. They can only take limited UV light and needs to be replaced after a couple of hundred hours use. DLP projector in a DLP resin printer alone costs a couple of thousand dollars. They can output much stronger UV light and Industrial UV projectors last about 20,000 hours.
You make it sound a lot worse than it is. Post processing takes like 5-10 minutes of work for cleaning it off and removing the supports. 15-20 minutes sitting in the sun or uv box, which requires zero work (it’s just sitting there). When filling the vat with resin you say “avoid light”. It’s not like it’s a darkroom for photography. Most lights in your home don’t put out any uv so you can have light, just not sun light.
It’s been a while since the last post on this thread so I’m hoping that someone is still out there. :-)
I’d like to start by saying I don’t know anyone who’s entire tool collection is either a box of hammers or a box of screw drivers.
3d hobby printing, in whatever form, has opened up a world of opportunity for people with design ideas to compete with big industry, so instead of bragging about who’s system is best (because both are best at some things) maybe we should be all sharing (without prejudice) our experience.
Just my thoughts.
Awesome sentiment. I started FDM printing in July ’18. October 2020 I purchased a resin printer. Love using all types. The only issue i see with the resin is sometimes fails for no easily discernable reason!.
Let me start by saying that both formats have an equally valid place in your tool box, so it’s not a case of moving from one to the other.
In general, resin gives a much higher resolution print, but much smaller build area.
I use it for non-functional prototyping of smaller designs.
Unfortunately resin is brittle so it’s not really suited to stressed working items.
FDM may be lower res, but it’s tougher, and has a much larger build area/£
So, it depends upon what you want to print.
If you are doing large models or parts replacements, stick with FDM.
If you want higher res smaller items without the strength go resin.
It’s also worth noting that each technology has different problems when it comes to building your print files and making them work.
I could spend hours explaining, but there are loads of youtube vids that can do a better job than me.
Hope this helps.
Another addition, resin can come with various material properties, it doesn’t have to be brittle…
But, fancy non brittle resins get expensive quickly!
People seem to widely mix Siraya tech flex with cheap resin to provide some flex, in ratios from 5% upwards! Though 10-20% seems common…
Ie one bottle of expensive flex resin will mix with up to 10 bottles of standard resin to help flexibility / ductility?
Golden rule:
FDM needs support from the ground up.
Resin needs support from the roof down.
Sounds easy, but it sometimes isn’t :-)