Some Tips For Monetizing Work In Open Source

Free and open-source software (FOSS) doesn’t have to be entirely separate from the concept of bringing in money, but the path to monetizing is maybe less clear than it could be. To help address this, [Drew DeVault] has shared some concise thoughts on different ways to monetize FOSS work and projects. [Drew] observes that monetizing one’s own projects is one approach, but that it is entirely possible, and less difficult, to make money by participating in open source work in a more general sense.

There are companies and organizations out there who may make their money otherwise, but are nevertheless involved in or reliant upon open source software for running their business. Such companies are a good starting point for anyone looking to work in FOSS, and [Drew] shares a clever tip for finding them: use git to clone the software repositories of large projects that are of interest to you, then run this command:

git log -n100000 --format="%ae" | cut -d@ -f2 | sort | uniq -c | sort -nr | less

This will extract the domain names from the last 100,000 commits to the repository in question; a good set of leads to companies and organizations that are invested enough in FOSS to contribute, and who may be willing to pay for such work.

There is also the option of monetizing one’s own projects, which [Drew] says is the more difficult approach. He shares tips on monetization options, but cautions that fundamentally one is building a business when going this route. One should therefore be prepared to face the attendant non-software-related problems in the process.

[Drew] runs SourceHut and works entirely in FOSS, but still makes time for fun hacks like using this old line printer to emulate the experience of working on a teletype, which is how it was done when terminal output went to paper, instead of a CRT monitor.

Simple Tips For Better 3D-Printed Enclosures

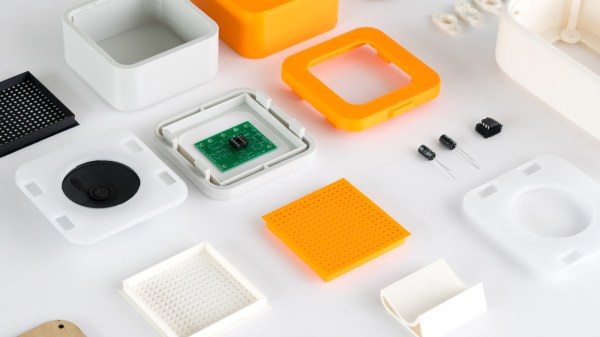
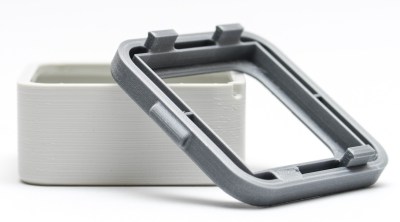
3D printing can be great for making enclosures, and following some simple guidelines can help the whole process go much smoother. 3D Hubs has an article on designing printed enclosures that has clear steps and tips to get enclosures coming out right the first time. 3D Hubs offers 3D printing and other services, and the article starts with a short roundup of fabrication methods but the rest is a solid set of tips applicable to anyone.

The first recommendation is to model the contents of the enclosure as a way to help ensure everything fits as it should, and try to discover problems as early as possible during the design phase, before anything gets actually printed. We’ve seen how a PCB that doesn’t take the enclosure into account risks needing a redesign, because there are some issues an enclosure just can’t fix.

The rest of their advice boils down to concrete design guidelines about wall thickness (they recommend 2 mm or more), clearances (allow a minimum of 0.5 mm between internal components and enclosure), and how to size holes for fasteners, clips, or ports. These numbers aren’t absolute minimums, but good baseline values to avoid surprises.

One final useful tip is that using a uniform wall thickness throughout the enclosure is general good practice. While this isn’t strictly necessary for successful 3D printing, it will make life easier if the enclosure ever moves to injection molding. Want to know more? Our own Bob Baddeley has an excellent primer on injection molding, and his been-there-done-that perspective is invaluable.

Art of 3D printer in the middle of printing a Hackaday Jolly Wrencher logo

3D Printering: The Things Printers (Don’t) Do

3D printers are amazing things, but if one judges solely by the successes that get showcased online, it can look as through anything at all is possible. Yet in many ways, 3D printers are actually quite limited. Because success looks easy and no one showcases failure, people can end up with lopsided ideas of what is realistic. This isn’t surprising; behind every shining 3D print that pushes the boundaries of the technology, there are misprints and test pieces piled just out of sight.

If you have ever considered getting into 3D printing, or are wondering what kinds of expectations are realistic, read on because I am going to explain where objects come from, and how to recognize whether something is a good (or bad) fit for 3D printing. The important thing to understand is that printers have limitations, and to get a working idea of what those limitations are. The result will be a better understanding of what they can do, and what problems they can reliably solve.

3D Printers Have Limits

I recently had a talk with someone who wanted to know if a 3D printer could help with a problem they had. As I listened to them describe their needs, I realized I had in a way heard it all before many times.

My colleague actually had a fairly good idea of what printers could do, in theory. But they had very little grasp of what printers did not do, and that disconnect left them a bit adrift when it came to practical applications. To help address this gap, here are some tips that can give anyone a working understanding of the things 3D printers do not do well. Continue reading “3D Printering: The Things Printers (Don’t) Do”

Tips From A Former Niche Item Etsy Store

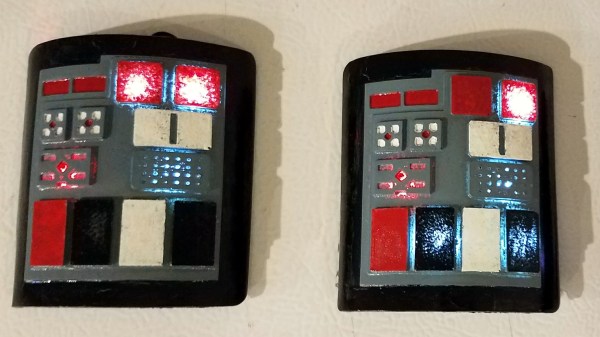
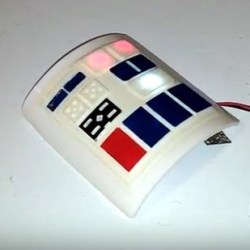
Etsy is a service aimed at providing a way for makers of handmade items to sell them online. [Bithead] closed up shop earlier this year and wrote up an interesting perspective on what did and didn’t work out. The main market for [Bithead]’s store was Star Wars cosplayers, because it all started with some Star Wars inspired com pads, some of which are pictured here.

One thing [Bithead] felt worked well overall was to “think big, start small, and scale fast.” In essence, bootstrap things by selling inventory on hand and carefully monitoring demand, then if demand is sustained, ramp up to larger batches, which are more efficient. The risk of making larger part orders and carrying more stock on hand is offset by the reliable demand. Waiting until solid data on reliable demand is available means missing out on early sales, but it’s a low risk approach that works well for niche products that have little or no real competition.

A couple things that didn’t work out were efforts to follow Etsy’s advice to add more products to attract a wider audience, and to try out tools for offering discounts and incentives aimed at turning abandoned carts into sales. Neither went well. The first resulted in adding items that sold poorly, diluted the focus of the store, and incurred a cost for each listing. The second never seemed to have any impact on sales whatsoever. Perhaps there is a place for these efforts, but [Bithead]’s niche market wasn’t it.

It’s a good read about how things went for an Etsy store that served a niche audience over three years. The perspective and experiences might be useful to anyone looking to turn a bright idea into something sold online, so if you’re at all interested, take a few minutes to check it out.

We’ve seen [Bithead]’s work before, this lightsaber-inspired violin bow was one project that went on to become a kit for sale.

Fail Of The Week: In CAD, Remember To Model The Environment

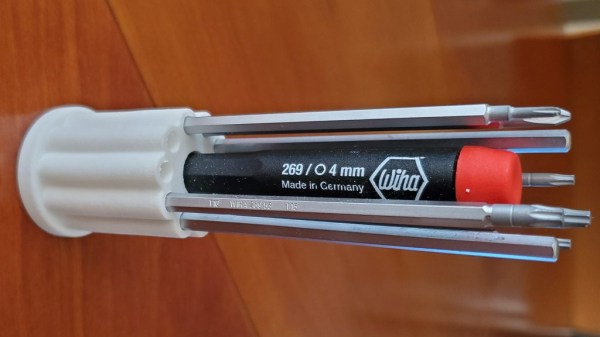
What’s wrong with the above picture? Failure can be an excellent teacher, and [J. Peterson] reminds us all of this when he says to remember to model the environment when designing things in CAD. He contrasts a failure with a success to demonstrate what that means.

The failure was a stand for a screwdriver set, shown above. He modeled up a simple stand to hold a screwdriver handle and the bits in a nice, tight formation. He didn’t model any of parts, he just took some measurements and designed the holder. Everything fit just fine, but it had a major ergonomic problem: you can barely reach the handle because it is fenced in by the surrounding bits! Had he modeled all of the parts during the design phase, and not just the part he was making, this problem would have been immediately obvious during the design phase.

The contrasting success is an adapter he designed to mount an artistic glass marble to a lit display stand. The stand itself as well as the glass marble were modeled in CAD, then the adapter designed afterwards to fit them. With all of the involved objects modeled, he could be certain of how everything fit together and it worked the first time.

Now, to most people with a 3D printer of their own, discovering a part isn’t quite right is not a big (nor even a particularly expensive) problem to have, but that’s not the point. Waste and rework should be avoided if possible. To help do that, it can be good to remember to model the whole environment, not just the thing being made. Add it on to the pile of great design advice we’ve seen for designing things like enclosures and interfaces.

When Does Moving To Resin 3D Printing Make Sense?

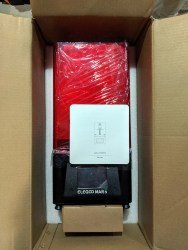
An Elegoo Mars resin 3D printer, straight to my doorstep for a few hundred bucks. What a time to be alive.

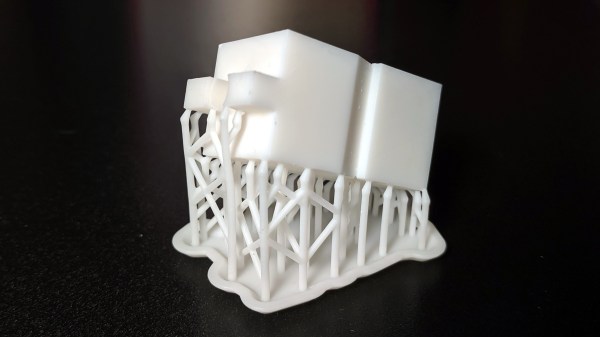
Resin-based 3D printers using digital light processing (DLP) and especially stereolithography (SLA) are getting more common and much more affordable. Prosumer-level options like Formlabs and the Prusa SL1 exist, but more economical printers like the Elegoo Mars, Anycubic Photon, and more can be had for a few hundred bucks. Many printers and resin types can even be ordered directly from Amazon, right at this moment.

Resin prints can look fantastic, so when does it make sense to move to one of these cheap resin printers? To know that, consider the following things:

  • The printing process and output of resin printers is not the same as for filament-based printers. Design considerations, pre-processing, and post-processing are very different.
  • Resin printing has a different workflow, with consumables and hidden costs beyond the price of resin refills.

Things may not be quite where fused deposition modeling (FDM) printers were just a few short years ago when we were extremely impressed with the quality of printer one could get for about $200, but it is undoubtedly far more accessible than ever before. Let’s look at how to inform a decision about whether to take the plunge. Continue reading “When Does Moving To Resin 3D Printing Make Sense?”

These Tips Make Assembling A Few Hundred PCBs Easier

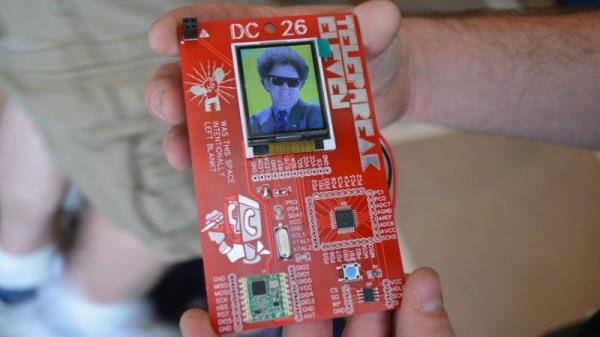
There are a few common lessons that get repeated by anyone who takes on the task of assembling a few hundred PCBs, but there are also unique insights to be had. [DominoTree] shared his takeaways after making a couple hundred electronic badges for DEFCON 26 (that’s the one before the one that just wrapped up, if anyone’s keeping track.) [DominoTree] assembled over 200 Telephreak badges and by the end of it he had quite a list of improvements he wished he had made during the design phase.

Some tips are clearly sensible, such as adding proper debug and programming interfaces, or baking an efficient test cycle into the firmware. Others are not quite so obvious, for example “add a few holes to your board.” Holes can be useful in unexpected ways and cost essentially zero. Even if the board isn’t going to be mounted to anything, a few holes can provide a way to attach jigs or other hardware like test fixtures.

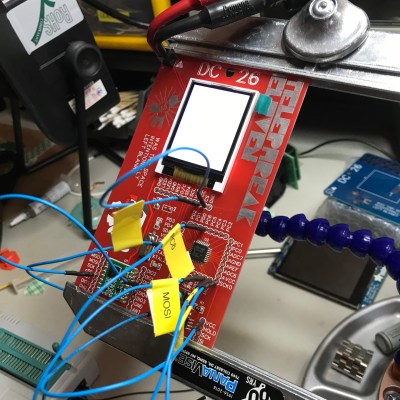
[DominoTree] ended up having to attach multiple jumper wires to reprogram boards after assembly, and assures us that “doing this a bunch of times really sucked.”
Other advice is more generic but no less important, as with “eliminate as many steps as possible.” Almost anything adds up to a significant chunk of time when repeated hundreds of times. To the basement hacker, something such as pre-cut and pre-tinned wires might seem like a shameful indulgence. But cutting, stripping, tinning, then hand-soldering a wire adds up to significant time and effort by iteration number four hundred (that’s two power wires per badge) even if one isn’t staring down a looming deadline.

[DominoTree] also followed up with additional advice on making assembly easier. Our own [Brian Benchoff] has also shared his observations on the experience of developing and assembling a large number of Hackaday Superconference badges, including what it took to keep things moving along when inevitable problems surfaced.

You don’t need to be making batches of hundreds for these lessons to pay off, so keep them in mind and practice them on your next project.