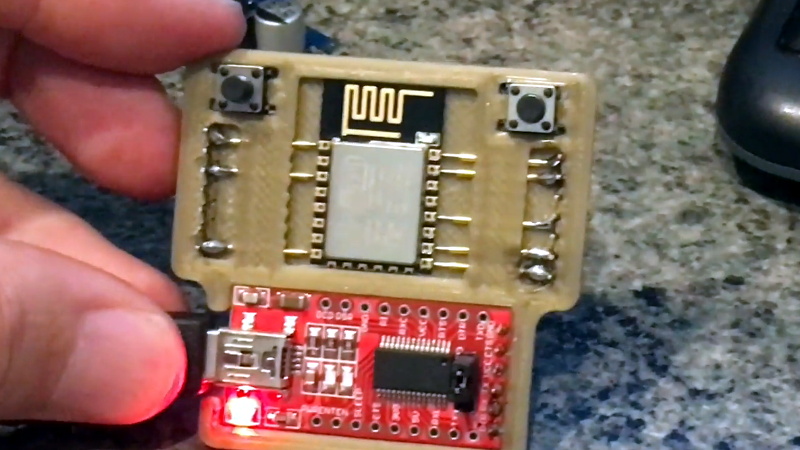
ESP8266 development boards like the Wemos D1 Mini and NodeMCU are an excellent way to get a one-off project up and rolling quickly, but their size and relative complexity mean they aren’t necessarily a good choice for even short-run production hardware. On the other hand, programming the bare ESP modules can be something of a pain. But thanks to [Greg Frost], flashing those tiny little boards just got a lot easier.
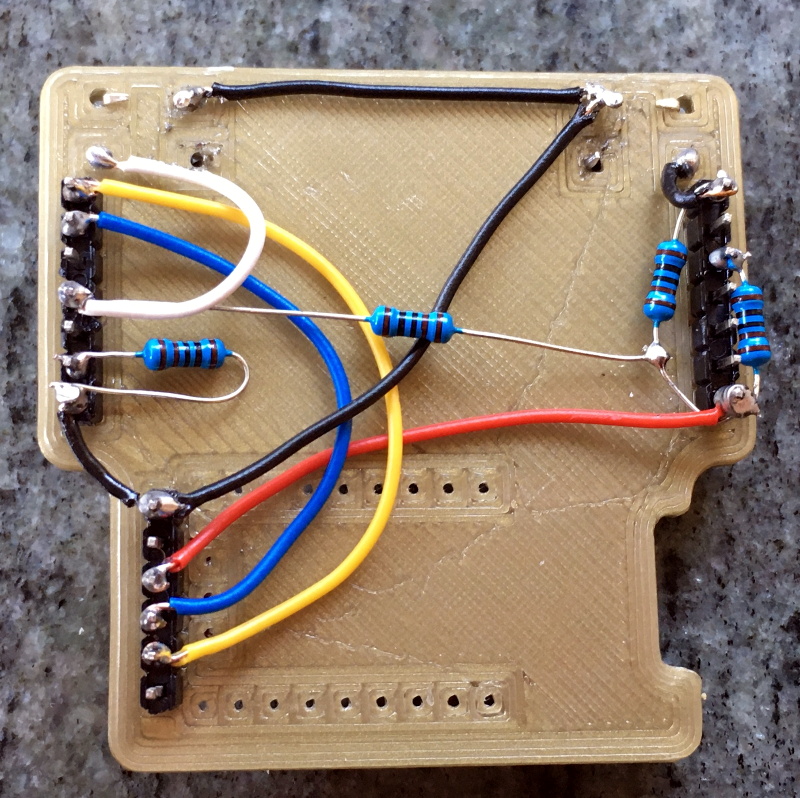 His 3D printed design uses pogo pins to securely connect to the board’s castellated edges, which also holds it in place during the programming process. On the back side there’s just a few jumper wires and a couple of resistors, which ultimately lead to the FT232R FTDI board that actually connects the chip to the computer so you can program it.
We’d like to see a back panel that encloses the wiring, and perhaps an alternate version that deletes the space for the FTDI board in favor of a row of header pins. Both easy enough modifications to the basic design should [Greg] or anyone else feel so inclined. But even as it is, this is a great little programmer that can be sourced and assembled easily and cheaply.
This isn’t the first 3D printed ESP8266 programmer we’ve seen, and there are some improvised versions which are even cheaper to put together, but this design has a certain professional look that we think will be right at home on your bench.


Nice
Nice
Thanks
fun concept, and very practical. I know the problem and solved it with two rows of long (wire wrap) headers. The springyness of the long header pins allowed for enough contact force (and bending for alignment).
The solution in this post is much better, the pogo-pins have a much longer span, though I can’t help thinking about how you should insert the ESP properly, because if the spacing isn’t correct you’re always scraping the edge of the PCB along one side of the pogo-pins. A video would have been nice. But I assume it’s not a big deal.
I’m fully aware that this isn’t a production tool. It can be very useful for incoming functionality check of your ESP part, desoldering those ESP’s isn’t fun. If for some reason they shipped you a wrong one (too small flash memory) or just a bad one that doesn’t work.
What wonders me the most is the 3D printed nature of this project. Because wouldn’t perfboard be much easier?
Then again, this is some form of 3D printed circuitboard, thick perhaps but a lot of similatities, it holds the components of the project… then again so does tape, cardboard and glue…
Nothing could go wrong here.
-Every printer will reproduce those little overhangs exactly the same size as the pogo pins
-The plastic could not build up a static charge over time and discharge it through the ESP as you place it in the programmer.
-It would be impossible to subject the pogo pins to any lateral forces here.
No red flags with this design. And yes I would expect nothing less than this design from a professional.
Not sure what causes the apparent disrespectful sarcasm. It’s a hack, right?
Personally, I’m impressed specifically by the use of 3D printing. Several times I’ve tried to use my 3D printer basically like Frost did, to help shape a pseudo-dead bug construct, and I’ve always failed basically because of the issues you highlight, and because of other issues caused by own unique incompetence. Good to see someone succeed where I’ve failed!
There’s an art to engineering anything, and anything can be over-engineered. I think this a great synthesis of several skills that is appropriate for a hacker community. Sure, things can go wrong, but what’s the damage – $3?
Actually PLA is pretty esd safe as moisture builds up and absorbs between layers not to mention that every one of those pins has a path to ground either directly or through an ESD diode before the 8266 is even connected
3D printed cases and components have been used for years without issue, I have a PET-G printed cases with pins going thew them for dozens of dev boards and not one issue
Did something like this, although not for esps. Worked fine for many thousand units. Finally wore out and printed a new one.
Oh my. What I see is a practical low cost hack that makes life easier for a ESP maker.
Hmm. I’m seeing more and more negative / sarcastic remarks on HAD. I suppose this is a sign of the times. Thanks internet. But at least someone hasn’t said (yet) those dreaded four words that has become popular on this hacker space: “Could have bought it.”
Could have bought it. Apologies for the unamerican source:
https://www.tindie.com/products/smdking/flex-nodemcu-programmer-be-for-esp-12-08-and-07/
Why build it when you can just buy it for 10 times the price, right?
Are you sure you know what site this is?
Wow, what a clown comment. Yeah I’m worried about static charge killing my $2 MCU.
although I doubt the dangers here, The Electro Static Discharge dangers are not within the damage, if something is broken there is an easy to detect situation. The problem is within crippling (partially damaging) the device. Even though it’s only a $2 component, if it waste your day because the problem you are searching for isn’t a bug in your code but a defect in your device, then you’ll start to think different.
Also, if it premature fails in the field because of ESD damage during programming/assembly then you have a problem.
The fact that you don’t notice a problem doesn’t mean that everything is OK.
But, again, I doubt that this build will cause problems, the person handling it with his/her plastic clothing and rubber shoes and plastic chair (or whatever is capable of building up a charge) is most likely more dangerous then this piece of plastic holding some pogo pins.
Quite right. We should all demand our money back! That someone would publish — on a platform so respectable and trusted as the Internet, no less — such a flawed, unpolished, half-baked idea simply shocks the conscience. The gall of some people! What kind of hack would demand the sum of $0,000 (€0.000!) for a product that so utterly fails to meet your clearly stated requirements for production use?
I want my money back for the comment/reply association service, too. You hear me, Hackaday? I want my refund!
You got it! The check is in the mail.
I’ve seen a couple handfulls of ESP8266 module programmer designs, and always wanted to do a shootout.
This one looks great to me.
very simple programmer
https://github.com/fenenko/SimpleESP8266