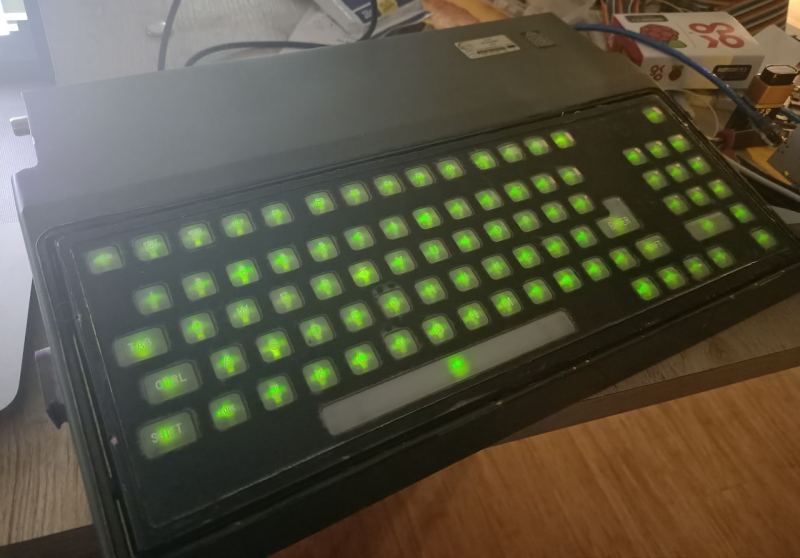
When [easyjo] picked up this late ’80s Marconi mil-spec keyboard for cheap, he knew it wouldn’t be easy to convert it to USB — just that it would be worth it. Spoiler alert: those LEDs aren’t a mod, they’re native. They get their interesting shape from the key traces, which are in the four corners.
 Despite having way-cool buttons such as WPNS HOLD, and the fact that Control is on the home row where it belongs, this keyboard does not look fun to type on at all for any length of time. Of course, the point of this keyboard is not comfort, but a reliable input device that keeps out dust, sweat, liquids, and the enemy.
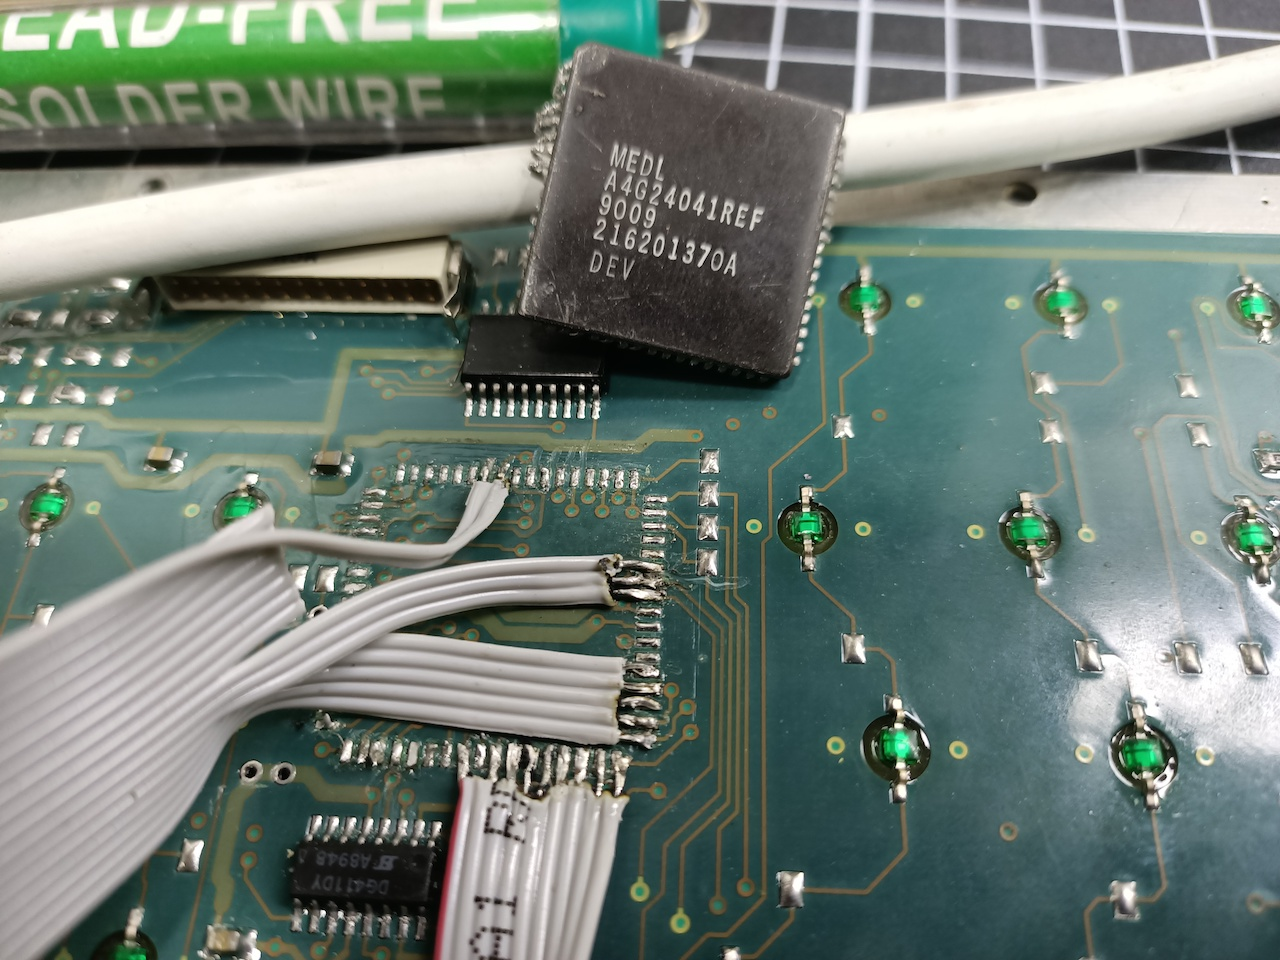
This is probably why the controller is embedded into the underside of the key switch PCB instead of living on its own board. [easyjo] tried to analyze the signals from the existing 26-pin connector, but it didn’t work out.
So once he was able to decode the matrix, he removed the controller chip and wired the rows and columns directly to an Arduino Leonardo. Fortunately, the LEDs were just a matter of powering their columns from the front side of the board.
The availability of certain kinds of military surplus can make for really interesting modernization projects, like adding POTS to a field telephone.
Via r/duino


“Of course, the point of this keyboard is not comfort, but a reliable input device that keeps out dust, sweat, liquids, and the enemy.”
And survive a player that likes to rage-quit…a lot!
That IC looks absolutely mangled. It’s 2020, get a cheap reflow kit already.
I can’t get over the use of lead-free solder.
To your point, though… I agree. I bought a cheap TENMA SMD reflow rig for about $100 on an MCM blowout about six years ago, and it’s still going strong. I’ve since moved on to my Hakkos, but for what it is the TENMA can’t be faulted. It has been dead-on reliable for years, with very little investment. I still use it in not-so-delicate projects, or as a “more portable” solution when someone needs help away from my shop. Coupled with good flux (Amtech NC-559-V2-TF is my very favorite) and stuff like this becomes trivial.
Is possible add potenciometers similar this concept? http://klawiatura.wordpress.com/
Secure connection failed on that website?
Hand soldering stranded wires from flatcable on small pitch components is a very time consuming thing to do, and also very error prone.
You get shorts from frayed strands of the wire, the PVC melts which makes a big mess of things. The end result is also not very reliable.
Next time, try this method:
1). Glue an IDC connector sideways near an area of interest.
2). Plug a connector into it to keep pins centered during soldering.
3). Solder solid wires between the IDC connector and the pads.
I often use “enameled” wire and turn the Iron so hot it burns off the lacquer, so you do not have to strip it. Thin wires with teflon isolation probably also work well.
To finish it off, put a dab of glue on the wires and glue them to the PCB for resistance against vibration and such.
Hot snot works well for this, and is still easily removable if the need arises.