Resin printers have a lot going for them – particularly in regards to quality surface finishes and excellent reproduction of fine details. However, the vast majority rely on UV light to cure prints. [douwe1230] had been using a resin printer for a while, and grew tired of having to wait for sunny days to cure parts outside. Thus, it was time to build a compact UV curing station to get the job done.
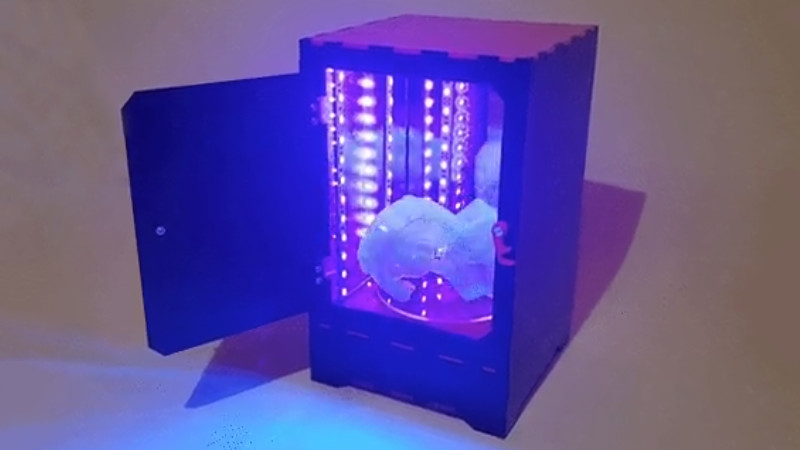
The build consists of a series of laser-cut panels, assembled into a box one would presume is large enough to match the build volume of [douwe1230’s] printer. UV LED strips are installed in the corners to provide plenty of light, and acrylic mirrors are placed on all the walls. The use of mirrors is key to evenly lighting the parts, helping to reduce the likelihood of any shadows or dead spots stopping part of the print from curing completely. In the base, a motor is installed with a turntable to slowly spin the part during curing.
[Douwe1230] notes that parts take around about 10 minutes to cure with this setup, and recommends a flip halfway through to make sure the part is cured nice and evenly. We’ve seen other similar DIY builds too, like this one created out of a device aimed at nail salons. If you’re struggling with curing outside, with the weather starting to turn, this might just be the time to get building!


Does UV penetrate acrylic? I’d suggest simply lining it with aluminum foil.
This is precisely what I did, using a small cardboard box to house it all, and it only took about 30 minutes to make. I’d love something more permanent, but using what I have + a 12 lamp has proved pretty effective.
According to corning yes it does. They use acrylic in their UV transparent plates for UV spectroscopy. Also I through these resins work with ~400 nm light which is well into the visible light. From my experience UV resins react between 190 and 320 nm. I assume that theirs is cross reactivity.
I wonder if a lot burning and yellowing of these resins is due to illuminating these plastics with UV light rather than the ~400 nm light that the resin expects.
Clarification UV resins = UV optical glues.
3D printer resins operate at ~405nm
You can get uv resistant that both blocks it and doesn’t deteriorate in material strength over a long time of exposure to it.
But the el cheapo acrylic just lets it all through.
I used aluminum tape in mine, works great!
Ditto on the aluminum tape. It was an easy way to reflect all the UV back in and protect my printed case parts from UV exposure.
nice build. being lazy as i am, i thin i would just use an old microwave, mount some UV lights in the corner and Bob’s your uncle
Yes! The rotation of the part works great! And it’s great to have a timer. An older one with a mechanical timer is best. I wired my UV lights into the rotation motor AC, so the timer controls both. When I hear the “BING,” it’s done!
But be sure to disconnect the magnetron — you don’t really want to “cook” your prints in microwaves AND UV!
You might be able to pick one up at the local dump for free, or at least very cheap from a thrift store.
some time ago cast araldite parts were stressed whilst viewed through polarized filters, mainly I think for civil engineering, this made visible the stresses within the part, I discovered that UV resin parts also display stress patterns, although FEA is now used this can be useful in some cases.