Building A UV Curing Station For Resin Prints

Resin printers have a lot going for them – particularly in regards to quality surface finishes and excellent reproduction of fine details. However, the vast majority rely on UV light to cure prints. [douwe1230] had been using a resin printer for a while, and grew tired of having to wait for sunny days to cure parts outside. Thus, it was time to build a compact UV curing station to get the job done.

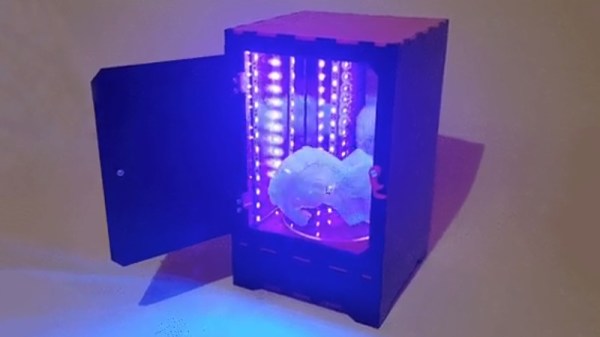
The build consists of a series of laser-cut panels, assembled into a box one would presume is large enough to match the build volume of [douwe1230’s] printer.  UV LED strips are installed in the corners to provide plenty of light, and acrylic mirrors are placed on all the walls. The use of mirrors is key to evenly lighting the parts, helping to reduce the likelihood of any shadows or dead spots stopping part of the print from curing completely. In the base, a motor is installed with a turntable to slowly spin the part during curing.

[Douwe1230] notes that parts take around about 10 minutes to cure with this setup, and recommends a flip halfway through to make sure the part is cured nice and evenly. We’ve seen other similar DIY builds too, like this one created out of a device aimed at nail salons. If you’re struggling with curing outside, with the weather starting to turn, this might just be the time to get building!

Make Your Own UV Exposure Box For PCB Manufacture At Home

UV exposure box

[Shane] needed a UV exposure box to help speed up the process of making PCB’s at home. Not wanting to spend a few hundred on one, he decided to design and build his own, using a planter box!

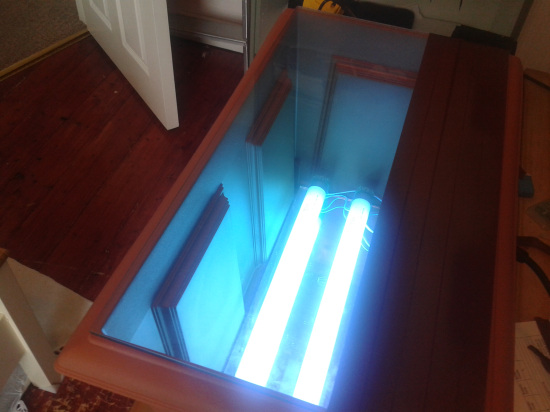
Why a planter box? To be honest, it was simply the first opaque container [Shane] found, so he decided to base the design around it. Inside the planter box are two 15W fluorescent daytime bulbs which output a similar amount of UV to normal sunlight. A mirror is placed below them to help reflect all the useful light out of the box. A pane of glass was cut to fit on top of the planter box, giving you a nice surface to place curing PCB’s on.

All in all, it’s a pretty simple and inexpensive method to make your own UV exposure box. We’ve also seen it done before using UV LEDs and IKEA picture frames — just make sure you don’t start tanning your hands while you’re working!

Ikea Provides A Great UV Exposure Box

Making your own boards at home is among the heights of achievement for home tinkerers, and one fraught with frustration. The toner transfer process requires carefully peeling away layers of photo paper, and milling your own circuit boards is an exercise in complexity. One of the best options is using photosensitive copper boards, but this requires exposing the masked-off copper to fairly intense UV light. A UV exposure box is a wonderful project, then, and something [Carlo] just about has wrapped up.

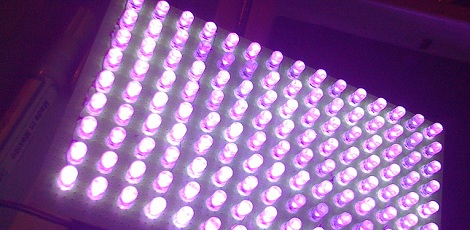
The first portion of [Carlo]’s build involved placing 135 UV LEDs on a piece of protoboard. This UV source eats up a surprising amount of power; [Carlo] is using 12V for the supply, so an old industrial power supply is more than capable of dishing out the 1.5 Amps required for the build.

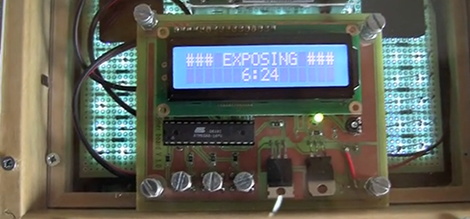
Next, [Carlo] needed a timer for his exposure box. He settled on a design based on an ATMega8 turning a high voltage transistor on and off with a character LCD for the user interface. A few buttons allow [Carlo] to set the countdown timer, after which the LEDs turn on for a set period of time.

All this was packaged into a small box [Carlo] picked up from Ikea. It’s a very useful build, and judging from the video after the break, extremely easy to use.

Continue reading “Ikea Provides A Great UV Exposure Box”

UV LEDs Expose PCBs, Gives You A Tan

Among the projects that define electronic design, a UV exposure box is right up at the top of the list. These boxes shine UV light on a work piece and are used for everything from exposing photosensitive PCBs to erasing EPROMs. [carlolog] decided to build his own and ended up with a fairly impressive array of ultraviolet LEDs perfect for making PCBs or tanning the back of your hand.

One important thing to remember when making large arrays of LEDs is current consumption and power needed to light the device up. [carlolog] naive assessment of how much power would be required used a 12 volt supply with 135 LEDs and 135 resistors, wasting a lot of energy and producing 24 Watts of heat.

Of course this power consumption can be reduced by putting a few LEDs in series, so [carlolog] wired 3 LEDs together with a 150Ω resistor. This array requires just over 11 Watts and consumes less than 1 Amp; perfect for a desktop UV box.

The enclosure for the box was crafted out of three Ikea photo frames, and a small timer circuit powered by an ATmega8 was added. Now whenever [carlolog] needs to wipe an EPROM, he can put the chip in the box, set the timer, and walk away.

A very nice build, but when dealing with a lot of UV we must remind our readers: do not look into the UV array with your remaining eye.