Creating projects is fun, but the real value, as far as the imaginary Internet points are concerned, is how well you show them off for the clout. Taking a few snaps is fine, but if you want to produce a quality video of your project, it pays to put some thought and effort into the process.
Telling The Story
Before setting out to document your project on video, think about what you’re trying to communicate to the viewer. Are you attempting to create a step-by-step guide on how to recreate what you’ve done, or are you simply trying to show off the awesome finished product? These are two very different types of video, and will require different content and delivery entirely. It also guides how you shoot your video.
If you want to show off your build process, you’ll need to shoot as you go. This can be time consuming, but also a great way to show the reality of what goes into your work. I always like it when people convey the pitfalls and successes they faced along the way, and get people involved in the story. It also means that you’ll end up shooting a lot of footage and you’ll spend plenty of time editing it all together.

Alternatively, you may wish to show off the end result instead. If your project is more interesting as a finished piece, you may not feel the need to show people the hours you spent wiring up an Arduino and debugging the code. Instead, you can skip to the end, show them the fancy glittery results, and just give the background information where necessary. This is great if you have limited time to edit and want to work without slowing down to shoot video all the time.
Sometimes, it’s possible to go even simpler, and just shoot a timelapse. Paired with an appropriate soundtrack, this can make for a very appealing video, particularly if you’re building something crafty or intricate. It can also guide others on your process without all the work required to create a fully explanatory how-to.
Whichever option you go for, you should think about what you want to show people, and what they want to see. Is the value of your project in the creation process and the workmanship, or is it in the shiny finished product? Identifying this will save you from wasting hours making a video full of content nobody wants to see. Doing some fancy machining to produce an intricate clock? Consider filming the build. Wiring up a bunch of LEDs to produce a stunning art piece? The soldering and wiring is probably a little dry – consider spending your time shooting beautiful shots of the reveal.
Depending on your project, a good video can be a replacement or a complement for documentation. If you’re doing something that’s fun, but perhaps not particularly novel, there may not be a great need for exhaustive documentation. Your video might just be a little overview of what you’ve achieved, and all you need to share with the world. Alternatively, if you’ve been working on an advanced new process that’s at the bleeding edge of your field, a video might serve as a nice complement to richer documentation of your project — but please still write down those nitty gritty details which help provides the deeper understanding. In these cases, a short video that hits the major points and directs the viewer to more in-depth resources can be a really useful thing to have.
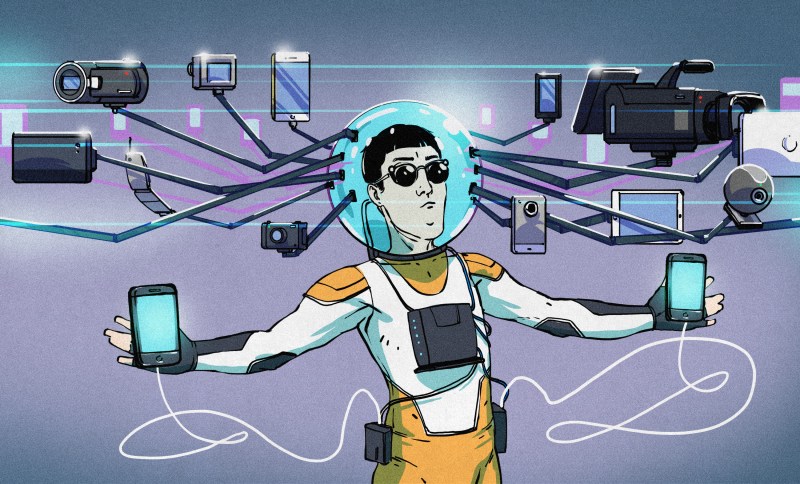
The Great Camera in Your Pocket
Shooting a great video is about having the right tools and using the right techniques. Thankfully, we live in an age where consumer electronics are cheaper than ever, and there’s a whole raft of hardware and software out there that’s ready to make your video look wonderfully polished.
You’ll want to start with a decent camera capable of shooting nice, quality video. Mid-tier to flagship smartphones are all capable of shooting in HD, if not 4K nowadays, and can serve as an excellent platform when you’re starting out. Used properly, they can put out good quality content every time.
Moving up, there’s DSLRs, long the realm of the professional photographer, these offer interchangeable lenses and greater finesse over shooting. A DSLR can be useful when shooting in low-light environments, or macro subjects, or in other cases where fine control over the capture process is necessary. Beyond that, the sky is the limit, with professional video equipment offering the best performance for those with the budget to match.
So Steady As She Goes
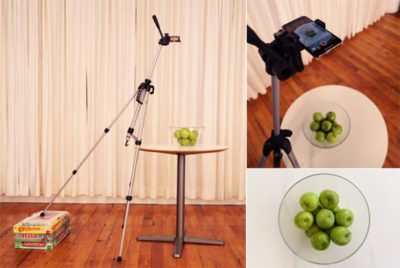
Your first purchase beyond a camera should be a tripod. Despite all the image stabilisation technology in the world, none of it can quite compete with a camera that is simply mounted on a stable footing. Even if you’re using a smartphone, buying a cheap adaptor and fitting it to a proper tripod will improve your videos immeasurably. No longer will your audience have to contend with the distraction of your shaky hand movements and poor framing. Instead, they’ll have a clear view of the action and be able to focus on what’s going on.
For shooting project videos, a photography-style tripod with a ball head will be more than adequate. Most shots you’ll want to take will be static, with perhaps the occasional pan thrown here and there. Of course, if you’re getting into filming more action shots, you may find a reason to invest in a more expensive fluid-head system. Fluid-head tripods are designed with hydraulic fluid mechanisms to help you shoot smooth pan and tilt shots, and are great if you’re looking to get more movement in your work. People who are constantly moving the camera around are know to go far beyond this, custom designing rail systems, some are portable but some are computer controlled and built right into the shop itself.
Aziz, Light!
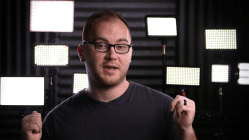
You have to think about lighting. If you’re really looking to take things seriously, some proper lighting can make all the difference. If you’re shooting outdoors, aim to take into account the position of the sun relative to your subject and make sure you’re not losing detail in unnecessary shadows or with whites becoming overexposed. Indoors, it pays to have a good set of video lights. These are specialist lights that output a broad color spectrum and are designed to help you shoot quality images and video. Often paired with a soft box, they can make a huge difference to the quality of your final image.
You can definitely make photography lights yourself. As someone who has tried, and failed, to shoot nice quality video with workshop lights and bedside lamps, it was amazing to see the improvement a set of video-quality CCFLs fitted into softboxes made to my shoots. These will help provide your scene with bright, even illumination and show your project in its best possible light.
Go Forth And Shoot!
With good lights, a solid tripod, and a good camera, you should have all you need to shoot quality videos of your projects. If you want to push the boat out, of course, there’s more hardware to discover. You might want to score yourself a steadycam or gimbal for quality motion shots, or perhaps a motorized slider for dramatic reveals. Of course, this is Hackaday, not Buyaday, and building your own is always an option too. This is great if you’d like to customize your tools to work with the way you like to shoot.
With a strong idea of what kind of video you want to shoot, and armed with the right hardware, you’re ready to go. All you need now is a project, though we’re fairly sure the Hackaday readership is never short of things to work on. And remember — nobody knows your project better than you, so get out there and film some great content to share with the world!


If you (yes you, commenter) don’t understand the Aziz reference, please fix that.
By watching the Fifth Element.
I thank you for letting me know hot to fix my ignorance over said reference..
If I shall still thank you after doing so on the other hand… Well its a better use of a rainy stuck indoors afternoon than pulling my hair out I hope…
or is it from ‘Battery Aziz’ – True Lies?
That reference brought a smile to my face, for sure. Now to work in the phrase, “Chicken. Good.”
She knows it is a multipass.
*mooltipass
It is related to the heliostat article of a couple days ago as well.
It wasn’t until a friend mentioned it that I realised that my latest video was feature-length (not modern feature-length, but as long as The Dark Crystal). No wonder the editing seemed to take all week.
So, I would suggest that it is worth considering how _much_ of the process you want to show in one video.
Splitting in to shorter episodes is worth considering for longer projects.
(This isn’t pushing my video, my point is that if you make your video too long, and without enough variety, nobody will watch all of it, and you are wasting your time)
Very true, I have a lot of long crappy videos that no one watches, including me.
The videos today are too long.
Makes me fast forward.
(Who wants to spend 20min on some stupid simple?)
Really depends on the video content and style – Adam Savage frequently does stuff I consider simple for example but I still enjoy some of his longer videos. He has presentation flair, such genuine enthusiasm and can work at a rather high level of craftsmanship which can be satisfying to watch in own right. That said I do also skip or stop many of them if they fail to grab me this time.
And that wonderful youtuber Lindybeige with his huge, long, rambling, sidetrack filled, informational, (and clearly defined opinion/conjecture) filled rants (usually on history type stuff) really appeals to me.
Long isn’t always bad, but you certainly have to be doing something more than just endless repetitive work in silence from the same fixed camera angle to add interest if you are making a long video.
This! In spades.
The missing section in our writeup is “prepare extensively and edit ruthlessly”. If a part of the video will bore your audience, take it out. If you can say it more succinctly, do. Respect your audience and their time, and realize that if you have 100 people watching, it’s worth 100 minutes of your time to remove that one crappy minute of fumbling around. (How does PewDiePie sleep at night?)
Once you commit to editing, it allows you to improv a little more: if something works, keep it, otherwise just cut it. The freedom that good editing provides is massive.
Also, as an old photo head, lighting is more important than the camera. This also extends to exposure, and this is especially difficult with cellphones. But here’s my pet peeve: cameras expose as if everything were grey. If you have a lot of white in the frame, you need to up the exposure.
There is one point missing: sound/narration. I usually don’t watch any videos that have these problems:
1. No narration, instead walls of text inserted by someone, who doesn’t understand readability and contrast. If you can’t/won’t speak, then use a TTS engine to do all the talking. For example I use Balabolka app for TTS with either Microsoft TTS voice or with my original copy of IVONA 2 TTS engine.
2. Sound quality so bad, that most of it is noise. I’m guilty of doing this myself, so I deleted those videos.
3. Narrator sounding as if he/she is trying to bore everyone to death. TTS engine usually sounds more human and more passionate than this kind of narration.
4. Obnoxious music choices and bad mixing. Music that sounds like Scottish experimental band that decided to fill their bagpipes with hungry cats, playing them while stomping on some toy keyboards set to sawtooth synth, and this being combined then with power metal drum solo as it is played on trashcans, is probably a bad choice. Especially if it is louder than narration.
Bad lightning, bad camera work and low video quality can be forgiven, if the sound is okay and topic is interesting and properly narrated…
If YouTube views is the priority then that’s fine, but if documenting the project is the priority then photos, diagrams and accompanying text on a good old fashion web page or pdf or whatever is usually way superior in terms of bang-for-the-buck-type efficiency for both the people doing the documenting and for those viewing it IMO.
Some great YouTubers are completely silent. (My Mechanics, Red Dead Restorations for example)
I accept that not all experts in their field speak my language. And not all speaker of _my_ native language understand it the way I speak it. Demanding that they learn to speak your language is unfair.
Turn this round. Imagine that _you_ only speak Romansch and want to make Swiss watch videos. Should you have to make a Hindi version for (some of) the Indian market?
I think that good content can transcend language.
This was meant to be a reply to Moryc. Even now the header says “Leave a reply to Moryc”. But bet, like the last one, it ends up under steves’s comment.
Yeah I’ve had that a few times… And I agree with your sentiment – heck I sometimes rewatch something like a Clickspring without the sound just to see stock turn into something so well crafted.
I just wish the algorithms would give me more of the makers with real craftsmanship even if they don’t speak English (or one of the few other languages I comprehend well enough to search in when I am really looking for something to inspire)
Andy Pugh, I understand your point, and it is a valid one. I watch those silent movies too. But if the music is appalling, I won’t.
Usually I search and watch most of the guide/project/tutorial videos in either english or polish. I taught myself english (my grade/middle/high school covered basics four times for the sake of new students), but I can’t speak it well enough for others to understand me. Because of that my latest video (a demonstration of a trick in Blender) was “show, don’t tell” with some short description in the description. Anyone can use Google Translate for that. Also until recently there was an option on YouTube for community captions – translations submitted by viewers. Great feature, but YT removed it because some idiots and spambots abused it…
“Romansch” – I suspect I’m one of the few here who know what you’re talking about!
Andy ist ein Schweizer?
Grüezi Wohl!
Indeed, I wish more content was just written and diagrams. I actually prefer them to video by a huge margin – better to reference back to as well as very clear on the important details (if done right). No matter how hard you try to shoot a video of you actually assembling something your hands, the movement etc will get in the way – but a decent still image or two with the right lighting and focused on the trickiest parts is much easier to make crystal clear.
A thousand times yes. YouTube is for entertainment or demonstrating something that needs to be seen in motion. Looking for a linux terminal command, the last thing I want to see is a video that takes 4-5 minutes of scrubbing to find the one line that I then can’t even copy and paste. All Android rooting videos are guilty of this. A website with simple text is vastly superior in these situations. And the focusing problems people run into on youtube are quite ridiculous. If your video is mostly screen grabs, make a webpage.
Also: show the end result of the project before you dive into any details. I want to know upfront whether this will interest me.
Don’t tell me a long story. I don’t need to hear how your life led you to this point. I probably don’t even need to hear your motivation for the project; if I’m watching, it’s because I’m already motivated similarly.
Keep everything direct and to the point. You’re not being paid by the minute.
This chicken soup recipe started back in 1903 with the birth of my great grand uncle…
Here are a few things not to do. Don’t start a video with “Whats up!” and your face. No one needs to be shocked like that.
Don’t show yourself with a man-bun. You will look ridiculous(er) in 10 years and your video will be instantly dated. The man-bun will be the mullet of he millenials.
If you MUST show yourself speaking, do as little as possible. If you can describe something you can show it. What? You say even David Attenborough will recline next to a fungus and lecture? Yes, when he runs out of material and has to deliver a set length video. You don’t have that problem. (If you are trying to get a Discovery Channel deal like Smarter Every Day, you might have to show your face a lot, such is the pity. Those channels like more face, less content since they are personality based.)
Look at the lighting with a critical eye. Check for showing dark things against dark backgrounds or light against light.
The R squared law is counter intuitive. If you want that background to be darker compared to your subject, move the light closer.
And to wrap it up DO NOT WAVE YOUR HANDS AROUND when holding something you want us to see! Please! Brace one hand on a table top or something if you need to. Watch a good teacher who demonstrates things under a projector.
Wait, one more. Practice what you want to say a little lest you come out with some of the ludicrous This Old House style phrases like “What you want to do is you want to cut the board here” instead of “Cut the board here”. And if you use pre-drilled holes, tell people where you got them!
Look at some This Old Tony to see how to start and avoid all the intro crap. I can play your video again so I don’t really need the old lecture advice about ‘tell them what you are going to say, say it, then tell them what you said’. Just do it.
Open question: I watch a lot of mountain bike videos because I spend a lot of time mountain bike racing, and I really value seeing the camera pointing at where the rider wants to go, and focusing on the important part of the trail. A lot of the time when I’m doing how-to videos, I want people to see the same thing: this is what the melting aluminum looks like down in the crucible, and here I’m pulling it out, turning, and pouring it into the mold. You can’t do that with a fixed camera: if it’s pointing down in the crucible, it’s not pointing at the mold. So I’ve been attaching action cameras to my safety glasses so when I want to have the focus of the video on a certain object, it’s what’s in the center of the field of view. When I see other videos shot this way I prefer them. Is this weird? Do other people prefer fixed camera locations? I agree that this can lead to shaky videos if you don’t have some sort of image stabilization. But for a lot of videos, being able to see what’s going on in shots that involve panning or varying camera angles, getting to see the relevant materials seems to outweigh the tripod’s stability.
Thoughts?
I buy it.
And along the way, I think you’ve just invented the two-camera setup: one wide and stable and one up-close and mobile. Tripod-cam and hat-cam. Cutting between them gives both the stable overview, and the focus on shifting details.
But it’s very hard to keep the mobile cam from shaking. One solution is just to use an ultra-wide lens, so the shake doesn’t matter so much. Another, that’s become ridiculously cheap these days, is a motorized camera gimbal. Ten years ago, $thousands. Today $100 on eBay.
My gripe is audio level in videos. A mic is something you talk into if it’s in a phone or tablet, not from the now requisite social distance for real personal interaction. If there is no gain control and metering on the recording process then it needs normalizing. Without normalizing the audio it is not at full level and we have to get up and turn the amp up as all digital level controls should be left at full normal level and only the amp gets turned up to deal with weak audio.
My audio complaint is for Hollywood movies that think every music track needs to be 3 times the level of the actors’ voices and all explosions need to be 10 times the level of the music. Whoever solves that problem will be one of my heroes.