At this point if you’re even remotely interested in home laser cutters, you know about the K40. These imported machines are very impressive considering they only cost around $400 USD, but naturally, quite a few corners had to be cut to get the price down. If you’re looking for something with a bit more punch and much higher build quality, a new breed of 60 watt lasers have started popping up on the usual import sites for around $2,000 USD.
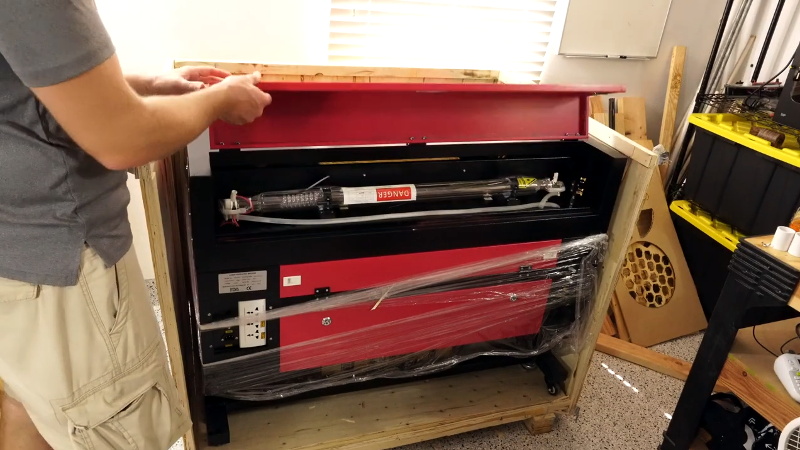
While these more expensive machines are certainly much higher quality than the K40, [Jeremy Cook] found there was still plenty of room for improvement. For example, the machine didn’t have any switch cut off the laser when somebody opens the lid. While we don’t doubt some readers will consider this more of a feature than a bug, it’s hard to believe that a tool that costs this much wouldn’t at least offer such a thing as an option.
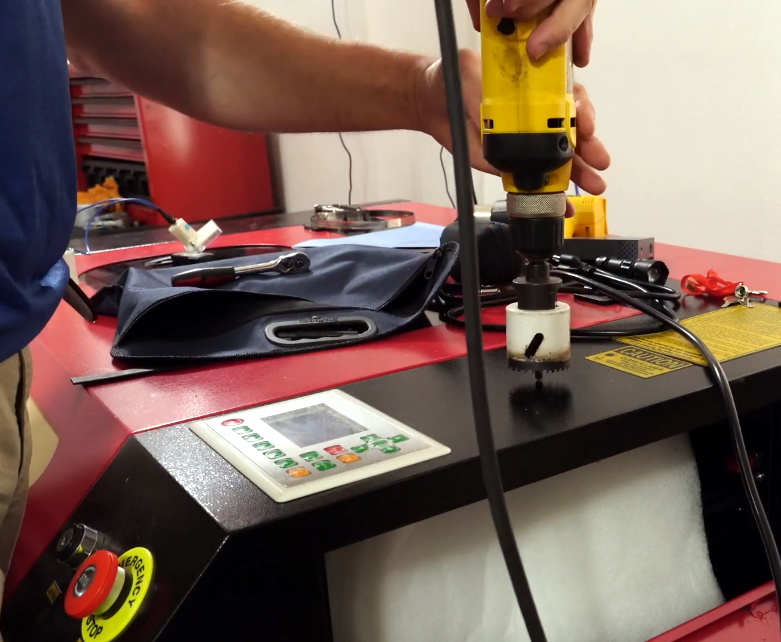
[Jeremy] also decided to add his own ammeter so he could see how much power the laser is drawing. While not strictly required for day to day operation, it turns out that the controller in many of these machines has a tendency to push the laser tubes beyond their design limits on the higher power settings. With the spec sheet for your tube and a permanent in-line ammeter, you can verify you aren’t unwittingly shortening the life of your new cutter.
Even if you ignore the modifications [Jeremy] makes in his video, it’s still a very illuminating look at what it takes to get one of these lasers ready for operation. Not only do you have to get the thing out of its shipping crate safely, but you need to come up with some way to deal with the fumes produced and get the water cooling system hooked up. It’s a decent amount of work, but the end results certainly look impressive.
While the K40 is still probably the better bet for new players, it’s good to see that there are some viable upgrades for anyone who’s outgrown their entry level machine but isn’t in a position to spend the money on an Epilog.


Any laser over Class IIIb with a service lid will not pass the easiest security certification if there is no safety interlock, for what I remember… this is not a feature, unless you are looking for free surgery!
Free random surgery!
$2000, that’ll burn a hole in your pocket.
LOL!
Could this cut 1/4 inch aluminum?
not a chance.
According to Wikipedia, you would need a power of around 10 kW for that. I.e. around 150 more powerful than this machine.
Thanks!
It can’t even *mark* metal, let alone cut through even a micron’s thickness of it. After all, what do you think the mirrors in the optics are made of?
You can mark metal with a moly spray, and it’s pretty tough.
There’s a guy on youtube that goes through these machines a step at a time, explains and demonstrates what each setting does, makes upgrades, replaces tubes, etc. Sarbar multimedia.
https://www.youtube.com/user/SarbarMultimedia
His latest videos are a fiber laser setup, but in the past he’s upgraded/setup two different import CO2 lasers. He’s kind of a cranky old Brit, but if you can tolerate his personality he shares a very large amount of info.
The laser is designed so that the beam is larger diameter at the mirrors than at the focus of the objective lens. Additionally, if that’s not adequate, you could also use multi-layer dielectric mirrors instead of metal. These can be designed to be virtually lossless at the design wavelength. Source: my PhD in optical engineering
The power density at the focus of even a lousy K40 is a few gigawatts per square meter: dozens of times the power density of the surface of the sun(/i>. That’s AMPLE to melt metal, provided the power isn’t reflected or conducted away faster than it can be deposited.
Aluminum is pretty reflective at the CO2 wavelength, so little power gets deposited, and quarter inch of thickness will suck away the heat faster than 40W can deposit it. But even a K40 will happily cut through 25 micron foil if the surface is blackened first. Running it through the flame of candle to deposit soot works well.
But if you want to cut metal, you really ought to look at fiber lasers: shorter wavelength, even higher power density. That said, a vendor I used once routinely used a CO2 laser to cut 1/4″ copper. (*BIG* laser, but it still required blackening the surface).
Thanks so much for the great writeup Tom!
A quick look at Aliexpress shows you can get a 60W laser with a 60x90cm cutting area from China (including shipping) from $1300 to $1500. Looks like the difference is the software/controller board with the $2000 models having the better/more usable version. YMMV.
Its a standard Ruida controller by the look of it. It has all the features you need – Water chiller interlock, Door interlock, air assist control etc etc. They just need to be fitted and configured. It is a very capable controller. Regarding mA meters and laser power supplies, most PSU’s have a current control trimpot accessable through a small opening. A 60w tube should have the current limited to 25 / 26 mA max. a lot of these cheaper machines have the current wound up to the maximum to get better performance at the expense of tube longevity. Another trap is ensuring the water flow is in the correct direction – the wrong direction will kill the tube in very short order…..
That tube looks like is a 40 watt – not a 60
Why does water flow direction matter? It’s not like it’s much different temperature between inlet & exit.
And which direction is “correct”? On mine the water outlet is the same end as the laser output, and the ground terminal. The high voltage end and 100% mirror are on the water inlet end.
Likely because of the gradient of temperature across the tube.
Your setup is right: Water must flow from the high voltage end toward the optical output.
And quite important: rotate the tube so that the water inlet is down and the water outlet upside: water will fill up the tube this way without air bubbles/pockets.
Stuck air bubbles are quite bad since they allow a local thermal buildup which stresses the glass tube.
I get the bubble argument — that’s obvious. Too bad the usual tube design doesn’t lend itself to that at all: no matter the orientation, there’s always a bubble trap somewhere. You just need to flow fast enough for the turbulence to work them out eventually.
But there’s essentially no temperature gradient down the tube (a fraction of a degree), so it’s unlikely that’s the justification for a preferred flow direction.
Regardless of the science behind it, the wrong direction will screw your tube……
“the wrong direction will screw your tube…”
Citation needed.
No tube manual I can find states that.
The 10 kW input power argon ion laser I used to work with didn’t care either.
Seriously: is this true that these little tubes are that picky about flow direction?
Yep – seen it inumerable times….. I do this stuff for a living….
The water flow direction markings on the back of my machine are because the flow switch only works in one direction. You won’t damage anything by turning the flow around, but the switch won’t let the laser turn on because it doesn’t sense the flow.
Many of them *look* like Ruidas but are not. Make sure you know what you’re getting. Mine looks like one but isn’t, and as such I’m stuck with LaserSoft and can’t use the much superior LightBurn software.
As long as you’re okay paying any fees at your port of call. Which will be hundreds of dollars, plus retrieval by the longshoremen and tax and tariff.
Plus you need to know how and where to pick it up. And have a way to get it.
Has anyone here have experience with cutting acrylic glass?
What pricerange of a cutter is needed, to get decent results?