IR Camera Is Excellent Hacking Platform

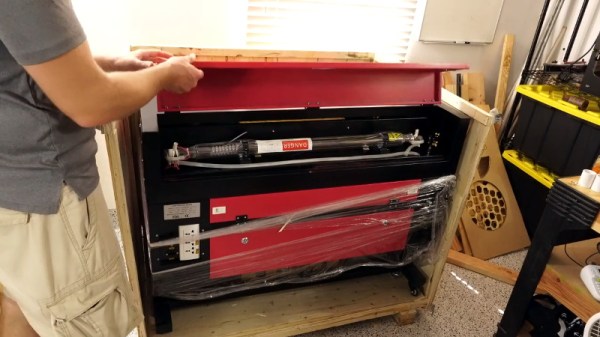
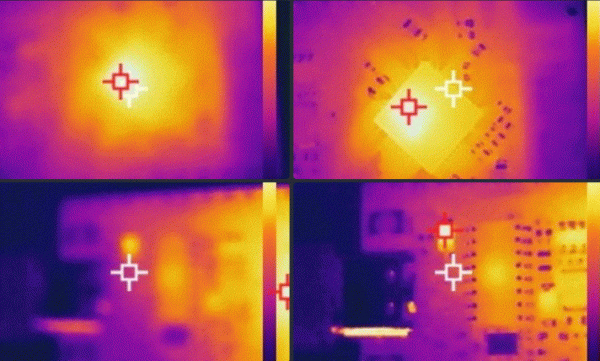
While there have been hiccups here and there, the general trend of electronics is to decrease in cost or increase in performance. This can be seen in fairly obvious ways like more powerful and affordable computers but it also often means that more powerful software can be used in other devices without needing expensive hardware to support it. [Manawyrm] and [Toble_Miner] found this was true of a particular inexpensive thermal camera that ships with Linux installed on it, and found that this platform was nearly perfect for tinkering with and adding plenty of other features to turn it into a much more capable tool.

The duo have been working on a SC240N variant of the InfiRay C200 infrared camera, which ships with a Hisilicon SoC. The display is capable of displaying 25 frames per second, making this platform an excellent candidate for modifying. A few ports were added to the device, including USB and MicroSD, and which also allows the internal serial port to be accessed easily. From there the device can be equipped with the uboot bootloader in order to run essentially anything that could be found on any other Linux machine such as supporting a webcam interface (and including a port of DOOM, of course). The duo doesn’t stop at software modifications though. They also equipped the camera with a lens, attached magnetically, which changes the camera’s focal length to give it improved imaging capabilities at closer ranges.

While the internal machinations of this device are interesting, it actually turns out to be a fairly capable infrared camera on its own as well. The hardware and software requirements for these devices certainly don’t need a full Linux environment to work, and while we have seen thermal cameras that easily fit in a pocket that are based on nothing any more powerful than an ESP32, it does tend to simplify the development process dramatically to include Linux and a little more processing power if you can.

Continue reading “IR Camera Is Excellent Hacking Platform”

Putting The Finishing Touches On A 60W Laser

At this point if you’re even remotely interested in home laser cutters, you know about the K40. These imported machines are very impressive considering they only cost around $400 USD, but naturally, quite a few corners had to be cut to get the price down. If you’re looking for something with a bit more punch and much higher build quality, a new breed of 60 watt lasers have started popping up on the usual import sites for around $2,000 USD.

While these more expensive machines are certainly much higher quality than the K40, [Jeremy Cook] found there was still plenty of room for improvement. For example, the machine didn’t have any switch cut off the laser when somebody opens the lid. While we don’t doubt some readers will consider this more of a feature than a bug, it’s hard to believe that a tool that costs this much wouldn’t at least offer such a thing as an option.

Drilling a hole for the ammeter.

[Jeremy] also decided to add his own ammeter so he could see how much power the laser is drawing. While not strictly required for day to day operation, it turns out that the controller in many of these machines has a tendency to push the laser tubes beyond their design limits on the higher power settings. With the spec sheet for your tube and a permanent in-line ammeter, you can verify you aren’t unwittingly shortening the life of your new cutter.

Even if you ignore the modifications [Jeremy] makes in his video, it’s still a very illuminating look at what it takes to get one of these lasers ready for operation. Not only do you have to get the thing out of its shipping crate safely, but you need to come up with some way to deal with the fumes produced and get the water cooling system hooked up. It’s a decent amount of work, but the end results certainly look impressive.

While the K40 is still probably the better bet for new players, it’s good to see that there are some viable upgrades for anyone who’s outgrown their entry level machine but isn’t in a position to spend the money on an Epilog.

Continue reading “Putting The Finishing Touches On A 60W Laser”

Classic 8-Bit Computing The Atari Way

In the classic gaming world, even before the NES arrived on the scene, there was no name more ubiquitous than Atari. Their famous 2600 console sold almost as many units as the Nintendo 64, but was released nearly 20 years prior. In many ways, despite making mistakes that led to the video game crash of the early 80s, Atari was the first to make a path in the video game industry. If you want to explore what the era of 8-bit computing was like in the Atari age, a new resource is compiling all kinds of Atari-based projects.

This site has everything, from assembling Atari 8-bit computers based on the 6502 chip, to programming them in BASIC and assembly, to running official and homebrew games on the hardware itself. This was put together by [Jason H. Moore] who grew up around Atari systems and later, their home computers. He even puts his biomedical experience to use here by designing a game for the 2600 called Gene Medic which can be found at the site as well.

If you grew up in the 70s and 80s and are looking for a bit of Atari nostalgia this site is the place to go. It’s even worth a visit from younger folks as well since the 8-bit world is a lot easier to get immersed in and learn the fundamentals of computer science. Of course, if you want to take it the other direction, it’s possible to modify the old Atari to add a few modern conveniences.

Photo via Evan-Amos