Last month in my hands-on review of the Ortur Laser I hinted that I had done a few things to make it work a little better. I made three significant changes in particular: I anchored the machine to a spoil board with markings, I added a moving Z axis to adjust focus by moving the entire laser head, and I added an air assist.
Turns out, you can find designs for all of these things all over the Internet and I did, in fact, use other people’s designs. The problem is the designs often conflict with one another or don’t exactly work for your setup. So what I’ll tell you about is the combination that worked for me and what I had to do to get it all working together. The air assist is going to take a post all by itself, but some of the attempts at air assist led to some of the other changes I made, so we’ll talk about it some in this post, as well.
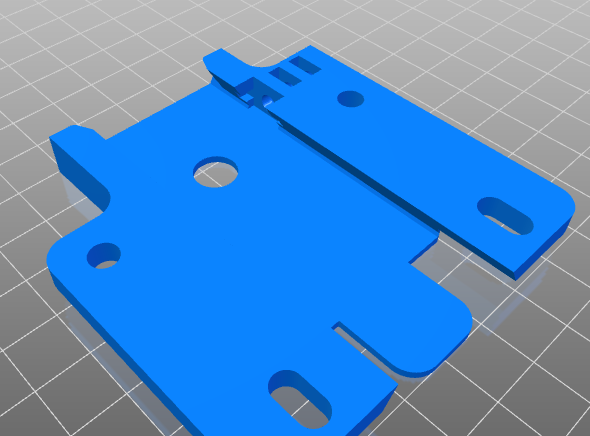
One of the modifications — the spoil board mount — I simply downloaded and the link for that is below. However, I modified the moving Z axis and air assist parts and you can find my very simple modifications on Thingiverse. You’ll also find links to the original designs and you’ll need them for extra parts and instructions, too.
Spoil Board
A spoil board protects the bed of the machine by using an inexpensive, replaceable material as a sacrificial surface when the laser passes through your workpiece. One easy addition is to grab a 2 foot square piece of plywood, attach the laser to it, and then use it to engrave a grid pattern. There are plenty around or you can make your own and everyone seems to have slightly different favorites. The one I used was from one of the Facebook groups, but if you look around, you’ll find something you like.
Instead of cutting from a full sheet, I just bought the square of plywood the right size. The big box stores sell project panels that are 2×2 or 2×4 and they are easier to haul in my two-seater or even on the motorcycle. You’ll eventually make some cuts through to the board so you’ll eventually want to replace it, so maybe buy a couple of panels while you are at it.
There’s only one problem. For the grid to make any sense, the laser has to be in the exact same position every time. So it makes sense to attach the laser to the board. I printed some feet from [diy3Dtech]. I liked them because they hold the machine steady but you can just lift it out if you want to put it somewhere else. Problem solved.

If you use Lightburn — or probably other software — you can also turn the built-in grid off and put your graphic image in a layer that is ignored during burning, such as a tool layer. That way what you see on the screen will match what you see in the real world.
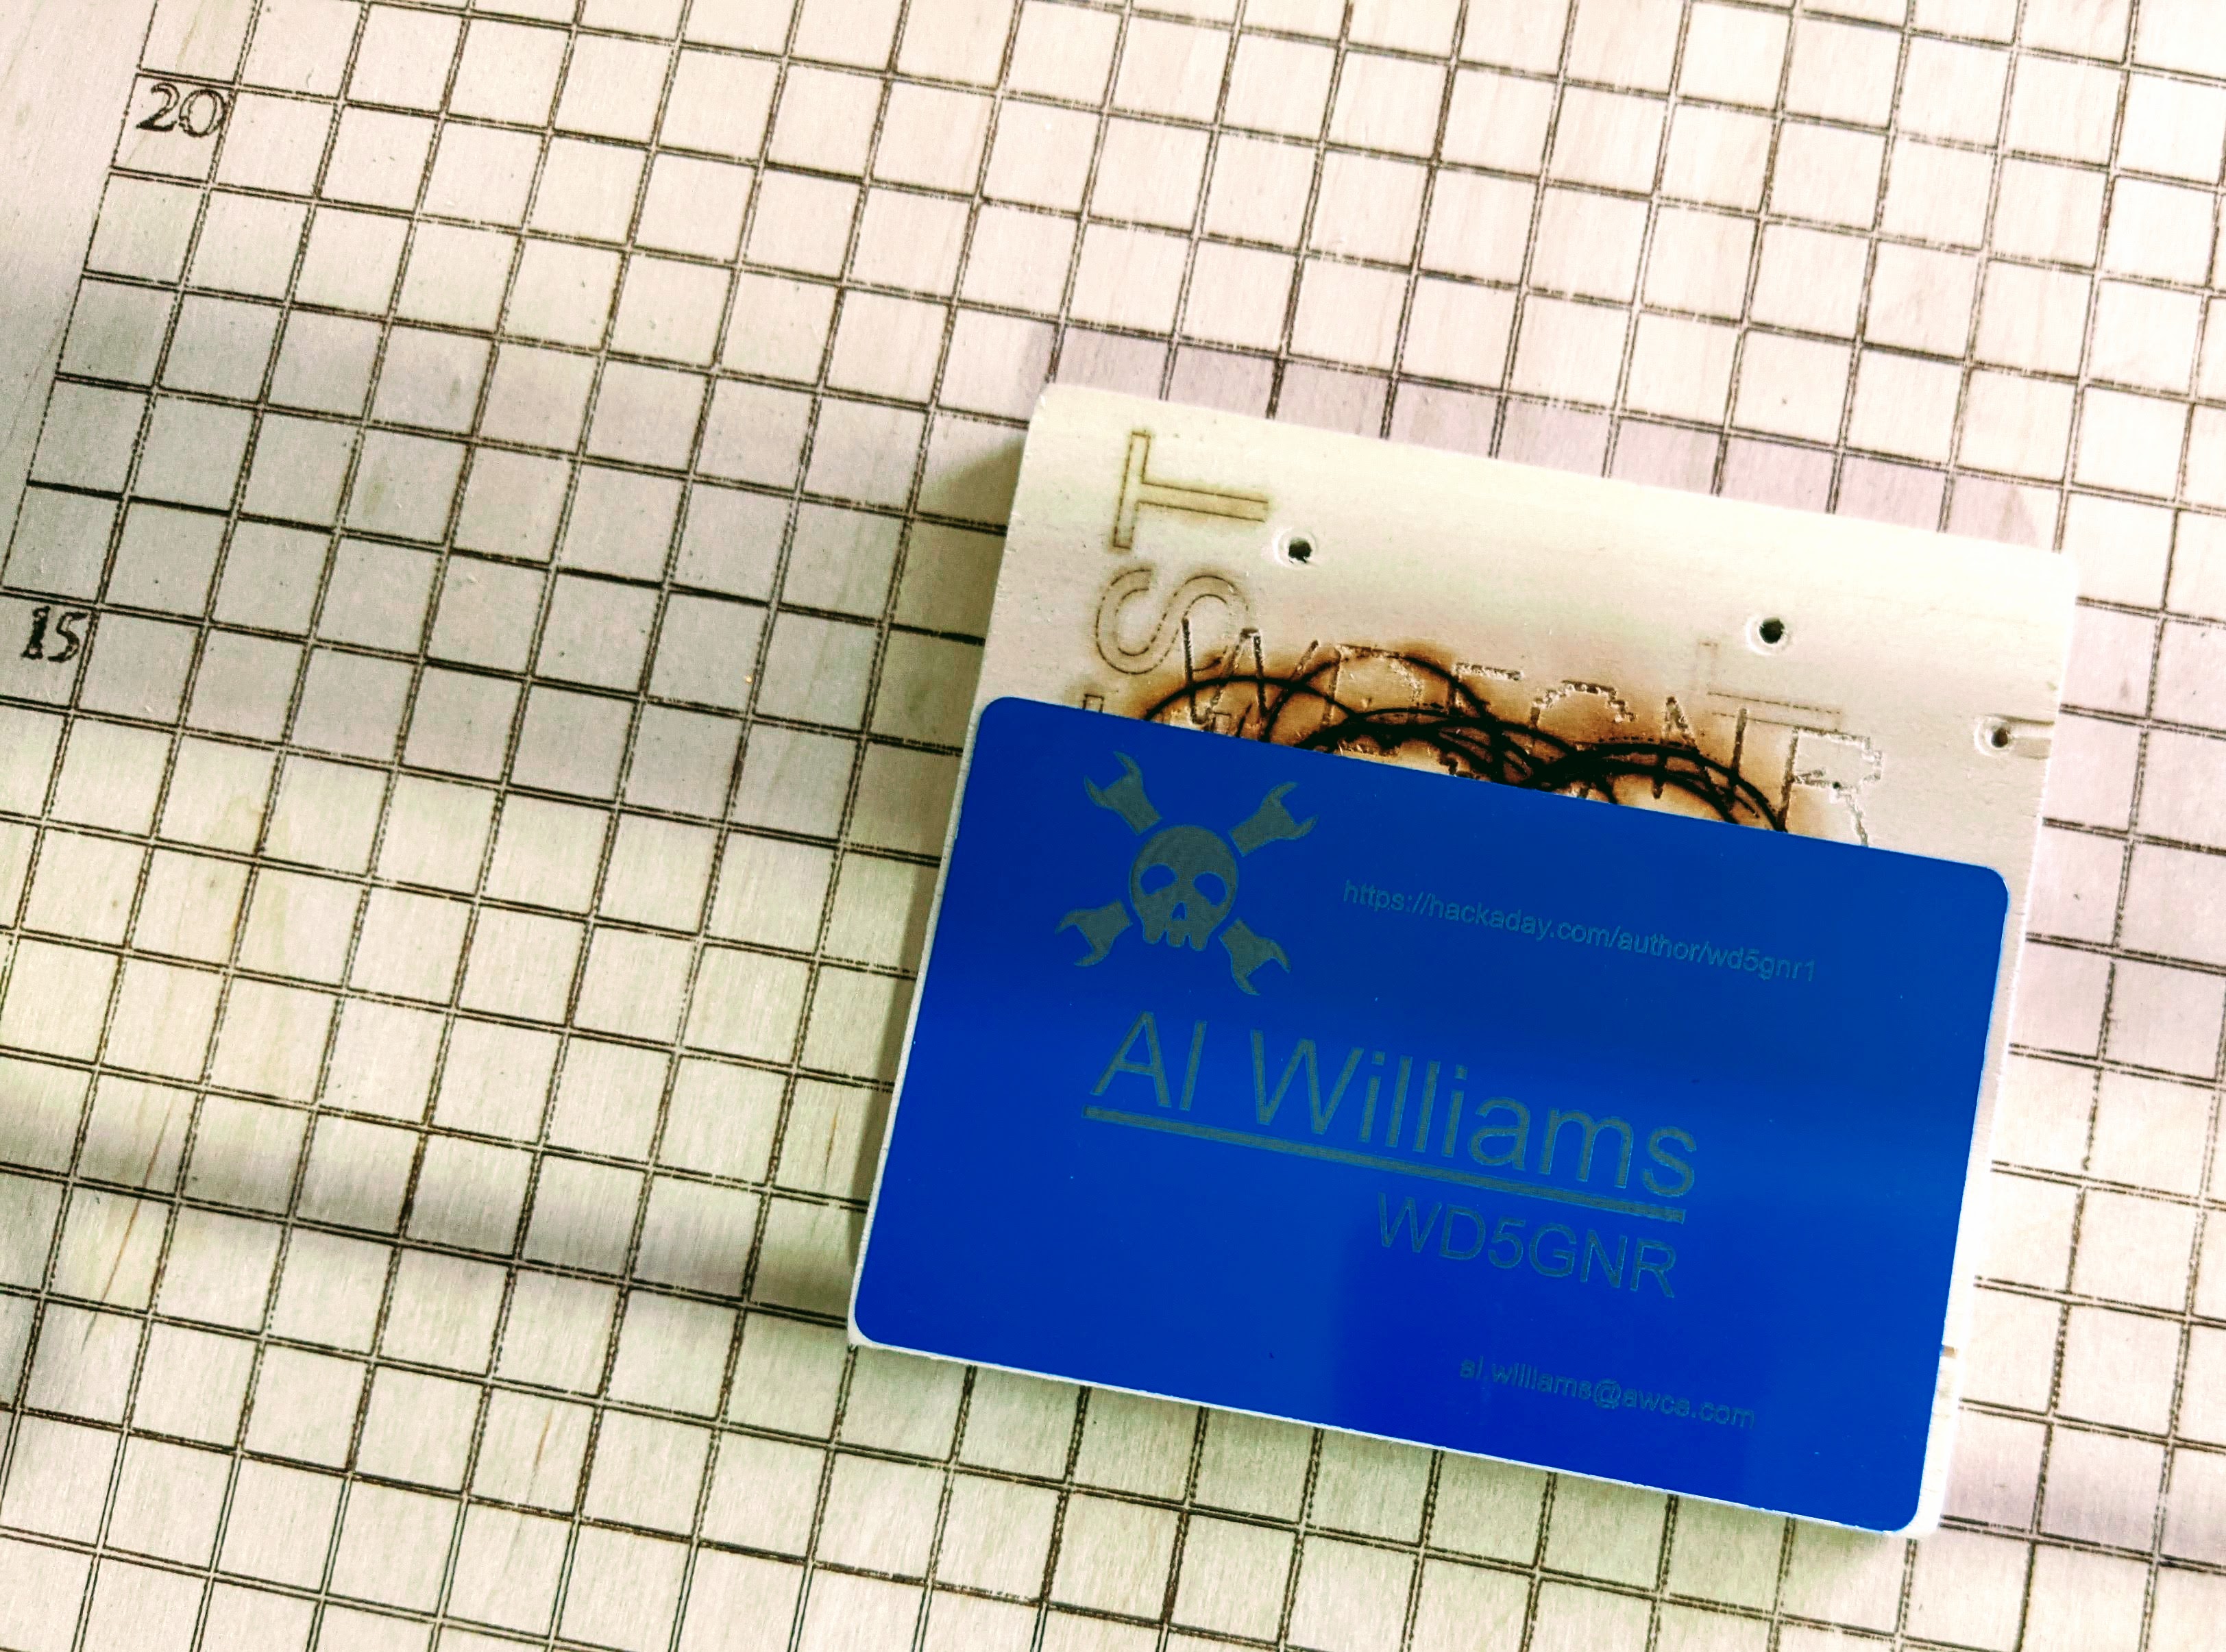
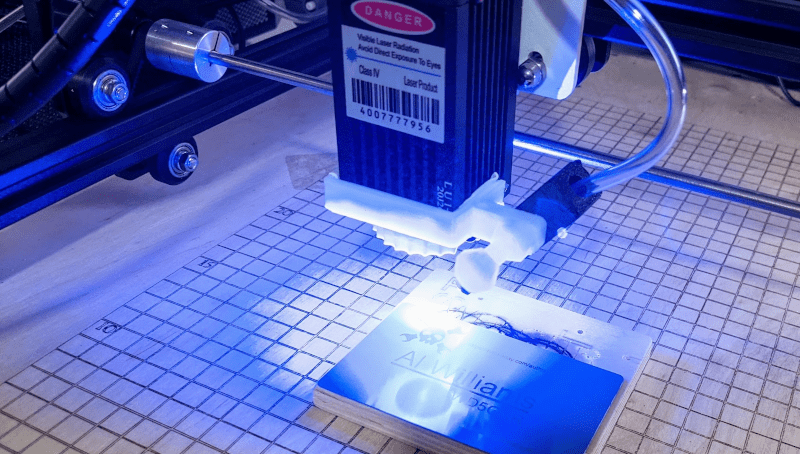
One nice addition to your spoil board is some common push pins. It is handy to push them in at different points when you want to repeatedly put an object in the same place. For example, if you are burning a bunch of aluminum business cards and the corner should be at an X of 100mm and a Y of 100mm, you can stick a pin at that point and then stick another pin at (120,100) and one at (100,120) to make an L-shape you can butt the card up against. Painters tape is also handy and you may find you want a small throw-away spoil board on top of your nice spoil board to make it last longer.
Air Assist (with No Air, Yet)
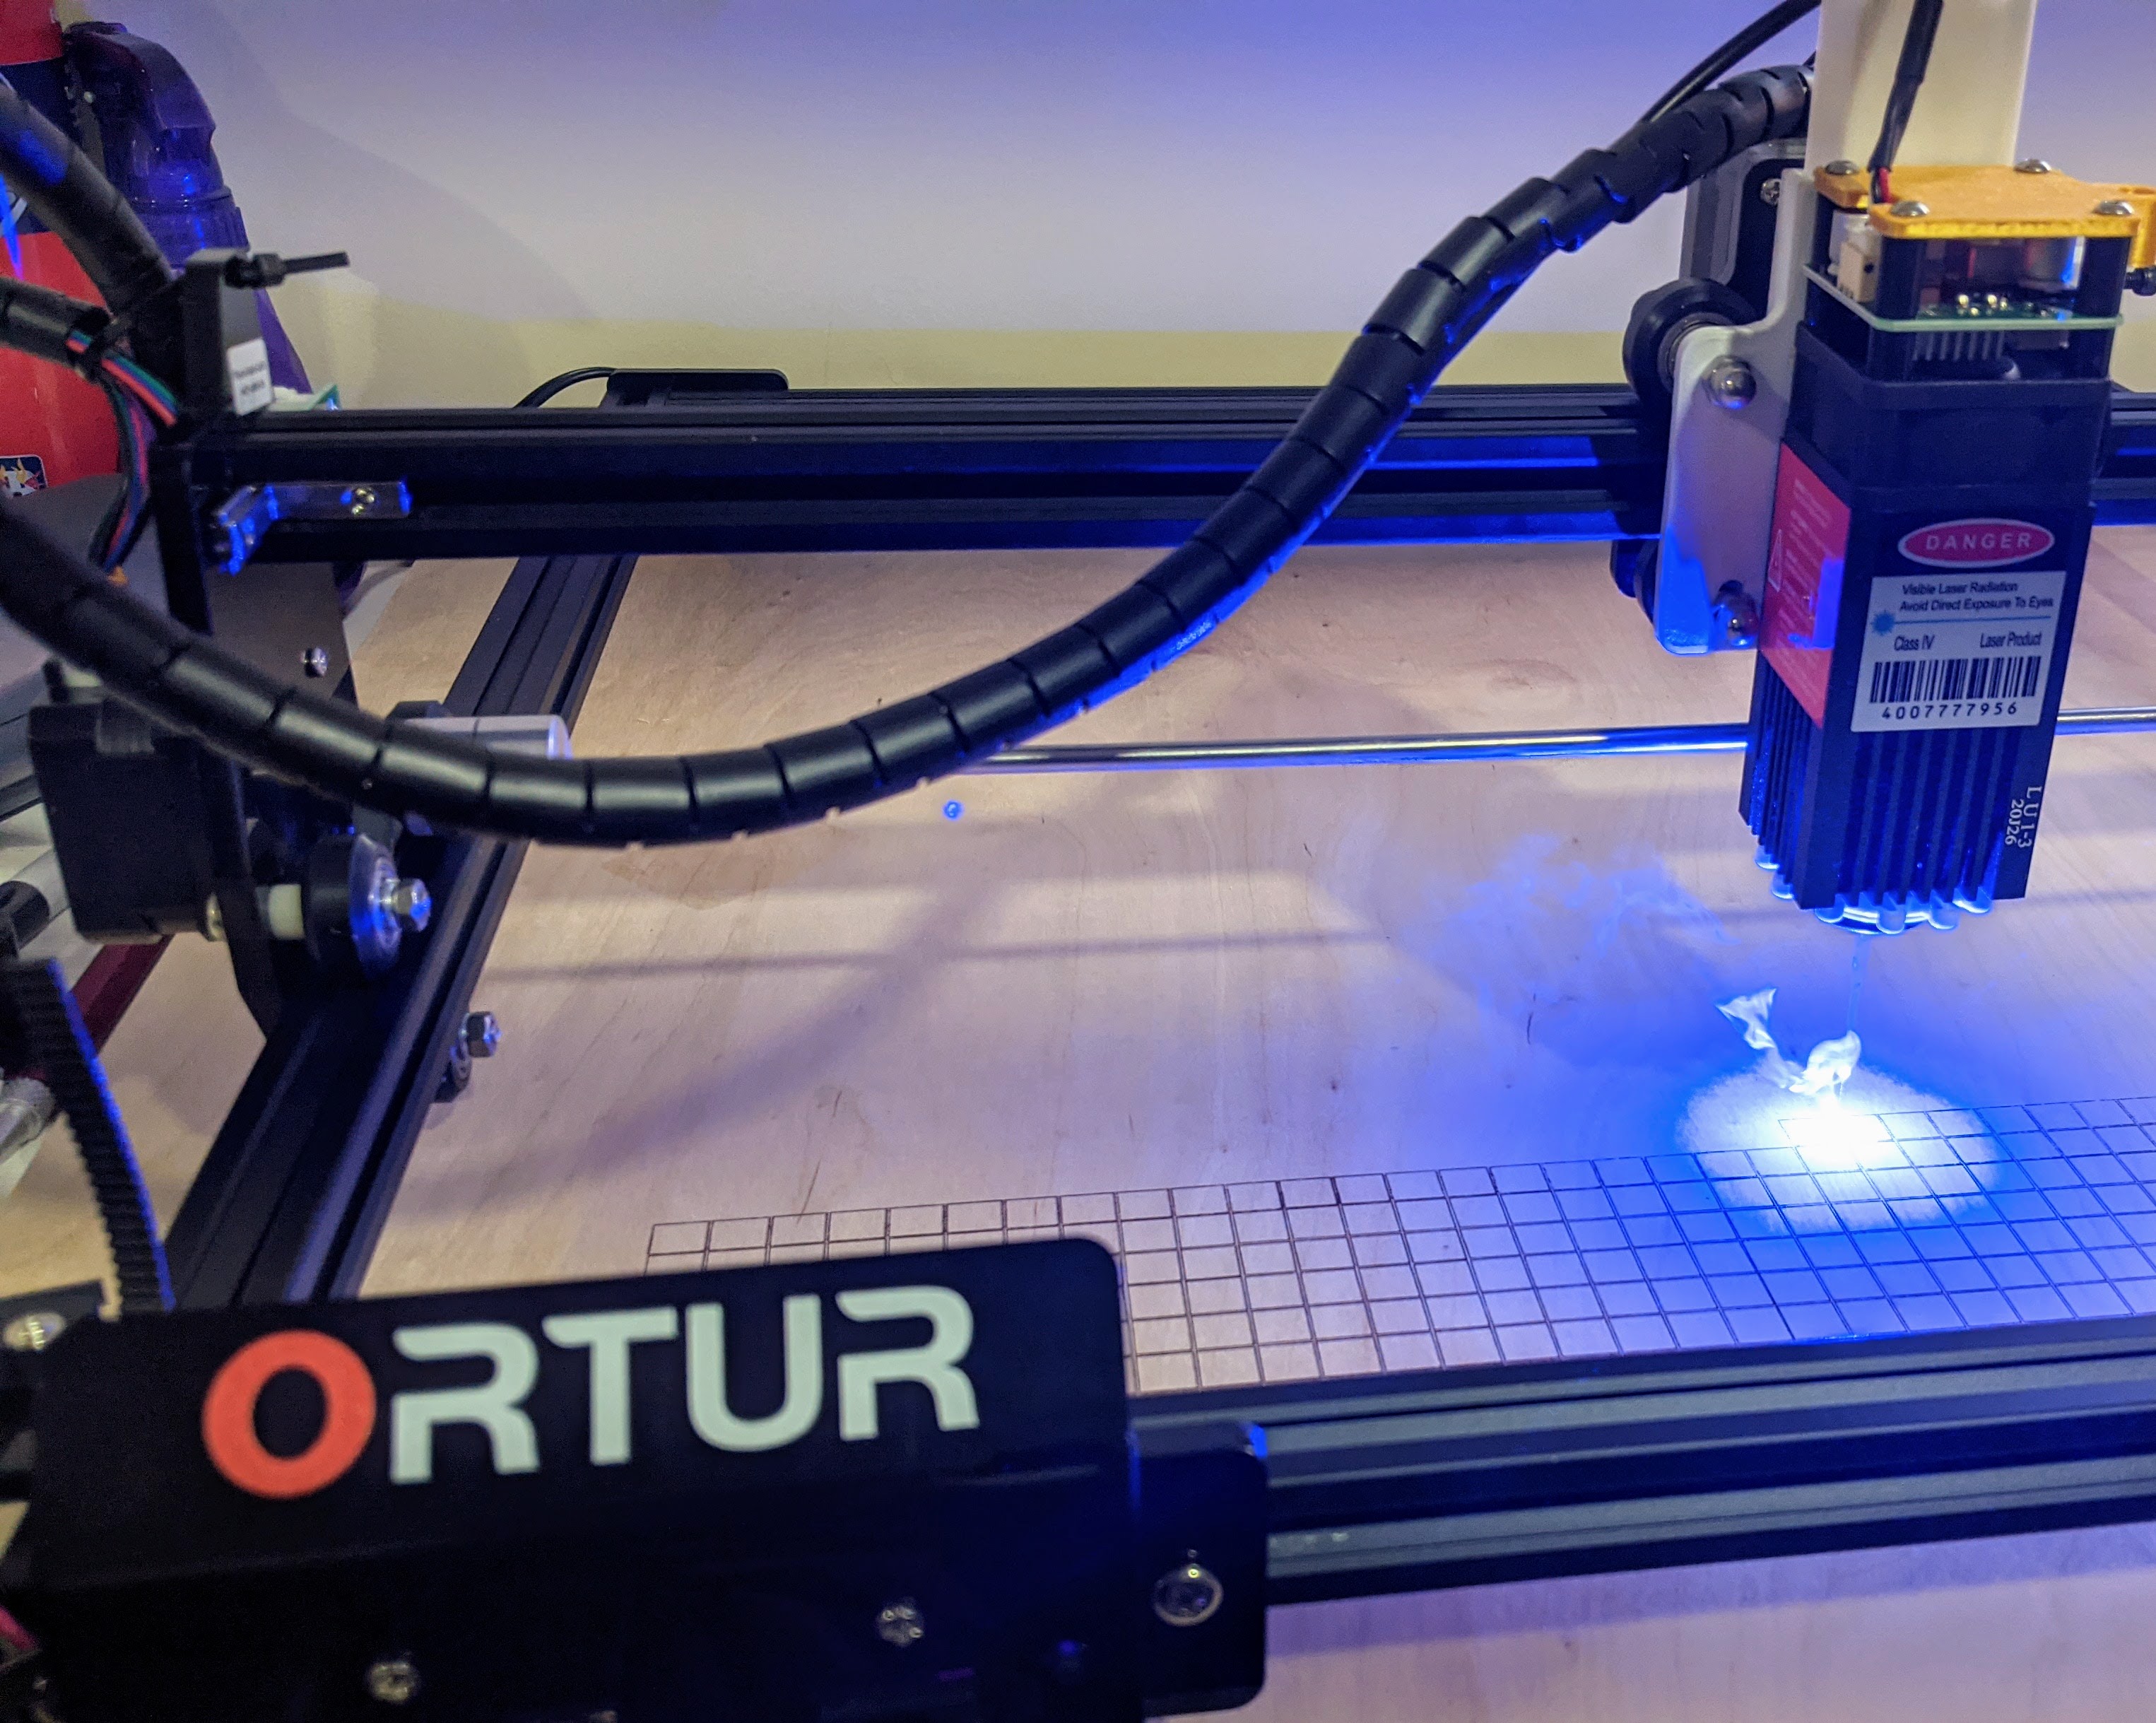
If you’ve ever used a big laser cutter, they usually have a way to blow smoke and fine ash away from the lens and the part. This can make a big difference since smoke absorbs some laser energy and also tends to discolor some workpieces. I tried several air assist designs I found on the Internet but didn’t like most of them.
There seem to be two problems with modifying the laser cutter. First, it appears that these machines might be made in small batches and not all of them are exactly the same. Something that fits someone’s machine might be a little bit off for your machine. For example, there seems to be a wide variation in the outside diameter of the lens holder. One design depends on the lens fitting through a hole that was far too small for my lens. Thingiverse is littered with lens knobs that mention they were remixed from others because the original didn’t fit a particular lens.
The other problem is that the X-axis end stop is pretty tight — it is a microswitch with no leaf — and anything you put on the left side of the laser has to be awfully thin, or else it will prevent the laser from homing.
I found a great design from [ChatToBrian] that I wanted to try. It allows you to blow air under the laser from an air pump using a nozzle from a 3D printer. It also lets you slide the laser head up and down.
Apparently, some of the newer Ortur lasers allow this, but the version I have doesn’t let the laser head move up without major work on the holding bracket. If you only engrave thin things, that’s fine. You focus the laser using the difficult-to-turn lens once and you are set.
But if you do things of different heights, it is a pain. And if you want to do somethings that are really tall, you might have to jack the laser’s legs up on stilts. There are several designs for 3D printed steps for this purpose, but that seems like a lot of trouble and defeats the markings on the spoil board, too.
[Brian’s] design is simple and gives a good range of motion to the laser. But the air assist was a bit of trouble. To get the proper bend in the air pipe, you stuff the hole with air hose for an aquarium and plunge the whole thing into near-boiling water. Once the PLA is soft, you bend the tube.
I decided that was too much trouble and was likely to take a few attempts to get it right. Plus, I want to experiment with different lenses and was afraid the angle might have to change. So to start with, I just put the air assist aside and cut off the air tube. I figured I could always print another one when I was ready to try the hot water bending method.
No More Focusing
Having the laser easily move up and down is definitely the way to go. Focusing the laser, as I mentioned last time, is a bit of a pain. I’ve found it is slightly easier if you put a piece of black paper on top of whatever you want to engrave or cut. With your safety goggles on, use the lowest power where you can still see the laser and twist that finicky knob for the finest possible point of light. It sounds simple, but it isn’t. I’ve also resorted to adjusting a higher-power beam until I get burning paper, but that runs the risk of burning what’s underneath, too.
However, if the laser can move in the Z direction, you can set the focus one last time. It is still a pain, but either tune it for good burning paper or engrave a scrap board with fine lines and see how tight you can get the resolution. I’ve also seen people put a board at an angle, engrave it, and then figure out the sweet spot’s height. However, you do it, once you have it right, measure from the bottom of the laser housing to the piece and that’s your focal length. Then never rotate the lens housing again, so that number doesn’t change.
According to Ortur, the 15W laser I have should have a focal length of 55mm. Of course, the lens adjustment affects that, so you can’t simply measure that and be done, but it does give you a rough idea. But once you have the focus dialed in it should stay at that height as long as you don’t adjust the lens.
It is easy enough to 3D print or laser cut a little piece with that exact distance you need. I just did a rectangle, but you could also make something shaped like the letter “I” if you want to get fancy. Or, you can really go overboard with your 3D printer.
Armed with your spacer, you put your workpiece on the spoil board, put the spacer on top, and loosen the Z fixing screw. Then you slide the laser until it fits over the spacer, tighten the screw, and pull the spacer out. You are now focused! If you like a different focal length for engraving or cutting, you can create different spacers. For example, for engraving, you might want the focus on the surface of the item, but when cutting you might prefer the best focus to be a little deeper into the material.
What about Air Assist?
Making the focus repeatable has about the same effect on laser cutting and engraving that putting a bed sensor on a 3D printer does. It makes your use of the tool much more plug and play.
This session still left me with no air assist even though I had the bracket to support it. As I mentioned, I dreaded taking another bracket and plunging it into boiling water. Turns out, I didn’t have to. I found a nice design that doesn’t require boiling water and will adjust easily even if I change lenses. It also stays out of the way when homing the laser. But that’s a story for the next post.


My spoil “board” is a $10 1 foot x 2 foot weldable 22 ga steel sheet from amazon:
(M-D Building Products 56066 1-Feet by 2-Feet 22 ga Weldable Steel Sheet)
I lased a 20mm x 20mm grid with LaserBond 100 (200mm/s 85% power on a 50w CO2 machine). From my perspective it offers two benefits 1) Shouldn’t ever need replacement 2) I can clamp and level pieces with neodymium magnets. Future plan is to drill 5mm holes at the grid intersections to allow for a vacuum plenum. Of course, drilling 300+ holes is not something I look forward to doing.
> Of course, drilling 300+ holes is not something I look forward to doing.
Automate! “Just” replace the laser with a spindle. With any luck, the amount of time spent finding and fixing the “gotchas” will be less than the time to do it manually.
Or crack a beer and put something on Netflix.
Separately, air assist is great. Suggest an air brush compressor. They can be quite small and quiet, but also are oil free and if operated with a max system pressure of only 5 to 10 PSI or so, should avoid condensation problems. If the input can be choked to reduce flow and keep pressure low rather than choking the output then even better. Or get a Variac/thyristor speed control and slow it down. Air assist is about flow not pressure.
For my little diode laser I built a box out of furring strips and cut a hole in the side for a small “computer” fan. I cut paperboard and it comes in 8.5×11 sheets so I made the OD of my box that size. My initial plan was to wrap the box with 42 ga wire to make a grid, but I tried it without any support and it works great. The fan is just powerful enough to hold the stock flat and it doubles as a mild air assist and sucks the smoke away from the laser. As far as anchoring the laser, I just used duct tape on the legs to hold it to the table. No need to overkill with 3D printing etc.
It’s not going overboard to do something properly.
Suggesting duct tape as anything but a temporary measure or to hold ducting together, is just showing an apathetic attitude. I hope you take more care when using something as dangerous as a laser!
I haven’t used a laser cutter so this may be a silly question, but when you say “With your safety goggles on, use the lowest power where you can still see the laser”, aren’t the safety glasses supposed to make it so you can’t see the laser? I.e. they absorb the wavelength that the laser is producing?
Not too sure about diode lasers, but the CO2 lasers are at a non-visible wavelength, so the beam itself and reflections are eye hazards. However, the heat generated by the laser makes most substrates flare quite visibly.
Safety glasses don’t completely absorb the beam. They absorb most of it. Just like your microwave oven door doesn’t block 100% of the radiation. It blocks most of it. See https://www.youtube.com/watch?v=WnDjIDhxnMs (go to 7:37 for a visible example of glasses working).
Great video. Thanks for the link!
Tom, you might find this page interesting too, it goes into the “OD” rating of laser safety goggles.
https://noirlaser.com/laser-standards
– Laser safety googles never filter out 100% for any given wavelength
– They don´t filter out all wavelengths equally
– They reflect the beam they are supposed to filter but diffuse it (spread in all directions) also (back and through)
– Most diode laser cutters use visible (blue-to-uv) visible region
– The sensibility of the eye is high and non-linear with the light intensity: tiny amounts of light can be perceived.
So, yes, one can use this method to adjust the focusing of the laser. I would even add “do this with low ambient light”
And by the way: due to the lasing properties of the diode, the focus at low intensity might not be exactly the same than at full power.
For this reason, a z-axis is a super win. Just run a test pattern going up in 0.5 mm increments, and see which one gives you the cut you want. Then use that z-height. Bam.
A great majority of things on Thingiverse were designed by people who have no concept of mechanical engineering or printing parts efficiently without many supports. It is truly a hot mess, but it is free…
Nonenclosed laser cutters or engravers still scare me but I do think it’s cool you can accomplish so much on such a budget these days.