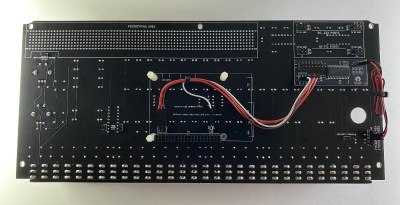
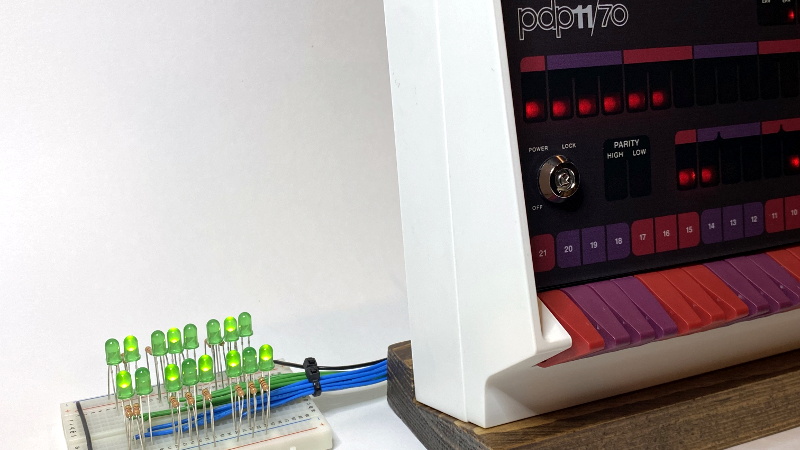
Like many Hackaday readers, [Steven Stallion] has had his eyes on the replica PDP-11 created by [Oscar Vermeulen] for some time now, and this summer he finally got the opportunity to build one himself. But while most owners might be content to just watch the Raspberry Pi based faux-retro computer blink away on a shelf, he wanted to explore putting the machine to more practical use. The end result is the PiDP-11 I/O Expander, an add-on that lets the modern minicomputer interact with the world around it.
Developed after some discussion with [Oscar] himself, the Microchip MCP23016 based expander board fits neatly onto the PiDP-11 PCB, and [Steven] has made sure his installation guide meshes well with the replica’s documentation. The Pi’s I2C bus is actually broken out on the original PCB, so you just need to solder a header on and run some jumpers to where the expander is mounted. You’ll need to pull 5 V as well, and the installation guide has a few tips on convenient connection points.

Each expander board gives you 16 GPIO pins which can be accessed over I2C, including support for interrupts which has been connected to GPIO 19 on the Raspberry Pi. [Steven] notes that you should be able to stack multiples of his expander up should you need even more free pins, though some fiddling with pull-up resistors and I2C addresses will likely be necessary.
The PCBs for the expander have been released under the two clause BSD license, so you’re free to spin up your own copies however you see fit. But if you’d like to save some time, [Steven] is offering assembled boards on Tindie.
Since [Oscar] first teased it at the 2015 Hackaday Supercon, we’ve been enamored with his fantastic PDP-11 replica. We’re always glad to see when somebody has picked up one of these wonderful kits, and doubly so when they’ve figured out a way to expand it in unexpected ways.


Good job on the project. In a prior career, I worked with PDP 11/34s running Unix System III and RSX. Modified a driver for IEEE-488 and remember discovering the FUBAR device register (Failed UniBus Address Register).
It’d be even neater to be able to add arduino support to the pdp-11 using a gcc C++ compiler (but Wiring would have to be somehow converted from Java), then one could write arduino sketches for a pdp-11 and see them working on a platform designed 50 years ago :-)
Well there’s the Unibone, a quad-height Unibus board with a BeagleBone Black on it which simulates memory, peripherals and so on for a real PDP-11:
http://retrocmp.com/projects/unibone
Years ago I worked for the company Scan Data. The original product was an high speed OCR machine of rather hefty size. It used the venerable PDP 8 and or 8E. The company added a board to the PDP 8 bus that would allow the correction of non recognizable characters that were kicked out as not being able to be read by the machine and operator could sit at the keyboard and put in the proper letter or number that was missing this was used for all insurance forms Billings and many other things. I had the pleasure of repairing the core memory boards. This tech was old by 1970 standards but there was a huge amount of software written for it.
It had diode to diode logic there was a paper punch reader mounted to a ksr33 teletype for allowing the entry of other programs and it had a toggle front panel in which you could load both the address and the data buffer of a particular location to make corrections. This was the same time that the Comadore 64 was competing with Apple and many other now extinct brand names including the Tandy TRS80 WITH it’s huge floppy disks. Z80- 6800- the infamous 6502 were some of the micro controller chips pressed ganged into use to create the later home computer revolution including the IBM PC.
I got excited when I saw this a few weeks ago, but didn’t see any info on how to make it show up on SIMH or access it via UNIX or any other OS. Without that, it’s really just a Raspberry Pi I/O expander, no?
Hey Paul, thanks for the interest! I have some good news for you – I’m working through adding support to SimH as we speak. Software support for the I/O expander is straightforward, however distribution will be a little difficult since the PiDP-11 sources are distributed as a tarball from Oscar’s site. I’m hoping to have something ready to go within the next couple of weeks. I’ll be sure to update the project page as soon as something is available!
P.S. Programming GPIO pins using the front panel switches has been the goal all along – I just wanted to get hardware in people’s hands sooner rather than later. There’s just something so damn satisfying about tactile feedback!
Cool, thanks Steven, I’ll keep my eye out for updates!
Hey Paul, I’m happy to report the software is finally complete! I’ll be updating the project page shortly, but you can find all of the details on GitHub: https://github.com/sstallion/pidp11
Nifty. I may have to look into this to extend usage of mine.
My PDP/11 70 replica just keeps chugging along. The computer behinds the scenes in a RPI 4 8GB which I also use for other services (like Pi-Hole, Time server for home network, redis, etc.) running in the background. Meanwhile the lights are blinking like a ‘real’ computer should :) .
Not only did I install and maintain PDP 11 systems, I still have one – a PDP 11/23. Sadly, lacking a hard drive (MFM drives are hard to source these days), it still boots from floppy (RX50).
One day, I’ll get around to emulating a hard drive for the poor old soldier.