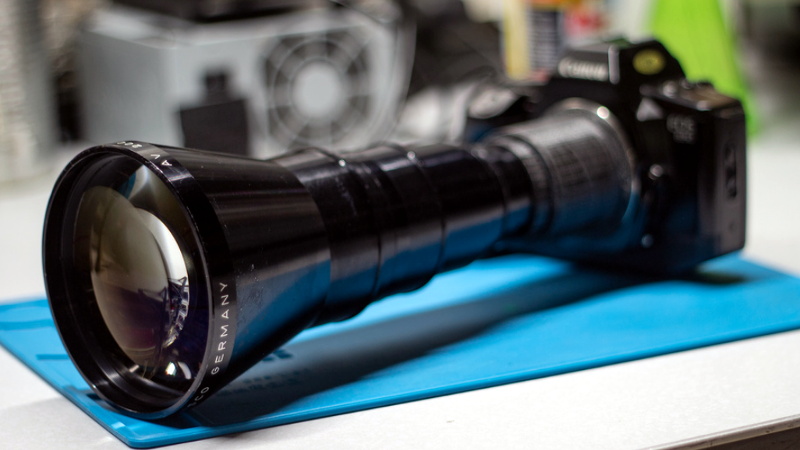
While browsing through an antiques shop, [Nick Morganti] came across a Kodak slide projector with an absolutely massive lens hanging off the front. Nearly a foot long and with a front diameter of approximately four inches, the German-made ISCO optic was a steal for just $10. The only tricky part was figuring out how to use it on a modern DSLR camera.
After liberating the lens from the projector, [Nick] noted the rear seemed to be nearly the same diameter as the threaded M42 mount that was popular with older film cameras. As luck would have it, he already had an adapter that let him use an old Soviet M42 lens on his camera. The thread pitch didn’t match at all, but by holding the lens up to the adapter he was able to experiment a bit with the focus and take some test shots.
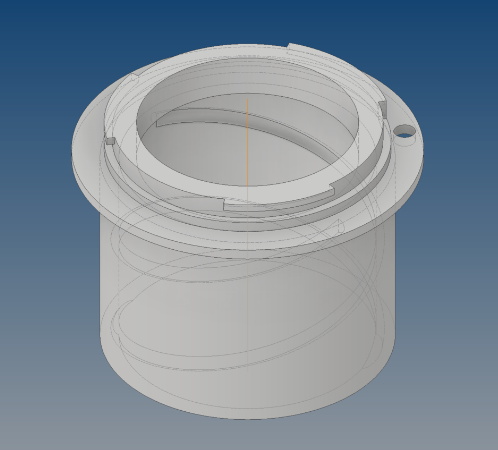 Encouraged by these early tests, [Nick] went about designing a 3D printed adapter. His first attempt was little more than a pair of concentric cylinders, and was focused like an old handheld spyglass. This worked, but it was quite finicky to use with the already ungainly lens. His second attempt added internal threads to the mix, which allowed him to more easily control focus. After he was satisfied with the design, he glued a small ring over the adapter so the lens could no longer be unscrewed all the way and accidentally fall out.
To us, this project is a perfect application of desktop 3D printing.[Nick] was able to conceptualize a one-of-a-kind design, test it, iterate on it, and arrive on a finished product, all without having to leave the comfort of his own home. To say nothing of the complex design of the adapter, which would be exceedingly difficult to produce via traditional means. Perhaps some people’s idea of a good time is trying to whittle a lens bayonet out of wood, but it certainly isn’t ours.
So it’s probably little surprise we’ve seen a number of similar projects over the years. From monstrous anamorphic adapters to upgraded optics for the Game Boy Camera, it seems there’s a healthy overlap between the 3D printing and photography communities.


This is great, it kind of makes me sad to see beautiful, old lenses sitting around not being used because they don’t fit on modern cameras, good work.
Probably a T mount which is M42x.75 vs M42 lens mount which is 1mm pitch.
Only caution I would make is that lens is really heavy with lots of leverage, so make damn sure the layer adhesion on the print is really good before you trust it to survive unsupported. Or perhaps update the design slightly with a few radial slot in strengtheners you print in the other orientation and glue (it won’t be required with the right filament, in the right condition (so having been properly stored/prepared) on a halfway reasonably tuned print profile for that material, but at the same time its pretty easy to add to the design, and won’t get in the way, might even feel nicer to use with some grip.)
Great project though, its always nice to see the old high quality optic somebody worked damn hard to produce being used for something, and seems like it often lends an interesting artistic flair when the ‘wrong’ lens is retrofitted.
Couldn’t you print a “mount” to screw into the tripod nut (whatever it’s called) to support such a long lens?
You can, but that probably then leaves your camera hanging off the back – as two tripods that close together would a nightmare, and the camera is probably valuable enough you would rather it didn’t hit the floor if the print peels, where dropping a cheap old lens its just the cheap old lens…
i’ve been machining mine for quite some time before 3d printers became popular. I agree having the strength there is something that is important. however most of these people use once or do it for quick youtube clickbait because it has been done countless times before. It is fun figuring out flange focal distances though with these lenses.
No iris, only the biggest f-stop?
It’s a projector lens, so never intended to be put on a camera and probably not of the highest optical quality either. Interesting project, but no actual application.
Pretty cool, but I don’t see any 3-D files posted there.
> exceedingly difficult
By what standard?
The modeled part on display doesn’t look that complicated to make even by hand if you just think about it.
This is definitely not too difficult with access to a machine shop but not a walk in the park either- plus I’d want to 3D print a prototype anyway to ensure the fit was right. Getting the odd pitch helical groove would be the main challenge- most manual lathes in the US have feed gearing that matches SAE pitches – so even cutting a standard metric thread on a lathe can take some wrangling. And just generally with optical parts you are trying to keep good concentricity across features- given the 3D print worked it seems there was some margin for error but just hand-tool fabrication might be tricky. If I were trying to machine this part I’d turn the round features on the lathe in a single op to keep things as concentric as possible and then do a couple mill setups for the off-center hole+ three locking lobes and then maybe a single point thread mill for the helical groove. Probably could get away with doing the groove on the lathe and the rest by hand too.
I was already thinking about how to build it “on the knee” out of tubes that fit into each other and can be glued or solvent-welded together, which turns the problem of an internal thread into an external thread, which can be done easily with hand tools and simple jigs.
How could you convert this design to metal? Could you machine this part from the 3d-files?.
You certainly could. Its really a job for a lathe, and wouldn’t be that bad to do on a manual lathe – though you would want one with a gearbox driven leadscrew for thread cutting capacity (or an electronic leadscrew conversion). But your CNC lathe could make most of the features on that sort of part pretty easily, if you have a 4 axis or greater CNC machine you could probably do the whole thing in one operation, throw metal billet in and wait while it works…
These days you could also try the 3d print it with metal powder filament followed by the sintering oven cook stage to make all that metal powder stick together and burn out the plastic, though that method seems to me to be far more effort than its worth generally, with shrinkage and warping to worry about – but I’ve never personally tried it.
Actually I was more picturing something that could screw into the camera tripod mount and then have another nut underneath for the tripod, something like this
LLLLCCCC
AAAAAA
T
T
L is Lens, C is Camera, A is Adapter and T is Tripod. (I know it’s am abomination of a “picture”.)
Might get in the way of adjusting the lens some, but yeah you could do that sensibly enough.
And never knock such adequate diagram created in text, even more so in the modern internet world where its hard to know if its going to parse the white space you left deliberately correctly or remove it etc, really cleared up exactly what you meant.