Advanced 3D Printing Tips

One of the best things about hanging around with other hackers is you hear about the little tricks they use for things like 3D printing. But with the Internet, you can overhear tips from people you’ll probably never meet, like [3D Printer Academy]. His recent video has a little bit of a click-bait title (“10 Secret 3D Printing Tricks…“) but when we watched it, we did see several cool ideas. Of course, you probably know at least some of the ten tips, but it is still interesting to see what he’s been up to, which you can do in the video below.

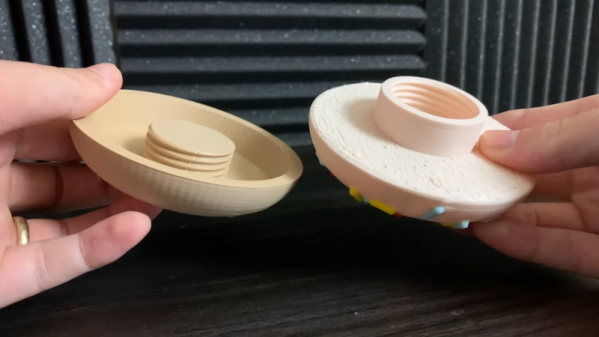
At one point he mentions 11 tips, but the title has 10 and we had to stretch to get to that number since some of them have some overlap. For example, several involve making printed threads. However, he also shows some C-clips, a trick to add walls for strength, and printing spur gears. Of course, some of these, like the gears, require specific tools, but many of them are agnostic.

Some of the tips are about selecting a particular infill pattern, which you’d think would be pretty obvious, but then again, your idea of what’s novel and what’s old hat might be different than ours. The explanation of how a print-in-place hinge works is pretty clear (even if it isn’t really a live hinge) and also applies to making chains to transfer power. We also thought the threaded containers were clever.

So if you can overlook the title and you don’t mind seeing a few tips you probably already know, you can probably take something away from the video. What’s your favorite “expert” trick? Let us know in the comments.

A lot of what we print tends to be enclosures and there are some good tips for those floating around. Of course, the value of tips vary based on your experience level. But if you are just starting out, you should check out [Bald Engineer]’s video of things he wished someone had told him when he started 3D printing.

Continue reading “Advanced 3D Printing Tips”

Printed Adapter Puts Vintage Lens Back To Work

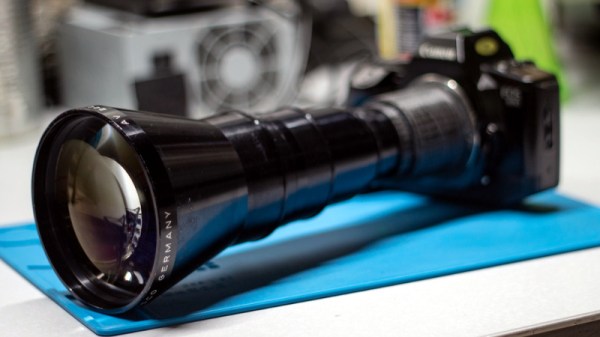
While browsing through an antiques shop, [Nick Morganti] came across a Kodak slide projector with an absolutely massive lens hanging off the front. Nearly a foot long and with a front diameter of approximately four inches, the German-made ISCO optic was a steal for just $10. The only tricky part was figuring out how to use it on a modern DSLR camera.

After liberating the lens from the projector, [Nick] noted the rear seemed to be nearly the same diameter as the threaded M42 mount that was popular with older film cameras. As luck would have it, he already had an adapter that let him use an old Soviet M42 lens on his camera. The thread pitch didn’t match at all, but by holding the lens up to the adapter he was able to experiment a bit with the focus and take some test shots.

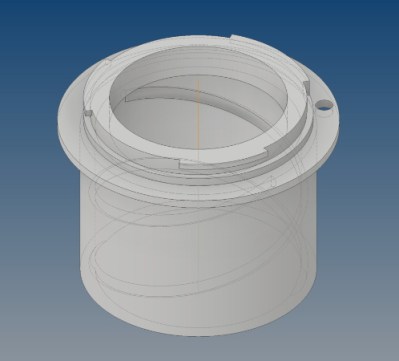
Encouraged by these early tests, [Nick] went about designing a 3D printed adapter. His first attempt was little more than a pair of concentric cylinders, and was focused like an old handheld spyglass. This worked, but it was quite finicky to use with the already ungainly lens. His second attempt added internal threads to the mix, which allowed him to more easily control focus. After he was satisfied with the design, he glued a small ring over the adapter so the lens could no longer be unscrewed all the way and accidentally fall out.

To us, this project is a perfect application of desktop 3D printing.[Nick] was able to conceptualize a one-of-a-kind design, test it, iterate on it, and arrive on a finished product, all without having to leave the comfort of his own home. To say nothing of the complex design of the adapter, which would be exceedingly difficult to produce via traditional means. Perhaps some people’s idea of a good time is trying to whittle a lens bayonet out of wood, but it certainly isn’t ours.

So it’s probably little surprise we’ve seen a number of similar projects over the years. From monstrous anamorphic adapters to upgraded optics for the Game Boy Camera, it seems there’s a healthy overlap between the 3D printing and photography communities.