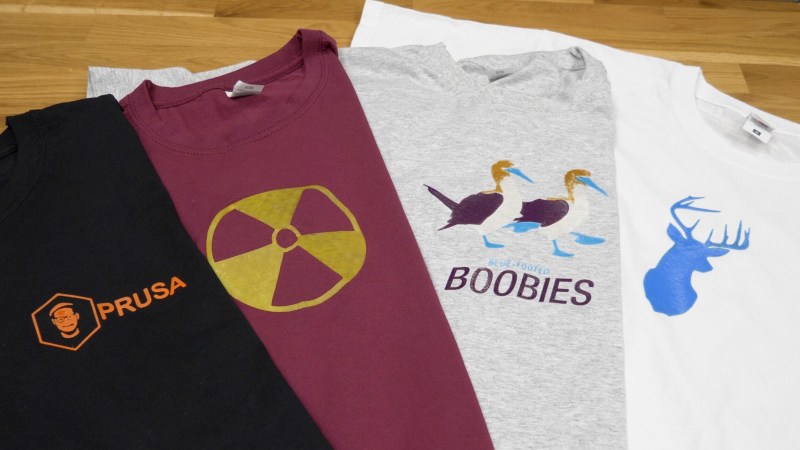
Want to make a t-shirt with a custom design printed on it? It’s possible to use a 3D printer, and Prusa Research have a well-documented blog post and video detailing two different ways to use 3D printing to create colorful t-shirt designs. One method uses a thin 3D print as an iron-on, the other prints directly onto the fabric. It turns out that a very thin PLA print makes a dandy iron-on that can survive a few washes before peeling, but printing flexible filament directly onto the fabric — while more complicated — yields a much more permanent result. Not sure how to turn a graphic into a 3D printable model in the first place? No problem, they cover that as well.
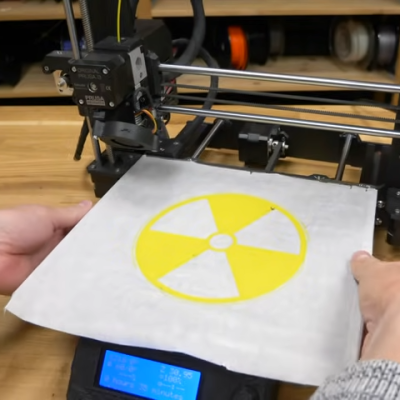
Making an iron-on is fairly straightforward, and the method can be adapted to just about any printer type. One simply secures a sheet of baking paper (better known as parchment paper in North America) to the print bed with some binder clips, then applies glue stick so that the print can adhere. A one- or two-layer thick 3D print will stick to the sheet, which can then be laid print-side down onto a t-shirt and transferred to the fabric by ironing it at maximum temperature. PLA seems to work best for iron-ons, as it preserves details better. The results look good, and the method is fairly simple.
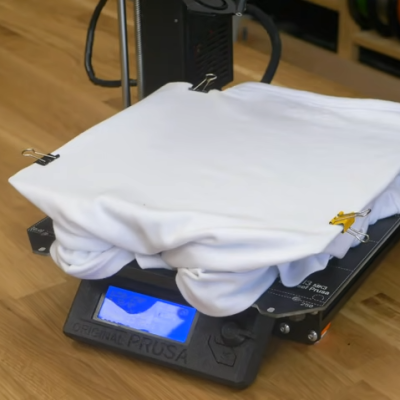
Direct printing to the fabric with flexible filament can yield much better (and more permanent) results, but the process is more involved and requires 3D printing a raised bed adapter for a Prusa printer, and fiddling quite a few print settings. But the results speak for themselves: printed designs look sharp and won’t come loose even after multiple washings. So be certain to have a few old shirts around for practice, because mistakes can’t be undone.
That 3D printers can be used to embed designs directly onto fabric is something many have known for years, but it’s always nice to see a process not just demonstrated as a concept, but documented as a step-by-step workflow. A video demonstration of everything, from turning a graphic into a 3D model to printing on a t-shirt with both methods is all in the short video embedded below, so give it a watch.
With Halloween coming up, here’s a reminder that 3D printing onto fabric can go interesting places with costume design, and this 2020 Remoticon presentation goes into all the nitty-gritty details of how to make that kind of approach work.


Why not use flexible filaments for iron-on method?
I thought the same, tried it out and it worked great. (20ShD filament). I just need to test the durability after laundry.
The blog post addresses this:
“Interestingly, flexible filament (even in one layer) tends to blur to the sides instead of soaking in the fabric. Ironing TPU and TPEE are therefore not recommended and we suggest printing them directly on fabric instead.”
A third way would be to print a stencil and use spray paint or some old rag to apply the paint.
yeah that’s just what i was thinking… it’s clever to print directly on the shirt and i’m sure it can be effective at impregnating the fabric, but i hate the uneven texture that results, even in professionally-produced shirts. but a paint or dye approach doesn’t alter the fabric’s properties as much.
whenever i’ve tried to make masks with the 3d printer, i’ve been disappointed by the regular stencil problem, my stencil floats above my target and i get overrun as a result. if you want to build a vacuum table though, it seems like it’d work real well for holding stencil to fabric!
you know, the more i think of it, the more i want to build some sort of knife plotter (i guess laser cutter would do it) and simply cut the stencils out of masking tape.
Agree with both of these. When I was a kid my art class made stencils out of waxed paper. We taped them to t-shirts and used a sponge to apply the dye (or maybe paint… can’t remember… too many years ago…). The stuff didn’t run and lasted for years.
Maybe printing a thicker frame around the thin stencil could make it rigid and easier to press against the surface.
A spritz of bleach is a really good way to take this approach as well. (Make a stencil, spritz some bleach, remove stencil.)
Well if you can print on the fabric you should be able to print on a screen and just print shirt like normal screen printing, and you can easily make more than one shirt per print.
I’ve done this method with good results. I found sticking the stencil to the fabric with glue stick helps stop the paint from bleeding under, then just washes away.
I’ve been meaning to one day try using my printer to draw on a t-shirt with a sharpie. The tough part for me will be getting the shirt on the bed. I don’t have a magnetic bed yet like in the video.
https://www.thingiverse.com/thing:910550
The only way that I can see this as a benefit over the traditional methods of putting a design on a shirt would be if you printed three dimensional designs onto the shirt (possibly only viable with the flexible filament). That way it is very unique. Maybe not in a good way, but unique,
If you don’t have access to traditional methods, but have a 3d printer and want a design on a shirt, that sounds like a huge benefit to me.
3d printed scale mail shirt. Simple-ish, and good for a medieval costume.