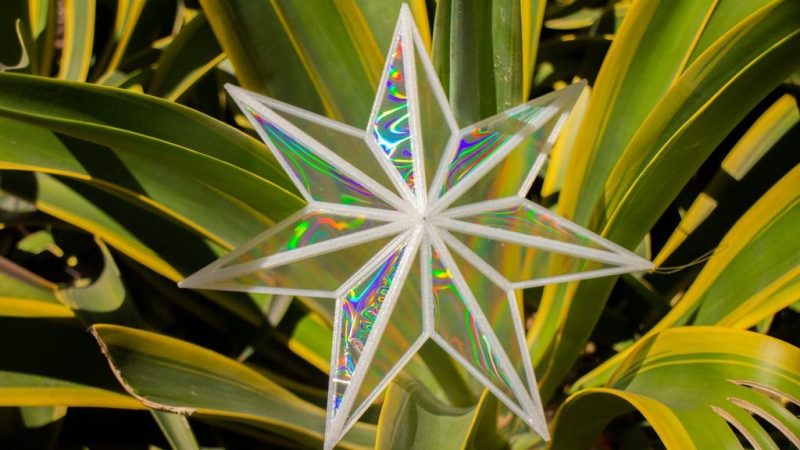
Diffraction gratings create beautiful rainbow patterns when interacting with natural white light, and [audreyobscura] was familiar with their properties. Thus, she set about producing an attractive 3D-printed suncatcher ornament that positively shines in the sun.
 The design is straightforward, consisting of a 3D printed frame made of pieces glued together using QuickGrab glue. The pieces come together into a 7-segment star design, with a subtle 3D structure to it which helps add strength in addition to looking good.
Once assembled, sections of plastic diffraction grating are cut to size using a Curio desktop cutter. These are then glued into each segment of the star. While it’s possible to 3D print pieces with diffraction-grating like effects, using the film in this way allows light to pass through the suncatcher to create a more impressive effect.
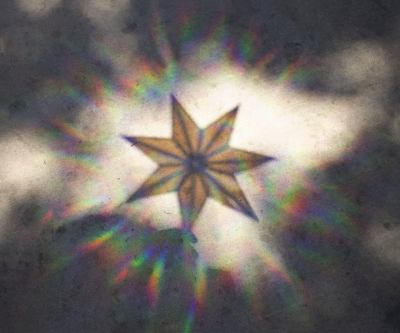
On a cloudy day, the suncatcher looks almost entirely unassuming. However, when Earth’s nearest star shines, it projects glorious rainbows throughout the room, and letting it sway in the breeze lets the light play across the walls.
It’s a nice build, and a relatively easy ornament to make even if you’re new to 3D printing. We do like a good bit of decoration around here, especially if it’s a tiny version of a real TV. Video after the break.
https://youtube.com/watch?v=ZjMyQ94mhWU%3Ffeature%3Doembed%26autoplay%3D1


There was me thinking this was entirely printed in a single piece, using a sheet of defraction grating to imprint the structure on the surface.
I do wonder, if a defecation grating sheet were pressed onto the sides of say a 3D printed cube, perhaps using one of those vacuum cleaner space saving bags for clothing. Then you were to heat it up to soften the plastic, could it be imprinted on all sides.
I don’t normally comment on typos, but ‘defecation grating’ is wonderful…
I have, BTW, seen this technique used to imprint diffraction gratings onto the surface of chocolate, producing iridescent colours without using any dyes.
For some reason this conversation reminds me of the drain plate in my shower.
As mentioned in the last several posts about shiny things.
Nice spotting. I didn’t even see that one as I was typing. That was a good one.
I have printed things with angled edges that are connected by a single layer of plastic. It comes off the bed as a single piece, then folds along the line where there’s a single layer of plastic. I think I left about 0.5 mm space between the two parts at the 2nd layer.
You want to make sure the first layer lines cross the intersection, not run parallel to it. Also, PLA can get brittle when it soaks up moisture from the air, so best to use ABS or PETG.
Waiting for the diffraction grating custom keyboard article in 3…2…1…
Well, aren’t you a dusty ray of sunshine!
Absolutely beautiful.