As one becomes more and more involved in hobbies that involve electronics of almost any kind, it becomes necessary to graduate from wall warts and USB power breakout boards and move up to something more substantial. One great way to do this is to repurpose an old computer PSU, and that’s exactly what the excellent writeup by [Mukesh Sankhla] shows us how to do.
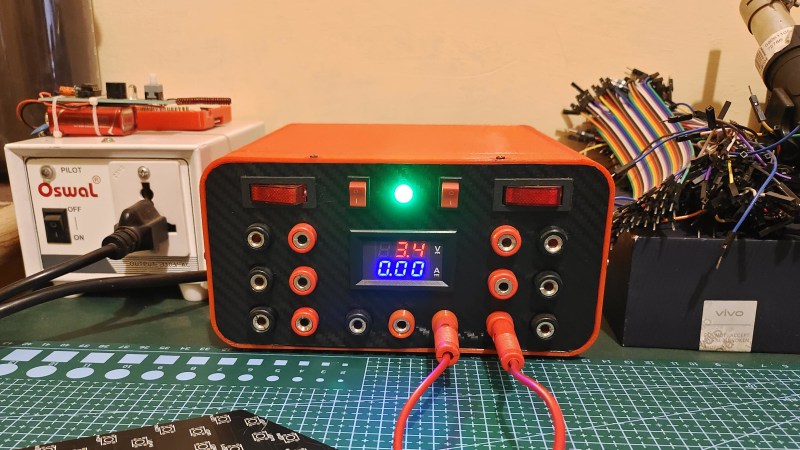
Starting with an ATX power supply from a derelict computer that was otherwise heading to to the bin, [Mukesh] walks us through the teardown of the power supply as well as how we can rebuild it in a snazzy 3d printed case complete with a voltage readout.
Now it’s easy to say “Sure, this is just another ATX PSU project” but the care that went into making a nice case adds a lot to build. There’s another element that is extremely important: The power resistor across the 5 Volt power bus. There are cheap kits online that will break out an ATX PSU into banana plugs, but they omit this vital piece. Depending on the ATX power supply being used, they may be unstable without the load.
The project also leaves a lot of room for adding your own hacks such as variable voltage and current limiting. We think this PSU would be a great (and great looking) addition to any hacker’s workbench. If ATX Power Supply get your electrons flowing, check out this entire computer built into a gutted ATX PSU.


Can’t or don’t want to source that big power resistor? When using old AT power supplies that absolutely required a load on the 5V line I used an old turn-signal bulb. It does the job, can also serve as a power indicator and since it’s running at less than half it’s rated voltage it will last just short of forever.
Yup, filament bulbs work great as low ohm resistors or dummy loads. 24V, 12V or 6V automotive ones can be had and household filament bulbs might be founds in some locations. (If a place has banned anything other than “energy saving” bulbs, you still might find 80-90W, “100W” equivalents or similar reduced consumption versions of oldschool filament bulbs that use halogen/tungsten tech or similar.)
>filament bulbs work great as low ohm resistors or dummy loads.
Huh. Why hadn’t I thought about this before? A filament light bulb is one of the few things I haven’t tried to load up on HF and make some CW contacts with.. Yet…
Just stick a Pi on it! Get useful computing at the same time!
“Depending on the ATX power supply being used, they may be unstable without the load.”
I think you’d need to find a real old PSU for the dummy load to be necessary.
I built two, with the oldest PSU used at least ten years old and they both function fine without.
I’ve bought surplus switching supplies intended for industrial use, and they had load resistors built in.
The voltages were more useful, too.
Now that’s just too many banana plug sockets. You don’t have to wire up every wire coming from the supply. ;) I do understand the impulse though. I also had no trouble with the 5v line on my psu that i salvaged.
I did have to wire something to ground, but I think it was the power button or the case lock security feature or something. That way I could turn it on with the switch in the back and it would just start outputting power. I kept the wires from the connectors as they were (except for the extras that I desoldered) and stuck alligator clips on the ends, then had a board with nails half hammered in and I stuck the clips on the nails to hold them out of the way and insulate them. Worked well till I outgrew it. Now I think it’s at the makerspace. Doesn’t look anywhere as good as this, but I was able to spend all that saved time on other projects.
I also recommend the little power supply module front ends from China (forgot the name ATM) paired with an old printer ac adapter. Those adapters give you most of the range you need and enough amps to make it useful.
If a compact design is necessary Anderson Power-pole works great.
“Anderson Power-pole works great.”
Only “Hams” think power-poles are “great”
Too much ARRL “kool-aid”
What power connectors do you like?
I’m pretty sure thats the connector that one of my APC/Dell UPS units uses to connect to the battery. What’s wrong with them? Cost per unit?
“I also recommend the little power supply module front ends from China (forgot the name ATM) ”
Do you mean this?
https://www.banggood.com/ATX-Power-Adapter-ATX-Computer-PC-Power-Board-Power-Supply-DC-Plug-Connector-+3_3V-+5V-12V-+12V-+5V-p-1572373.html?cur_warehouse=CN&rmmds=search
or this?
https://www.banggood.com/24-Pins-ATX-Power-Supply-Break0ut-Board-and-Acrylic-Case-Kit-with-ADJ-Adjustable-Voltage-Knob-Reset-Protection-ATX-Power-Converter-Board-p-1938594.html?cur_warehouse=CN&rmmds=search
I’m contemplating a build like this now; thanks for such a timely article!
Just keep in mind these things can source 20+ amps on some of the rails … Without current control you got to get it right the first time
The cheapo Chinese ATX boards have the load resistor and fuses on all the power rails. Stick in a low amp fuse and you’re all set
Couple of years ago i designed this one with a couple of polyfuses in each rail: http://dangerousprototypes.com/docs/ATX_Breakout_Board
Simple, effective and a bit more safer then the 20+ Amps the supply can generate.
The Seeedstudio links on that page are broken, it looks like seeed moved the page
Nice!
Wat? You don’t want a bench PSU and spot welder?
Without any labels on the banana sockets or any of the controls, it looks, well, unfinished.
Also is a printed plastic case a good choice for a high-voltage gadget that may put out a bit of heat?
its not high voltage nor is it going to produce enough heat to weaken the plastic before it shuts down
I’d count 350+ V as high voltage, and that is definitely present on the primary side…
If he’s using a stock ATX PSU that voltage is inside a metal box inside that plastic case… chill TF out dude.
The standards would disagree with you. High Voltage AC is defined as anything over 1000 V.
Using this PSU once is like eating over 9000 bowls of Horkin’ Fiber Chunks®™.
Nice 3D box, other than that it is a repeat of things we’ve seen over and over and over for the last 20 years. Should have color-coded the outputs. Also the choice of female banana connectors instead of a good BORNE+BANANA is not the best choice.
For sure some sort of current limit is needed for a bench supply. These ATX supplies will crank frightening amounts of current. Almost enough to jump start a car. If you are debugging and you short the wrong pins with your probe it can get ugly, welding the probe to the board is one outcome, or maybe a bunch of sparks shoot out and you might start a fire. A plain old fuse works or you can use fancy adjustable current limiters but you gotta do something. Been there done that .
The case looks nice.
I built one years ago before I bought a real bench supply.
No matter how old or new just put a load on the +5 supply. As stated by someone else a automotive bulb is fine.
You should float the ground so it’s not tied to earth. If anything toss on a switch to float the ground when needed. With the ground bonded to Earth it can be harmful with other test equipment that is earth ground referenced.
Ignore the -12 rail.
Toss on a couple of fuses and LM317s to get some constant current control so if you hook up DUT that is malfunctioning you’ll won’t pump 20 something amps into it. Put on a Buck converter on the +12 rail to get an adjustable constant voltage.
You don’t need a dummy load resistor unless it’s a >20 year old ATX PSU that has a -5v rail.