More Ideas For Setting Up An Electronics Workbench

Setting up an electronics work area is a highly personal and situational affair, with many interesting problems to be solved, and for many of us, significant budget constraints. The requirements for electronics development vary wildly depending upon the sort of work to be undertaken, but there is core equipment that many of us would consider a bare minimum for usability. [Badar Jahangir Kayani] is at the start of his career as an electrical engineer, and has documented the kitting out of his personal work areas for others to learn from.

A place for everything, everything in its place

As we already touched upon, the cost is often the main driving factor determining what we end up with, and this cost-vs-performance/quality tradeoff is what makes some of us fret over a buying decision. Buying secondhand off eBay is an option, but a lack of warranty and the unknowable condition are not great selling points.

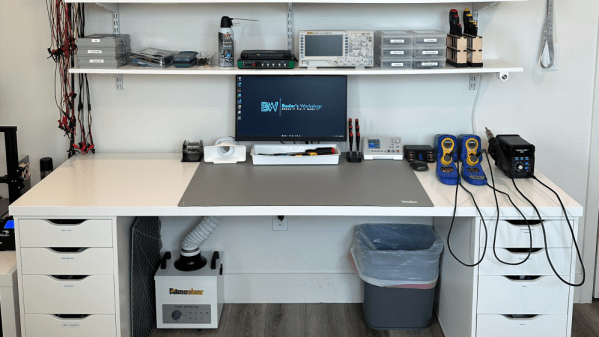
[Badar] has a good grasp of the basic concepts of usability, such as keeping the most frequently used tools, instruments, and components out in the open. Less frequently used stuff is stored in drawers, bins, and compartment boxes. Buying the same storage systems keeps things as consistent as much as possible since it makes storing them easier. We were particularly interested in the use of the cloud-based database solution, Airtable used to create a parts database for minimal outlay.

Oooh! Cable tray action

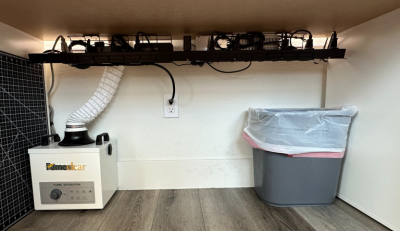
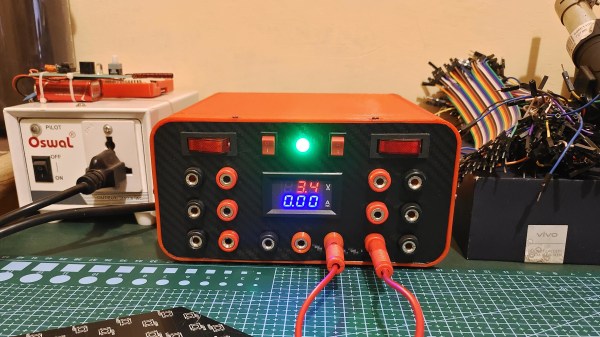
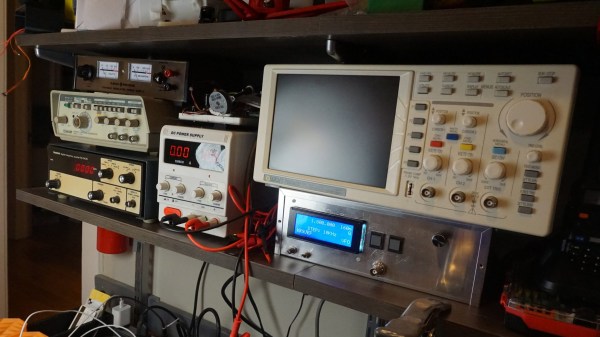
There is also a lot of detail about how to walk that cost/quality/performance tightrope and get the best-valued gear currently on the market. Some notable examples are the UNI-T UT61E Digital Multimeter for general test use, the Controleo3 reflow controller for SMT assembly, and the Omnifixo OF-M4 magnetic fixament kit for that fiddly wiring part. [Badar] also recommends the FumeClear Solder Fume Extractor, although they lament that particular bit of kit is still under evaluation.

Obviously, we’ve talked about work areas a lot on these pages, like this time. For those with more space, this flippin’ awesome bench will be of interest, and if space is tight (or travel is a regular thing) might we suggest this 3D printed DIN-rail mounting cube as a starting point?

DIY Bench PSU Looks Like A Million Bucks But Is Easy On The Budget

As one becomes more and more involved in hobbies that involve electronics of almost any kind, it becomes necessary to graduate from wall warts and USB power breakout boards and move up to something more substantial. One great way to do this is to repurpose an old computer PSU, and that’s exactly what the excellent writeup by [Mukesh Sankhla] shows us how to do.

Starting with an ATX power supply from a derelict computer that was otherwise heading to to the bin, [Mukesh] walks us through the teardown of the power supply as well as how we can rebuild it in a snazzy 3d printed case complete with a voltage readout.

Now it’s easy to say “Sure, this is just another ATX PSU project” but the care that went into making a nice case adds a lot to build. There’s another element that is extremely important: The power resistor across the 5 Volt power bus. There are cheap kits online that will break out an ATX PSU into banana plugs, but they omit this vital piece. Depending on the ATX power supply being used, they may be unstable without the load.

The project also leaves a lot of room for adding your own hacks such as variable voltage and current limiting. We think this PSU would be a great (and great looking) addition to any hacker’s workbench. If ATX Power Supply get your electrons flowing, check out this entire computer built into a gutted ATX PSU.

What Does An Electronics Tinkerer’s Workbench Need?

Ever been in a situation where you’re not sure where to begin building your own electronics workbench or improve your existing one? [Jeff Glass] writes in with a blog post as detailed as it is beautifully long, chronicling each and every part of his own home lab in order to give us some ideas on how to get one started.

Despite [Jeff] using his own workbench tools accrued over 10 years of working in the field as prime example, his guide takes into account that you don’t need the latest and most expensive in order to get working. Affordable examples of the tools presented are suggested, along with plenty of links to follow and what to look for in each one of them. He even goes on and aside to note the lack of affordable versions of bench-top multimeters, seeing how the portable counterparts are so cheap and plentiful in contrast.

However, contrary to [Jeff]’s claims, we would argue that there are things you could do without, such as the oscilloscope. And you could use a regular soldering iron instead of a soldering station if you are in a pinch. It just depends on the type of work you’re looking to do, and simpler tools can work just fine, that’s what they’re there for after all. That’s not to say his advice is all bad though, just that every job has different requirements, and he notes just that in the final notes as something to keep in mind when building your own lab.

Lastly, we appreciate having a section dedicated to shop safety and the inclusion of soldering fume extractors in the recommendations. We’ve talked about the importance of fire safety when working with these tools at home before, and how soldering is not the only thing that can produce toxic fumes in your shop. With no shortage of great tips on how to build your own fume extractors, we hope everybody’s out there hacking safely.

Tiny Function Generator On The ATtiny85, Complete With OLED

It’s easy to have a soft spot for “mini” yet perfectly functional versions of electronic workbench tools, like [David Johnson-Davies]’s Tiny Function Generator which uses an ATtiny85 to generate different waveforms at up to 5 kHz. It’s complete with a small OLED display to show the waveform and frequency selected. One of the reasons projects like this are great is not only because they tend to show off some software, but because they are great examples of the kind of fantastic possibilities that are open to anyone who wants to develop an idea. For example, it wasn’t all that long ago that OLEDs were exotic beasts. Today, they’re available off the shelf with simple interfaces and sample code.

The Tiny Function Generator uses a method called DDS (Direct Digital Synthesis) on an ATtiny85 microcontroller, which [David] wrote up in an earlier post of his about waveform generation on an ATtiny85. With a few extra components like a rotary encoder and OLED display, the Tiny Function Generator fits on a small breadboard. He goes into detail regarding the waveform generation as well as making big text on the small OLED and reading the rotary encoder reliably. His schematic and source code are both available from his site.

Small but functional microcontroller-based electronic equipment are nifty projects, and other examples include the xprotolab and the AVR-based Transistor Tester (which as a project has evolved into a general purpose part identifier.)

The internals of a home built 10 MHz frequency reference.

Low Cost Lab Frequency Reference

[Mark] wanted an accurate frequency reference for his electronics lab. He specified some requirements for the project, including portability, ability to work inside a building, and low cost. That ruled out GPS, cesium standard clocks, rubidium standard clocks, and left him looking for a low cost Oven Controlled Crystal Oscillator (OCXO).

The Low Cost 10 MHz Frequency Reference is based around a Morion OCXO. These Russian oscillators are available from eBay second hand at about $40 a pop. With a stability well within the requirements, [Mark] order a few.

The next step was to stick all the components in a box. The two OCXOs in the box need about 3 amps to heat up, which is provided by a 12 V PSU. For portability, a sealed lead acid battery was added. The front panel shows the supply voltages, switches between mains and battery supplies, and provides connectivity to the OCXOs.

Since OCXOs work by heating a crystal to a specific temperature, they can use quite a bit of power in the heating element. To increase battery life, a neoprene foam insulator was wrapped around the OCXOs.

For less than $100, this portable tool will aid in calibrating equipment or creating very accurate clocks.

Neosporin…the Retrobright For Bench Equipment?

polishing-knobs

[linux-works] picked up an old power supply from eBay, and as it was built back in the 60’s or 70’s, it was in need of a little TLC. One thing that immediately caught his eye was the condition of the knobs, dials, and banana plug receptacles – they were dull and faded, showing off 40+ years of heavy usage.

He started off by simply removing the knobs from the power supply, giving them a thorough cleaning with soapy water before leaving them to air dry. They didn’t look any better afterward, so he decided to take a different approach and apply some triple antibiotic ointment to the knobs. As it turns out, letting the ointment sit for a few minutes then wiping the knobs with a soft cloth really made them shine, as you can see in the image above. [linux-works] attributes the effect to the white petrolatum base of the product rather than the antibiotics, likely making a wide array of products equally suitable for the job.

We know how well Retr0bright has worked for the vintage computer folks, so we’ll be interested to see how long the effects of the triple antibiotic treatment last. It certainly can’t hurt those readers who spend their time perusing flea markets in search of classic electronic equipment.