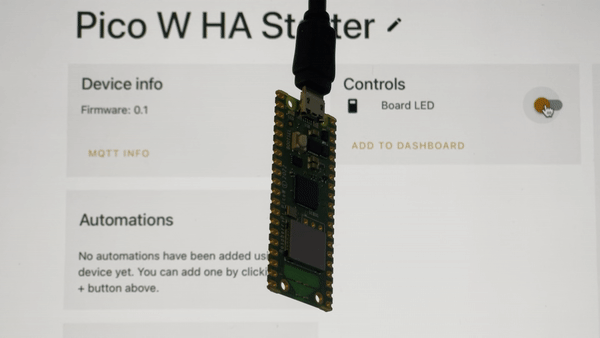
Many of us hacker types with some hardware knowledge and a smattering of embedded experience would like to get into home automation, but there can be quite a learning curve. If you’re looking for a hackable starting point; something to deploy, learn about and then later expand upon, then look no further than the PicoW Home Assistant Starter project from [Danilo Campos].
The project is based upon the arduino-pico core, which supports a whole pile of RP2040-based boards, so you don’t need to restrict yourself to the “official” Pico-W, so long as you have working networking, Wi-Fi or otherwise. Integration is provided by the arduino-home-assistant library, which acts as the bridge between your sensors and other widgets, MQTT, and thence the network beyond. Events and sensor data on the end-point are packaged up with MQTT and published out to the broker via the network provided, all for minimal initial effort. Once you’ve got the basic connectivity to your Home Assistant instance working, there are many code examples in the arduino-home-assistant GitHub page to give you a helping start to connect whatever tickles your fancy.
It turns out we’ve covered HA quite a bit on these fair pages, like for example, these sweet automated window blinds. Another hack uses load cells under the bed legs to detect if someone is in bed or not, and if this isn’t your thing, maybe your idea of a home assistant is a bit more like this one?


Nice !
If you can’t get your hand on a pico w, try Esphome with some esp8266 (i.e. d1 mini)
Might even be easier.
Looks helpful for a project, thanks for the tip
Why load Arduino emulation on top of Raspberry pi pico hardware?
Not trying to troll, I just don’t get it. Not like native pi libraries don’t exist. Is the pi too fast or something? You can drop it’s clock to save power.
IMHO Something better came along, move along.
I’m assuming about the emulation, didn’t look into the details.
As you are not trying to troll…
This project is a starter system, in other words, it is baby food, once past toddlerhood, you can grill the steak.
Pi has native baby food. Python.
I still don’t get it.
I’m assuming all the layers add complexity, so make for bad baby food.
It’s all about familiarity. Someone might be familiar with C but not Python. I know that many people start hardware hacking with Arduino just like I did. Python may be simple for experienced programmers, but it’s still something new to conquer for a beginner.
You’re mistaking the Pico, a microcontroller from the raspberry pi foundation, with the Raspberry pi itself. This project uses a Pico. On that hardware, arduino code is native, python is not. A subset of python (circuitpython) can run on it, but it’s slower than native code. Therefore it makes total sense to use arduino libraries for this.
Hope that clarifies things for you.
It isn’t emulated. You’re getting native compiled code. arduino-pico is the infrastructure and SDK glue to get the Wiring framework + libraries for a RP2040. Wiring is C/C++.
What does it get you but added complexity?
Wouldn’t it make more sense to port the framework and libraries? Assuming the equivalent don’t already exist.
You can do whatever you want. That’s the great thing about OSS.
@HaHa said: “Why load Arduino emulation on top of Raspberry pi pico hardware?”
There is no emulation. To accommodate the Pico in the Arduino IDE, just like the ESP32/ESP32 boards (or any other board), you simply install a compatible Core.[1][2] Once that is done you compile your C/C++ source natively just like you would with any other supported board. Your programs run faster and without the added bloat that comes with Python.
I have found one big advantage to using the Arduino IDE with any board. It is available in a portable stand-alone version for either Windows or Linux (I don’t know about macOS). No annoying installer involved, no new directories created where you do not want them, all your environment and file type preferences remain untouched. You can install/upgrade/downgrade/delete boards and/or libraries at will. The portable IDE instance can be zipped to an archive file and saved as a future-proof IDE snapshot in time.
Almost all Arduino Libraries work with the Pico but sometimes a minor tweak or two is needed. There is a list of Pico/RP2040 arduino libraries as well.[3]
1. Raspberry Pi Pico Arduino Core
https://arduino-pico.readthedocs.io/en/latest/
https://github.com/earlephilhower/arduino-pico
2. Program RP2040 in Arduino
https://learn.adafruit.com/rp2040-arduino-with-the-earlephilhower-core/overview
https://learn.adafruit.com/rp2040-arduino-with-the-earlephilhower-core?view=all
https://cdn-learn.adafruit.com/downloads/pdf/rp2040-arduino-with-the-earlephilhower-core.pdf
3. Rp2040 Arduino IDE Library List
https://www.arduinolibraries.info/architectures/rp2040
I recently got into home automation. I went the route of buying the esp based Sonoff smart switches. They’re cheap and we’ll documented for hacking. It’s convenient to have premade hardware I can flash with tasmota (a very nice custom firmware for MQTT support). I also decided to use OpenHAB, which was the biggest part of the learning curve for me. I’m still not quite sure why there are so many layers (items, things, etc) to implementing a device, but once you figure out the main steps, you can get most things to work with little trouble.
I decided to go this route for a couple of reasons: it’s all capable of working locally with no cloud connection, and it can all be set up without an internet connection. Home Assistant wouldn’t install properly until I finally got internet hooked up in my new home, and by then I was already rolling with OpenHAB.
Tasmota can also simply be installed on any old esp to be instantly up and running with MQTT support, and then it’s a simple matter to hook up sensors like you would with any hand made microcontroller. You select the pin assignment of sensors in the web browser based config tool, and the sensors just work. If you hook up something new or unknown, you can code it in manually or with setting parameters manually via “command line.”
Home Assistant seems to be the simpler system overall, but perhaps at the cost of customization. On this point I’m assuming, because I couldn’t get it to install properly due to the aforementioned lack of internet connection at the time.
Do you know when the aurduino nano 33 ble sense will be available?
Do not get this: why not run HA natively on an odroid or rpi? What does this add, that an rpi with native HA image doesn’t do?
After all, the biggest learning curve is HA itself, installing it is trivial, you can even launch it as a virtual appliance or docker container
Answering myself (maybe the article could have made this clearer?):
This is not a HA server!
This is an OSS example of HW&SW that, with minimal hassle, shows up as devices in HA that can be immediately used and acted upon.
Coming up with all of this would be very time consuming due to the complexity of the layering that HA demands before accepting data streams as actual devices (though Mqtt does simplify things)
“Why load Arduino emulation on top of Raspberry pi pico hardware?”
I could have done this with a 555 :)
I wish I would have more carefully auditioned software alternatives before getting too deep into HomeAssistant to dread doing it all again.
Like how I regret taking so long to switch from Windows to Linux.
This seems more difficult and expensive than using an ESP8266 or ESP32 which have full integration and first party support for home assistant? With ESP-home you can edit and flash new code from inside home assistant, update, and change wifi credentials. What is the benefit of the pico w?
Esphome supports the Pico W. I find that much more convenient.
Indeed! The ESPHome firmware is being ported to several new platforms at the moment. I did a cursory port to the STM32 platform last year, Jesse (one of the maintainers) did the Pico W port, and there also a port to a large number of Tuya microcontrollers underway under the LibreTuya banner. All of which is super awesome to see!
One other possibility that might be worth exploring is a port to the regular Pico (non-W) board, using the USB networking capabilities (RNDIS, CDC-ECM) supported by the TinyUSB stack that the Pico makes use of. Set up the Pico to enumerate with a USB-Serial and ECM/RNDIS endpoint, and you should be good to go!
Admittedly it requires more complicated networking to actually communicate with anything, unless you are directly plugged in to the server running Home Assistant, in which case it is just a point to point link with no routing or NAT required.