[ArduinoNmore] took an interesting approach to designing a counter intended to accurately display how many meters of filament a 3D printer has used. The Filamentmeter looks a little bit like a 3D printed handheld tally counter (or lap counter) but instead of a button to advance each digit, the readout represents how many meters of filament have gone through the extruder.
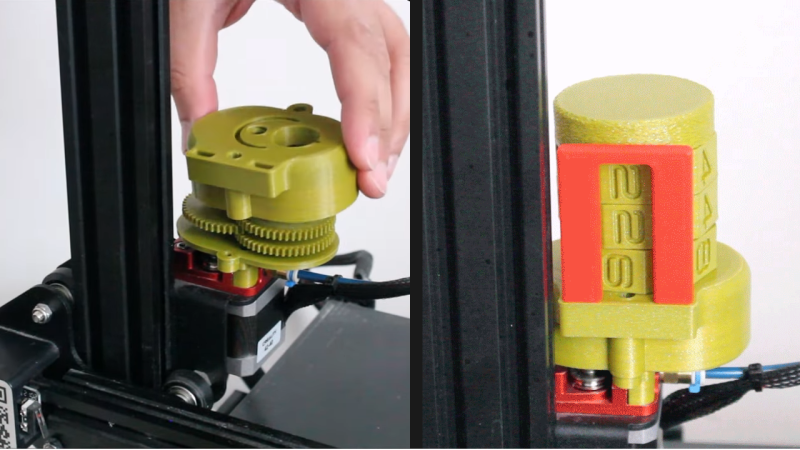
At first glance it may look like there is a motor hidden inside, or that the device is somehow sensing the filament directly. But it’s actually the movement of the extruder motor that drives the device. A small spur gear attached to the printer’s extruder drives a series of gears that advance the digits. This means that retractions — small reverses of the extruder motor during printing — are properly accounted for in the total, which is a nice touch.
[ArduinoNmore] designed this for the Ender 3, and the Filamentmeter relies on a specific extruder design and orientation to work properly. Of course, since it’s 3D printed, modifying the design for your own purposes should be pretty straightforward.
Curious? The design is being sold for a few bucks, and there is a free test piece one can print and use to confirm whether the design will work before mashing the buy button. Non-free printable 3D models can be a world of buyer beware, but test pieces and solid documentation are good ways to give buyers confidence in your work.
The insides of the unit are really quite intricate, with a clockwork-type elegance to them. You can see it all in the short video, embedded below.


Does not account for material slip and deformation.
Just buy a scale and weight your filament.
weight≠length
Why ? Shouldn’t be a problem if your filament has the same diameter and density all along the length, which is largely true, if you don’t use half-assed homemade filament.
Weight will almost certainly change with age, at least a little. No filament is entirely above absorbing moisture, or collecting dust, some are a little brittle and less than perfectly homogeneous so shed the odd flake off their outer shell.
Comparing weight before and after a print can give you a good indication – but again the weight is complicated by the mass of the spool likely being an unknown, so you never knew how much filament there really was until the end.
That said this is a fun odometer I can’t see a real use for.
I doubt this is appreciably more accurate than what the slicer tells me, and since I typically don’t burn through an entire spool of filament without changing it I would have to separately log the results either way.
But why? Who measures their filament? I know I don’t, nor do I feel the need to.
FYI- The person who doesn’t want to “think” they have enough filament for a print then runout at 24/25hrs
Love it! I can always appreciate a good mechanical design project since the best I can do with CAD is a solid cube
I hear you and like-minded folks disaffected with CAD complexities, and I have an answer for you: OpenSCAD!
Here’s your cube:
cube([20, 20, 20]);
Type in the above line in OpenSCAD, press F5, F6, and then F7 to save your model, and you’re finished, ready for slicing!
No menus, no workplanes, no mousing about trying to pull, push and prod blobby shapes, no proprietary file formats, I really can’t think of any other CAD application where an absolute beginner can have a finished “Hello World” STL so quickly.
Almost forgot: and no cloud connectivity required either!
I agree. Once you learn how to look at the world as primitives, you can make anything, you can make it faster, and you can make it more exact.
Mainsail/Fluidd tells you that, along with something actually useful: Hours of print time (useful for MTBF).
Right now I use the slicer to tell me how much filament I will use then actively update a sticky note on the drybox after updating the tds verified density in cura (because what if you change filament? Then this wouldn’t work)
seems superfluous to me. extruders seem to be pretty good accountants of how much material goes through it. tweak the firmware of your cnc controller to dump the counts over an io pin if you absolutely need a solid measurement.
Cool I guess, but seems specific to that model of 3D printer. I have a dozen devices and this would fit on exactly none of them.
This only adds more weight on the x-rail and more work for the extruder stepper for a limited convenience.
Cool design. If my printer didn’t already keeps track of that + print time it might be an interesting mod to add.