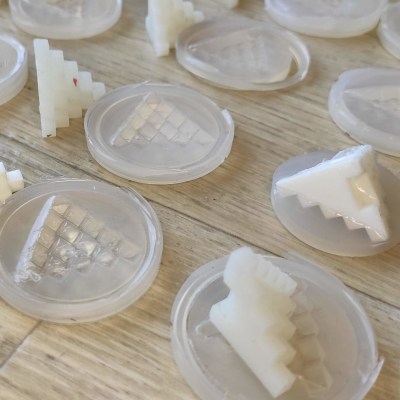
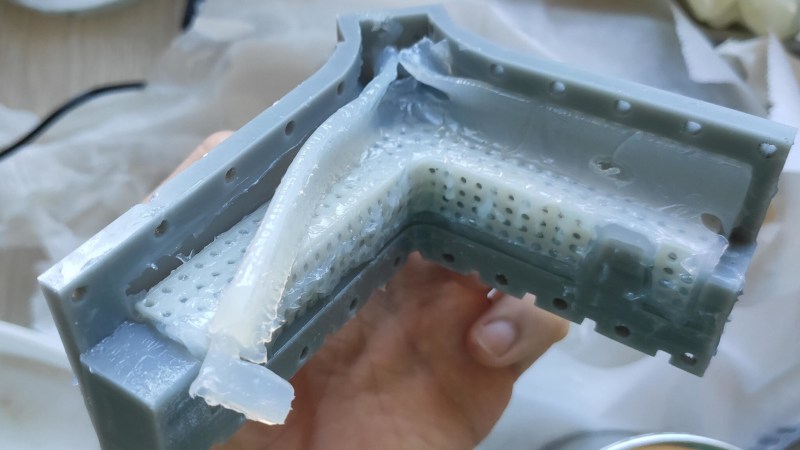
Casting parts in silicone is great, and 3D printing in resin is fantastic for making clean shapes, so it’s natural for an enterprising hacker to want to put the two together: 3D print the mold, pour in the silicone, receive parts! But silicone’s curing process can be inhibited by impurities. What’s cure inhibition? It’s a gross mess as shown in the image above, that’s what it is. Sadly, SLA-printed resin molds are notorious for causing exactly that. What’s a hacker to do?
Firstly: there are tin-cure and platinum-cure silicones, and for the most part tin-cure silicone works just fine in resin-printed molds. Platinum-cure silicones have better properties, but are much more susceptible to cure inhibition. Most workarounds rely on adding some kind of barrier coating to molds, but [Jan Mrázek] has a cheap and scalable method of avoiding this issue that we haven’t seen before.

[Jan] goes into a lot of great detail about this issue and his results, but here’s the short version: after carefully cleaning the resin printed mold to ensure absolutely no uncured resin is left on the surface, he submerges the print in water. The print (sitting in the water bath) is exposed to external UV curing for 30 minutes, followed by a 6 hour soak in the water. After this, the water is changed and the process repeated. That seems to be all that is needed to end up with an SLA-printed resin mold that doesn’t inhibit silicone curing. It sounds simple, but getting there was anything but.
That process applies best to thick-walled molds; there is a second process for thin-walled molds with fine features. Why? Because resin prints absorb water to some degree. A thick-walled print won’t care much, but a thin-walled one can’t sit in a water bath for 12+ hours without expanding and deforming at least a little. To deal with that, [Jan] seals small prints with a thin layer of acrylic (PMMA) after the initial cleaning.
Coating something in a fine layer of acrylic is easier than it may sound. [Jan] simply dissolves a small piece of clear acrylic in a quantity of acetone. Acetone is a poor solvent for acrylic, but it’s readily available and it does work if given a few hours. Once a roughly 1% solution is made, simply dip the cleaned and dried resin part into the solution, allow it to dry completely, then repeat. As a bonus, molds treated with an acrylic dip do not need a release agent: silicone simply refuses to stick.
As usual, [Jan] provides plenty of photos and details of what did and didn’t work as he zeroed in on a process. However, he does acknowledge that there still remain variables he hasn’t been able to identify or control. His process is overall a great success, but about 5% of the time, curing will be inhibited for no apparent reason. So for now, he always tests a new mold with a small amount of silicone to check for cure inhibition before committing to anything; cleaning cure-inhibited silicone is a real pain.
[Jan] does a lot of casting of parts in silicone, so this issue is something he’s certainly invested in. We always love to see the unusual approaches and fine attention to detail [Jan] brings to all kinds of aspects related to SLA printing in resin, whether it’s figuring out how to improve dimensional stability, or making and using flexible build plates before they were cool.


I’ve tried this process it does work. I’ve gotten inhibit-x to work reliably with less steps. I do coat my molds in the pmma solution It smooths out the layer lines. It also makes it easier to pull the silicone part out.
I use 3D printed molds for silicone everyday. Try heating the part straight out of the printer, do rinse off with alcohol. No UV. 80 C for 4 hours.
Did you use platinum-cure silicone or tin-cure silicone?
Platinum cure, its PDMS. Check out this paper and its supplementary information. https://pubs.acs.org/doi/10.1021/acs.analchem.0c04944#
I second the baking resin prints helping with platinum cure (specifically skin-safe platinum cures for me)
Hi newbie here, after baking can I still sand the model? I have some lines I want to sand. Or do you recommend sanding before baking?
Also curious this aspect, we have a few processes obviously after final process of dipping in PMMA there would be no futher post processing like sanding, but how about after (1) IPA washes, (2a) soap or Water bath with or without UV and/or (2b) baking without UV light when I best is best time to do Futher sanding of model if it needs it?
The white frosty stains are ok. I’ve noticed if it’s hot outside ( I have to work out ) I’ll get those. If the pmma ratio is to high it’ll happen also.
I only use platinum cure silicones for dimensional stability, practically zero shrinkage, and mold longevity. I have some 20+ year old molds that still work as good as the day they were made.
Clear lacquer spray paint does not cause cure inhibition. Enamel spray paints will, until they have sat around to dry for a very long time.
I’ve been doing a similar process with PLA prints and platinum cure silicone and haven’t had any (curing inhibition) trouble to speak of. The weather is getting cooler and I’m hoping that doesn’t screw things up.
That’s because PLA does not inhibit silicone curing, resin materials do.
Canola oil has worked well for me, believe it or not. Just wash it off with dishwashing soap or it will oxidize and leave a sticky film.
I buy cheap cooking spray canola oil, give the parts a spritz, then wipe with Qtip – pay attention to corners.
If your mold is smooth this leaves a pretty glassy cured piece.
How exactly do you make your PMMA solution, what is the 1%?
Is the PMMA is 1% and the Acetone 99%,
or is it PMMA + Acetone 1% and 99% water?
And if there was a higher percentage of solution would it coat it better, or if left for longer or more rinses etc?
Some small further details about this process is greatly appreciated.
I suggest reading the original blog post – there are probably answers to you questions.
Namely:
– “I quickly dip dried and cured pieces into a 1% solution of polymethyl methacrylate (PMMA) in acetone.” – that is 1 % PMMA and 99 % acetone (PMMA doesn’t disolve in water).
– and “Test samples for coating. The “30” sample was coated with too concentrated solution of PPMA (there are white stains on the surface), whereas “40” sample was coated just right”. The 1% is a compromise between making a nice and even coating and leaving stains.
Thanks for the orignally article and the quick response to my question Jan, I look forward to trying it out this week. So 1% PMMA in 99% Acetone will see how it dissolves and do a dip test on a few parts to see how the staining effects the Platinum cured silicone I want to mold ->(Vario 40 and 15).
Where does one acquire PMMA? Would a polymer gloss medium for acrylic paint have the same effect? I have used a floor polish that contains acrylic to smooth out layer lines, would that work?