Consumer-grade 3D printing is good for prototyping and making relatively soft plastic stuff. If you wanna make tough things, though, it’s really hard to beat the strength of metal. [Shake the Future] has produced a guide on using 3D printing in a process to produce solid parts out of actual cast iron.
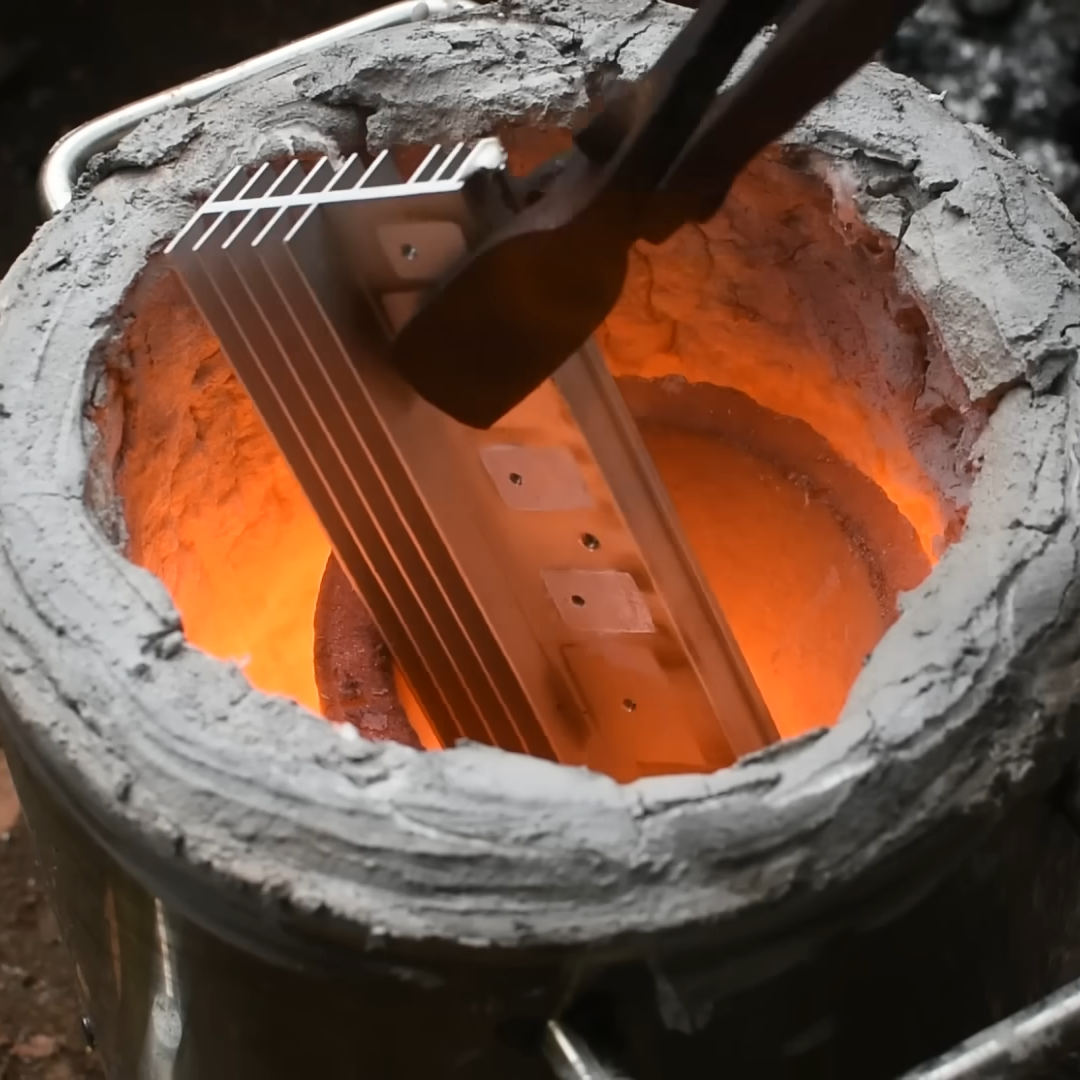
The concept is simple. [Shake the Future] uses silicon carbide crucibles, which can heat up by absorbing microwave energy. Put one in an insulated container, dump some metal in, and throw it in a microwave, and soon enough you have a pot of molten metal you can use to cast stuff.
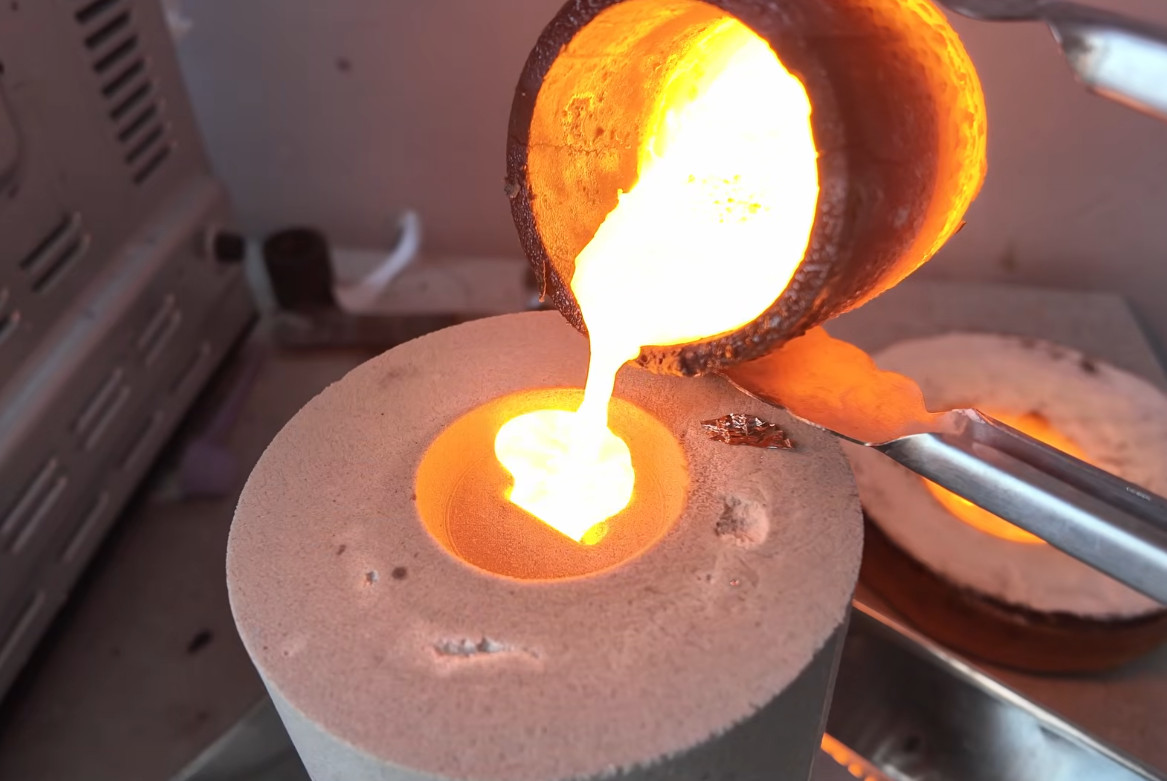 Let’s say you want to make an adjustable wrench, which is how [Shake the Future] demonstrates this technique. The first step is to print the wrench parts in plastic, such as PLA. These parts are then packed into fine sand to create casting molds. The PLA is burned out of the mold, leaving a negative imprint of the geometry. Molten cast iron can then be poured into the mold to create the part in solid metal.
It’s a messy technique that requires a lot of manual labor, but it does work quite well. There are some tricks to learn, though, particularly when it comes to successfully casting parts with holes or fine geometric features.
And before you think that you’re going to put the hardware store out of business, it should also be noted that it failed on first encounter with a real-world nut. The thinnest part by the screw just wasn’t strong enough.
Still, it’s a great demo, and if you’ve ever wanted to make a bespoke cast iron part of your own, this work may be very relevant to you. Alternatively, consider learning about DIY aluminium casting—just consider the pitfalls involved.
Continue reading “3D Print Becomes Cast Iron Wrench Via Microwave”