Snapping pictures is not technically difficult with modern technology, but taking good photographs is another matter. There are a number of things that a photographer needs to account for in order to get the best possible results, and if the subject matter isn’t particularly photogenic to start with it makes the task just a little more difficult. As anyone who’s posted something for sale online can attest, taking pictures of everyday objects can present its own challenges even to seasoned photographers. [Martijn Braam] has a few tricks up his sleeve for pictures like this in his efforts to photograph various circuit boards.
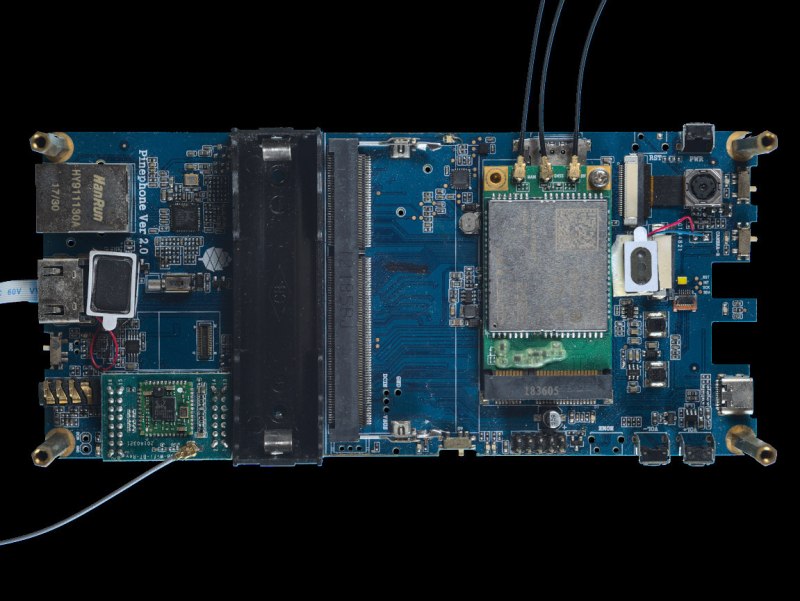
[Martijn] has been updating the images on Hackerboards, an online image reference for single-board computers and other PCBs, and he demands quality in his uploads. To get good pictures of the PCBs, he starts with ample lighting in the form of two wirelessly-controlled flashes in softboxes. He’s also using a high quality macro lens with low distortion, but the real work goes into making sure the image is sharp and the PCBs have well-defined edges. He’s using a Python script to take two pictures with his camera, and some automation in ImageMagic to composite the two images together.
While we’re not all taking pictures of PCBs, it’s a great way of demonstrating the ways that a workflow can be automated in surprising ways, not to mention the proper ways of lighting a photography subject. There are some other excellent ways of lighting subjects that we’ve seen, too, including using broken LCD monitors, or you can take some of these principles to your workspace with this arch lighting system.


Use a flatbed scanner?
A hair can push text on a flat piece paper out of focus on a flatbed.
What do you think all those components and leads will do?
Use a CCD scanner, not that CIS straight from 1960s.
If you own a modern, cheap scanner with CMOS line optical sensor, yes, it will be the case.
If you´re lucky to have a more expensive, higher quality or just older scanner with a CCD sensor and lenses (those are by design much thicker devices than the newer ones that are more slim) then no, some have an incredible depth of focus.
See by yourself, google “scannography”, you´ll be surprised !
It’s one of these things that shouldn’t work in theory, but in practice they give “good enough” pictures, even the cheap CMOS scanners. As a bonus you get real-world dimensions out-of-the-box.
Just be careful not to scratch the glass. And yes this is one of the reasons I keep an old (legal size) HP around. Take the cover off and put a black towel in it’s place.
It’s neither hard nor expensive. Can even me done with crap you already have around the house, like a cardboard box, a white bed sheed and that shop light you last used 5 years ago trying to make that last coat of paint on the wall dry faster.
If you really want to splurge, a light tent costs about $20 on amazon and you don’t even need a flash if you’ve got a table lamp.
https://strobist.blogspot.com/2006/07/how-to-diy-10-macro-photo-studio.html
If you really need a visual of such a setup.
https://www.google.com/url?sa=i&url=https%3A%2F%2Fwww.flickr.com%2Fphotos%2Fsometoast%2F3211291137&psig=AOvVaw1yqBlRIlvO8RD6TBryQQvg&ust=1670003033484000&source=images&cd=vfe&ved=0CA8QjRxqFwoTCMDn-p782PsCFQAAAAAdAAAAABAM
“Shop light of making the last coat of paint used dry faster” – Nice one! I installed a halogen lamp on top of the paper output tray of my ink printer for exactly the same reason. Figured out i can easily print 3 layers of paint on a transparent sheet that way (printing custom light filters for installations and need really vivid colours).
Our favourite Aussie has you covered, too:
https://www.youtube.com/watch?v=XD2ATXloF9o&t=995
With the sensitive camera of today why does flash lighting exist at all? Two or more broken TV’s with their screens taken off make super light sources or better yet four sides and top for a “light box” surrounding the subject. The problem of getting the light to stay on because of time out energy saving with no signal is moot for short photo sessions. Make big window sized sources of daylight to beat the winter blues or photograph bigger subjects. Hurry and hoard before OLED takes over.
One of the more important aspects—especially if you want to be able to zoom in and grab part numbers off every chip—is to also consider the reflections and light direction, plus the type of chip coatings/coverings in use. For SoC heat spreaders like the on on the Raspberry Pi, if you just throw it in a softbox, the text on the chip is often completely blown out.
You can put on a polarizing filter on your camera to help to some extent, but sometimes you have to be more intentional with your lighting, and provide a key/fill light instead of just 360° light as you’d get with a typical 4-walled softbox.
And on yet other chips and devices, you *do* want a little highlight on a smooth surface to make it pop, so in that case you might add in another light that bounces directly off that part towards the camera sensor.
Getting a good shot is easier with a softbox setup like those mentioned above. Getting a ‘great’ picture, consistently, for every board out there, is much harder!
BigCliveDotCom uses a tupper-cam for his PCB shots.
https://www.youtube.com/watch?v=L6sAS-y21xA
@Truth Tupper-box is nice but can only do small PCB, and I think this article is more geared to the large ones.
Just scale it up, use a larger container I’ve seen 35 Litre (~9.25 gallon) and 84 L (~22 gallon) plastic storage boxes.
You should check out “focus stacking”. Also, most lenses have the best sharpness f8 to f11. Some go as high as f32 but are diffraction limited there.
And a good way to see the text on ICs clear is to use a polarization filter. It’s amazing.
I like the tip about photographing on a lightbox as “You can’t have a shadow on an emitter.”