
We feature a lot of fun projects with LEDs and lasers and all kinds of light effects going on. Most of these are very digital. However, there are a great many ways to make beautiful lighting effects without ones and zeros. The Maelstrom Lamp from [Michele Lorenzi] is a great example of that.
The concept is decidedly old-school. The lamp uses a delicate, thin soap film stretched across an aperture as its primary optical element. The varying thickness of the film across its surface leads to constructive and destructive interference when white light passes through it. This creates a kaleidoscope of color; the same effect you might have seen when an oil slick forms in a dirty puddle.
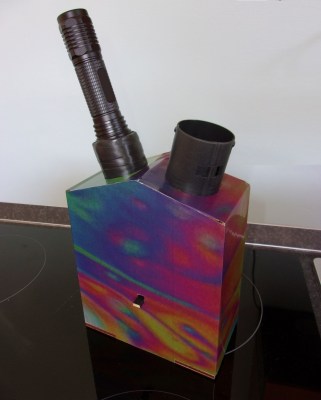
In this case, though, that effect is projected with the aid of a powerful 800-lumen flashlight and some supporting optics. [Michele]’s write-up does a great job of explaining the finer design details that maximize the vibrancy of the effect, from the waviness in the gasket that supports the soap film, to the optics that focus the torch beam.
If you’re looking for some suitably psychedelic lighting effects for your next house party, you really ought to build one of these. We’ve featured some other fun classic lighting effects before, like these wonderful bubble lamps. Continue reading “Creating Beautiful Light Shows With Soap”


