Throwback: USB Hotplate Used 30 Whole Ports

Once upon a time, USB was still hip, cool, and easy to understand. You could get up to 500 mA out of a port, which wasn’t much, but some companies produced USB cup warmers anyway which were a bit of a joke. However, one enterprising hacker took things further back in 2004, whipping up a potent USB hot plate powered by a cavalcade of ports.

Delicious.

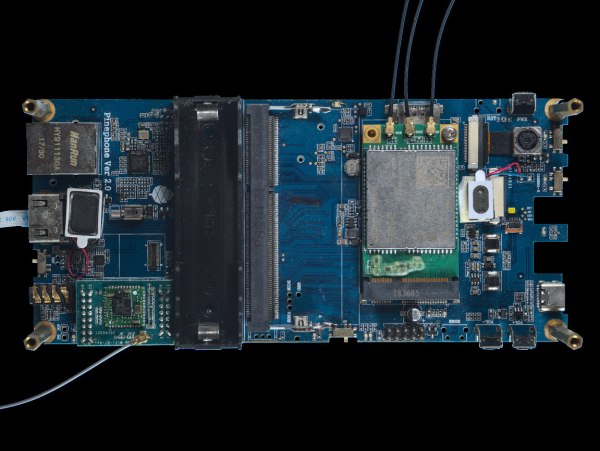
The project was spawned after a USB cup warmer sadly failed to cook a decent fried egg. To rectify this, a souped-up version was built. The cup warmer was stripped of its original hardware, and fitted with six 2-ohm resistors instead. At 5 volts, each would draw 2.5 amps and the total power draw would be on the order of 75 watts. Each resistor would thus need five USB ports to power it to stay under the 500 mA limit, for a total of 30 USB ports in total. Six PCI-to-USB cards were installed in a motherboard for this purpose, providing the requisite ports.  A 500 watt power supply meant the computer had plenty of juice to run the hot plate.

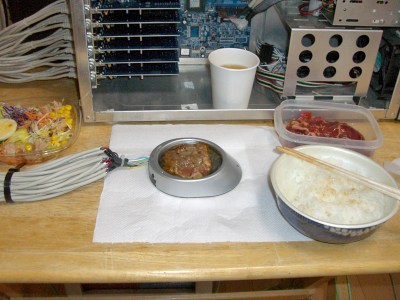
Cooking proved successful, generating a decent amount of heat to brown up some beef. Served with some white rice, it proved an adequate meal, though apparently with a noted taste of electronic components.

This wouldn’t be such a challenge today. USB-C is capable of delivering 100 watts through a single port at 20 volts and 5 amps. However, there’s something joyous and charming about cooking on a ridiculous hotplate running off 30 USB 1.1 ports. The ingenuity is to be applauded, and it is truly a project of its time.

Ply Your Craft With Tubular Origami

Researchers at the University of Pennsylvania have just published a paper on creating modular tubular origami machines which they call “Kinegami”, a portmanteau of “kinematic” and “origami”.

Diagrams of "kinegami" folds for various modules and joint mechanism

The idea behind their work is to create individual modules and joint mechanisms that can then be chained together to create a larger “serial” robot. Some example joints they propose are “prismatic” joints, allowing for linear motion, and “revolute” joints, which allow for rotational motion. One of the more exciting aspects of this process is that the joint mechanisms are origami-like structures which can be constructed from a single piece of flat material which is folded and glued together to make the module. Of particular interest is that the crease pattern for the origami-like folds can be laser cut into a material, cardboard or thin acrylic for example, which can be used as a guide to create the resulting structure. The crease patterns for the supporting structures, such as tubes or joints, can be taken from pre-formatted patterns or customized, so this method is very accessible to the hobbyist and could allow for a rich new method of rapid project prototyping.

The researchers go on to discuss how to create the composition of modules from a specification of joints and links (from a “Denavit-Hartenberg” specification) to attaching the junctures together while respecting curvature constraints (via the “Dubins path”). Their paper offers the gritty details along with the available accompanying source files. Origami hacking is a favorite subject of ours and we’ve featured articles on the use of origami in medical technology to creating inflatable actuators.

Video after the break!

Continue reading “Ply Your Craft With Tubular Origami”

Using I²C Sensors With Any Linux Via USB And IIO

Hooking up I2C sensors is something which is generally associated with microcontrollers and SBCs, yet it’s very easy to use such I2C sensors from basically any system that runs Linux. After all, I2C (that is, SMBus) is one of the interfaces that is highly likely to be used on your PC’s mainboard as well as peripherals. This means that running our own devices like the well-known BME280 temperature, pressure and humidity sensor, or Si1145 light sensor should be a piece of cake.

In a blog post from a few years ago, [Peter Molnar] explains in detail how to wire up a physical adapter to add a USB-connected I2C interface to a system. At its core is the ATtiny85 AVR-based MCU, which provides a built-in USB interface, running the I2C-Tiny-USB firmware.

The essential part here is that the MCU shows up to the Linux kernel as an i2c device, requiring the i2c-dev driver to be loaded. After this the I2C device that is connected to the adapter MCU’s I2C bus can be used via the Linux module’s API calls, either directly or via existing drivers. [Peter] found that the BMP280 driver came with Debian Sid, for example.

Simple ATX Bench Power Supply Adds Variable Output

A benchtop power supply is a key thing to have for any aspiring electronics hacker. While you can always buy one, plenty of us have old computer PSUs lying around that could do a fine job themselves. [Frugha] decided to whip up a neat 3D-printed design for converting any ATX PSU into a usable bench unit.

The design features banana plugs outputting +12V, -12V, +5V, and +3.3V, with all outputs appropriately fused for safety. There’s also a fused stepdown converter used to supply variable voltages as needed. Its original trimpot was replaced with a multi-turn pot for ease of control. To make everything work, a load resistor on the 5V circuit makes the power supply think it’s hooked up to a motherboard. It’s all wrapped up in a neat slant-sided 3D-printed case that fits onto the ATX power supply itself.

The result is a neat and tidy power supply built out of readily-available components. We particularly like the addition of the stepdown converter – most ATX-based projects don’t offer variable output, which can nonetheless come in handy.

We’ve seen some other great builds along these lines before, too. If you’ve been cooking up your own homebrew power supply, don’t hesitate to share it on the tipsline! 

Rescue That Dead Xbox With An External PSU

There is nothing worse than that sinking feeling as a computer or other device fails just after its warranty has expired. [Robotanv] had it with his Xbox Series S whose power supply failed, and was faced with either an online sourced PSU of uncertain provenance, or a hefty bill from Microsoft for a repair. He chose to do neither, opening up his console and replacing the broken PSU with a generic external model. See the video below the break.

The Xbox appears surprisingly well designed as a modular unit, so accessing and unplugging its PSU was quite easy. To his surprise he found that the connections were simply two wires, positive and negative lines for 12 V. The solution was to find a suitably beefy 12 V supply and wire it up, before continuing gaming.

Beyond that simple description lies a bit more. The original was a 160 W unit so he’s taken a gamble with a 120 W external brick. He’s monitoring its temperature carefully to make sure, but with his gaming it has not been a problem. Then there’s the board wiring, which he appears to have soldered to pads on the PCB. We might have tried to find something that fit the original spade connectors instead, but yet again it hasn’t caused him any problems. We’d be curious to see what has failed in the original PSU. Meanwhile we’re glad to see this Xbox ride again, it’s more than can be said for one belonging to a Hackaday colleague.

Continue reading “Rescue That Dead Xbox With An External PSU”

Car Batteries: More Than Just Wet Lead

Working on car electrical systems used to be easy. The battery simply provided power for the car’s starter motor when starting or to run the small number of accessories when the engine wasn’t running. The rest of the time, the alternator charged the battery and provided power for the rest of the vehicle and the ignition system. While very early cars didn’t have batteries, and some old cars had 6 V positive ground systems, most of us have lived our entire lives where car batteries come in several sizes (controlled by Battery Council International) and cars have a 12 V, negative ground system.

Times have changed. Cars don’t have distributors anymore, they have computers. They also have lots of gadgets from GPS to backup cameras and cellphone chargers. Batteries have had to get beefier and the modern trend is to also require less maintenance So, today, you’ll find that there isn’t just one kind of car battery. But how do these other batteries work and what was wrong with the good old lead acid wet cell?

For the purposes of this post, I’m not talking about electric car batteries which is a whole different topic — and most of them have a regular car battery, too. Continue reading “Car Batteries: More Than Just Wet Lead”

Taking (Good) Pictures Of PCBs

Snapping pictures is not technically difficult with modern technology, but taking good photographs is another matter. There are a number of things that a photographer needs to account for in order to get the best possible results, and if the subject matter isn’t particularly photogenic to start with it makes the task just a little more difficult. As anyone who’s posted something for sale online can attest, taking pictures of everyday objects can present its own challenges even to seasoned photographers. [Martijn Braam] has a few tricks up his sleeve for pictures like this in his efforts to photograph various circuit boards.

[Martijn] has been updating the images on Hackerboards, an online image reference for single-board computers and other PCBs, and he demands quality in his uploads. To get good pictures of the PCBs, he starts with ample lighting in the form of two wirelessly-controlled flashes in softboxes. He’s also using a high quality macro lens with low distortion, but the real work goes into making sure the image is sharp and the PCBs have well-defined edges. He’s using a Python script to take two pictures with his camera, and some automation in ImageMagic to composite the two images together.

While we’re not all taking pictures of PCBs, it’s a great way of demonstrating the ways that a workflow can be automated in surprising ways, not to mention the proper ways of lighting a photography subject. There are some other excellent ways of lighting subjects that we’ve seen, too, including using broken LCD monitors, or you can take some of these principles to your workspace with this arch lighting system.