It’s fair to say that one of the biggest advances for the electronic constructor over the last decade or so has been the advent of inexpensive small-order PCB manufacture. That said, there are still plenty who etch their own boards, and for them perhaps the most fiddly part of the process comes in drilling holes accurately. It’s to aid in this task that [John McNelly] has created a camera with a periscope, to give the drill bit perfect alignment with the hole.
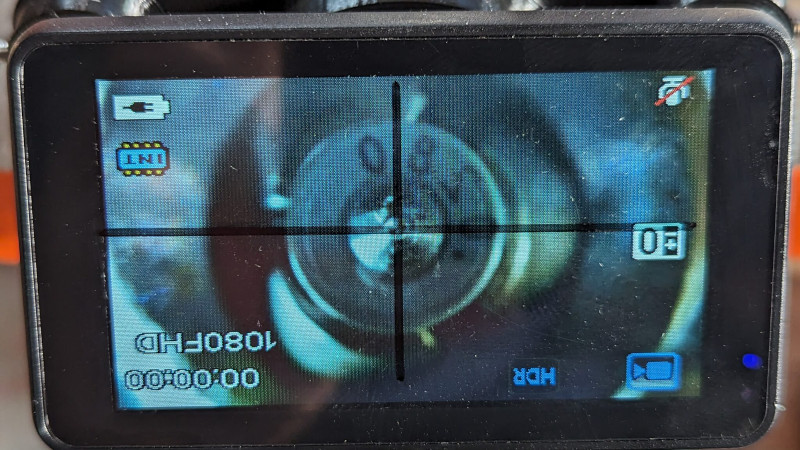
The idea is simple enough, an off-the-shelf all-in-one microscope camera points sideways at a mirror allowing it to look upwards. The viewport is placed under the drill and the crosshairs on the microscope are lined up with the end of the drill. Then the board can be placed on top and the pad lined up with the crosshairs, and a perfectly placed hole can be drilled. It’s a beautiful piece of lateral thinking which we like, as it ends that lottery of slightly off-centre holes. You can see it in glorious portrait-mode action in the video below the break.
Oddly this isn’t the first PCB drilling microscope we’ve shown you. but it may well be the more elegant of the two.


My drill-press has built-in laser cross-hairs.
Have you watched the video? You’d see that they managed far greater precision than laser crosshairs
The problem that I encountered was that the width of laser crosshairs is often much larger than the runout of the drill press, and also much larger than the width of what I’m trying to drill. I also generally got tired of squinting, so a bigger screen with a magnified view was pretty helpful.
My drill-press came with laser cross-hairs.
Its called a target drill I used one in the mid 1970s.
Came here to say that. The one I saw way back when had the periscope on top and the drill came up from the bottom.
Great idea, but only useable on flat material – a partially populated or otherwise irregular board wouldn’t sit properly on the imaging ring.
In standard practice you would drill up and it is easy to install the crosshair.
I was struggling to understand this at first. 4 pictures would have explained the concept faster then a ‘five minute hack’ video or paragraphs of text.
0 pictures of the PCB= :/
Tag these with ‘youtube link of the day’
So because there’s a 55 second video of the final product in operation, it’s now a “YouTube link”?
There’s an entire write-up about how the thing was built, but considering you struggled to parse the two paragraphs of text here on this page, I suppose not a great surprise you couldn’t manage to figure it out.
What a nice project. I’ve pondered this a lot, and this is the best one so far.
I’ve not drilled a ton of pcb’s, but would worry about pushing the pad off the board by drilling from the “back”. (On the other hand, maybe the torque from the drill has a bigger effect. How about a periscope that would rotate 180 (accurately) and let you look down at the target after aligning it with the drill?
Being an old guy, I first chuck up a sharp punch, line up the target, and then cuck up the bit.
Thanks for sharing.
Thanks for the nice comment! So far I haven’t had any issues with pushing the pad off the board by drilling from the back side. As long as you use a sharp drill bit and the copper cladding is well-adhered, it usually works great. Generally it’s pretty difficult to have the microscope view from the same side as the drill bit, since the bit and chuck get in the way.