Despite the near-complete collapse of its ecosystem in the face of portable videocassette camcorders in the 1980s, somehow the 8 mm format, smallest of the movie films, has survived the decades. There’s a special aura around an 8 mm image which electronic recordings don’t replicate, plus for film makers there’s an attraction to working with real film. Unsurprisingly almost all of the devices used with 8 mm film have ceased to be manufactured, but a few items escaped the cut. It’s still possible to buy an 8 mm digitizer for example, and it’s one of these with a Kodak brand that [Mac84] has. Unsatisfied with its image quality, he’s set about tinkering with its firmware to give it some video adjustment possibilities and remove its artifact-prone artificial sharpening.
Helped by the device having a handy EEPROM from which to extract the code, he was able to recover the firmware intact. From here on he was in luck, because the digitizer’s Novatek CPU is shared with some dash cams and this had spawned a hacker scene. From there he was able to find the relevant area and adjust those settings, and after a few false starts, re-flash it to the device.
The results can be seen in the video below the break, and perhaps reveal much about what we expect from an image in the digital age. The sharpened images look good, until we see untampered versions which are closer to the original.
If you don’t have a Kodak scanner you can always build one yourself, and meanwhile like many people we are still wondering what happened to that new Super 8 camera they announced in 2018 but never released.


Here is the link to the tinkerdifferent post https://tinkerdifferent.com/threads/modding-the-kodak-reels-8mm-film-digitizer-firmware-hack.2897/. That is an excellent hack. Looking at those videos I wonder if the Kodak device isn’t properly focused on the film. I would expect the grain to look sharp when it is in focus even if the original picture isn’t .
Thanks! I too wondered if the lens of the Kodak device was out of focus. However, I compared a reel I had digitized in 2016 (via a much more convoluted method of projecting the image onto the image sensor of my DSLR) and I found the sharpness to be the same, if not better on the Kodak device.
However, there may be room for improvement still. So I’ll continue to tinker with this and see if anything comes of that. I’d like to nail down everything before I go through digitizing the remaining film… as I’d hate to have to do it twice!
I don’t own a single frame of super 8 but this hack is awesome. I also feel that it increases the dynamic range of the picture as the highlights appear to be blown out with the original firmware. Well done!
A few years ago, I fixed two 1975 made broadcasting 8mm film scanners – 8mm film cartridge goes in, composite video goes out. The machines were massively overengineered – a single black&white rear projector CRT underclocked at 16kV (if it was direct view, it would have been around 8kV, and in a rear projector setup probably around 30kV) and three photon multipliers (after two dichroic mirrors). All it does is make a white raster (or two or three – one in still frame, two in 25Hz and three in 16Hz) while the film is dragged by the sensors. The film runs through smoothly, the sprocket holes are used to synchronize the film to the raster.
The image quality was simply stunning. They left any modern Full HD digitizer in the dust. Internally, they have standard RGB levels, which I broke out.
The higher ultor voltage was probably to get a smaller spot size, rather than more brightness.
This is a classic Flying Spot Telecine (or TK) – as used commercially by Rank Cintel. Until HD came along – flying spot TKs were industry leading and out performed line array CCDs (where the film was linearly passed over a CCD line sensor which was digitised, clocked into a frame store, and then clocked out with video signal timing. As others have said, running the CRT at a lower voltage will have avoided the spot becoming too big (as spot size dictated the quality of the capture)
The single scan in still frame would have been because the film was stationary and both interlaced fields could be captured ‘in the same place’ to output 50Hz interlaced video. At 25fps the scanner will have needed to scan one area of the CRT to output the first interlaced field, and then scan the same film frame in its new position to generate the second interlaced field (as both interlaced fields come from the first film frame) for 50Hz (i.e. you generated 2 x 50Hz fields from one 25fps frame and the frame has moved linearly between the two fields). At 16fps you will have had one film frame generating 3 interlaced fields (one video frame will have had fields from two different film frames) so there will have needed to be three different scanning areas, as you will have needed to scan the same film frame in three different positions to capture 3 interlaced fields and output 50Hz video. (16fps was used for silent film historically, 24/25fps for sound film)
Cool, did he upload the firmware to GitHub?
Congrats to [Mac84] for this hack. It is certainly a great improvement, 8 Mbits/s was a much too low bitrate.
But i disagree with its analysis and quality assesment. I think there’s a little confusion between sharpening (details/edges accentuation) and noise reduction.
8mm films are by nature very grainy/noisy because of the very small film size, silver grains in emulsion, low quality cameras, no additional lighting…
And noise (grain randomness from picture to picture) is not easy to compress, especially with a low bitrate, real time, 1 pass compression. So indeed this generates compression artefacts: blocks and other “strange” things on large surfaces like brick walls.
To reduce these artefacts you can:
– increase bitrate : it’s what this hack do
– lower noise: it’s what negative sharpening levels do, since anti-sharpening is in reality noise/details reduction.
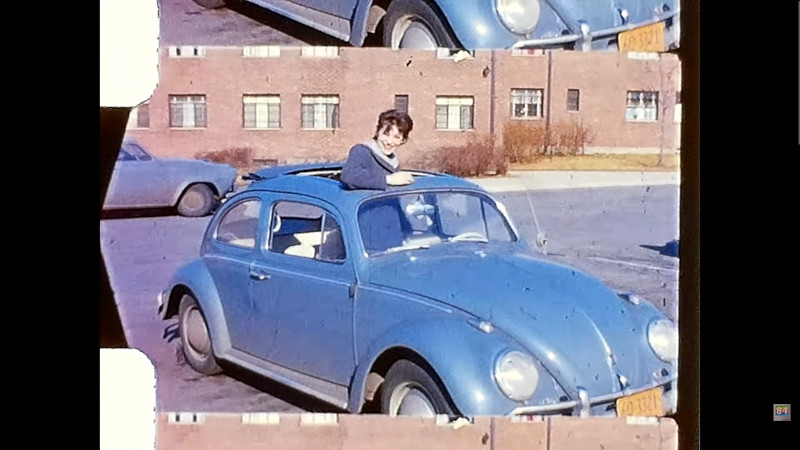
Being able to compress at 23 Mbits/s instead of 8 is certainly a great improvement, but setting sharpening to -2 not at all If you look at the result, there’s absolutely NO more film grain, and in the process you also loose a lot of natural details (bricks of walls, car plate number, even the girl’s face…). The result is overall extremely soft and blurry, which is certainly not natural. Details must be preserved (but not accentuated), and natural film grain too.
Of course, if natural film grain is not [Mac84]’s taste, it is is right to prefer to set noise reduction to its highest level, but it’s not what i would call a good recommandation.
Beside that, it seems that this device is over simplified, probably in the idea to ease the use by people knowing nothing to film scaning and video compression, but i think it should have an “expert” mode allowing to alter bitrate, frame rate (seems to be fixed to 20 fps when 8mm is shot at 16 fps and Super 8 at 18 fps, so strange choice here too), white balance (by selecting white zone, being able to lock it…). So there are maybe other hacks/improvements possible to really upgrade the scanning quality.
Also, the sensor is 8MP 3280×2464 (similar to 4K UHD, but with a 4:3 aspect ratio close to the 1.36:1 8mm film aspect ratio), BUT the scan resolution is only 1729 x 1296 = 2.2MP, so about only 27% of the sensor’s resolution, for a result closer to standard HD than UHD.
For a part, it is because there’s no optical zoom, and the sensor and lens are set to capture the whole film’s surface including sprockets, and then a digital zoom (ie cropping) is done to allow to adjust scan position and size. But i’m not sure this explain all the 73% lost resolution. Maybe the resolution is decreased even more to ease the compression with the stock 8 Mbits/s, or because of some hardware limitation. It would be great if some additional hack could bring a little more resolution (even if 8MP is debatably higher than film grain resolution).
Also, [Mac84] says that this device is hard with the film and quite often damage sprockets, which is a problem. And it scans at 2 fps, which is rather slow.
All in all, at $400/€400, it is more affordable that other more professional scanners (for which you have to add 1 or 2 zeroes), but still a little bit overpriced compared to its limited and locked capacities. This hack is a great improvement, but not completely enough to my taste.
Thanks for the reply. Please see the link to the TinkerDifferent forum, as there have been some updates since this post. It turns out the lens on my device was not focused properly, thankfully it’s adjustable. I didn’t like how the grain wasn’t visible with the sharpness set to zero. This has helped it a bit, but obviously this thing is all plastic… so sadly I don’t think I’ll ever get it perfect.
I’ve even increased the resolution to 1920×1440. With these changes I’ve gotten better results. The film grain is a bit more visible, although sadly a lot of Kodak’s “auto” settings with the color and picture mess things up, which I’m not smart enough to turn off. Either way, it’s a good bit better than the default settings!
Hi! I have a Reels, for about it a month now. I’ve worked on hardware issues with it, but I with I could fix the software problems.
One apparent, when first turned on, the screen slowly turns light blue. If I put my finger in the way of the camera, and slowly pull it out, sometimes, maybe most, the screen goes grey. Absolutely necessary for a white source light. Another issue, same area, there is a slight modulation of the brightness when the image doesn’t change much. As soon as there is good motion on the film, this pulsing stops.
My biggest gripe is the loss/drifting of the time the frame is captured. It seems to cross with the time the film moves in the transport. The line-grabbing camera sees this more at the top of the image and the captured frames flutter like crazy. This issue hasn’t manifested during a capture. It must be happening at the start. So, I’ll capture a dozen frames or so, just a few seconds, and play it back. If it’s good, the rest will go fine.
A menu problem in my opinion, the ‘tint’ is changing the color level, but t thank goodness the ‘tint’ looks good anyway, until the blue thing happens.
The hardware mods, taking a lot of pull out of the springs. There is a longer spring that holds the ‘actuator’ (if I can call it that – it has a pin that moves the film) against the cam horizontally. Way too stiff. There are also two much smaller springs that hold the actuator on the ramp portion of the cam that pulls the pin out of the film. In other words, the springs provide the otherworldly force to stab the film if the sprocket hole doesn’t line up, and it never will when first threaded. I stretched these two springs to almost twice their length. The cam rotates much easier now, and the film transport is much quieter. BTW, I bent that pin slightly inward toward the center of the film, too. What I’d like to do is modify the cam’s lobe, that moves the film horizontally such that, the pin pushes the film forward, and then the pin backs up by maybe a thousandth of an second inch before pulling away from the film, preventing the scrape ng and tearing of the sprocket holes. I think a light Dremel grinding in the right places will fix that. I also took some of the torque out of the take-up wheel. The clutch is a bit of a pain to get to, because the arm has to be taken off to get to all the screws. That spring is too tight, too.
I’ll try to keep you posted.
HarryHydro
Hi all, all of my attempts so far have resulted in really grainy results. Nothing like the examples I’ve looked at here. Am I doing something wrong or is my unit defective?
I have the same problem and I can’t solve it.
How did you correct the focus issue with the lens?