The results from your 3D printer may be improved if you use a dedicated enclosure for the job. This is particularly helpful for printing certain materials which are more sensitive to cold drafts or other thermal disruptions to the working area. If you want an elegant solution to the problem, consider getting yourself an IKEA Billy bookshelf, says [wavlew].
The Billy makes a remarkably elegant 3D printing workstation, overall. It’s got a nifty slide-out drawer that makes a perfect mounting point for a 3D printer. It lets you slide out the printer for maintenance, using the controls, or extracting finished prints. It also naturally features plenty of storage for your filament, tools, and other accoutrements. When it comes to the business of actually printing though, you just slide the printer inside and shut the door. Its thermal and noise isolating performance can also be further improved by adding a silicone door seal.
We love this idea. Too often, 3D printers are left chugging away on messy desks, where they’re subject to blasts from AC vents and other disruptions. Having everything tidily tucked away in a cupboard neatens things significantly, and could also prove helpful if you pursue fume extraction, too.
If you’ve identified any other nifty maker applications for IKEA furniture, be sure to let us know!


While this is a pretty build, ime IKEA furniture lacks the rigidity needed for good printing performance.
I have decided to just keep my printer on the floor where it has less flex in relation to the house structure.
If you know it lacks the necessary rigidity you can stiffen the frame as required. It’s certainly easier to adapt something as cheap and easily acquired as this than to build your own, stronger enclosure from scratch.
>certainly easier to adapt something as cheap and easily acquired as this than to build your own
Depends on the tools you have to hand, if IKEA happens to do something that doesn’t need much modification and how far away the local IKEA is to find the best unit to butcher – you almost certainly can’t get something as cheap (even after all the modifications and stiffening) as the IKEA stuff but with the right workshop space you can cut and build a custom ply box/cupboard whatever really quite easily. And being made of ‘real’ materials everywhere its much more likely to last.
Even in my tiny space and relatively modest tool collection it is pretty quick and easy to get the right unit built, and because it was built for the job you don’t get into that awkward “I need this beam (re)moved but it turns out to be the only structural element in the region, and there is nothing else to anchor a new beam too either” you can get modifying IKEA’s stuff.
Though don’t get me wrong IKEA stuff is great, and really cheap way to get something that might just be 90% of the way to what you needed.
Ahh, yes, the hacker mentality is to come up with a list of excuses to not do something
All I’m saying the build your own method can be easier than the bodge an Ikea method… If anything an encouragement to do something bespoke for yourself rather than make do with whatever you can cobble together from the IKEA stuff.
Unfortunately this isnt cheap, it starts with 2 $50 or better bookshelves, then add doors, drawer slides and etcetera. If I was planning this from Ikea I might start with the Sektion 24x24x90″ cabinet, but it is also $145 and the 60″ door is $39. If you just got your printer for $99 at Microcenter this isn’t going to look too smart.
Another option might be 2 base cabinets and stack them or put on a bench. EG: Sektion Base cabinet $63 21x24x30″ and the 21×30″ door is $17. It’s not the absolute best freestander, and you’ll need a roof (I suggest melamine or another ~$20 24×30 door for the roof.)
But there you go, an enclosure.
i think you’ll be hard pressed to find a cheaper alternative than the floor.
Help teach a man to fish, as they say — why would the rigidity of whatever the 3D printer is sitting on matter for the printing performance?
From my naive understanding, you only need the forces of the gantry motors to act upon a rigid printer frame; from Newton’s second law the frame is also accelerated, but it is the relative motion of the gantry and the frame, not the frame and the environment that matters, right? I would expect that a printer sitting on springs or floating in space ought to print equally well as one sitting on a wobbly table.
Though I know very little about 3-D printers, I imagine that, although the printhead and worksurface are generally unaffected by motion, the unsolidified printing material may be displaced due to “wobbles” between the time it’s extruded and the time it solidifies. I can imagine a plate of Jell-O wobbling with motion.
Vibration from the environment can be passed though the wobbly table and act on the frame and nozzle. Also vibration from the printer could set up resonances with the wobbly table and amplify the vibrations at some frequencies causing misalignment in the print.
At Ultimaker we had basic storage racks filled with these printers. They where wobbly, and if you looked really closely you could see some minor effect of one machine influencing the other.
The effect was really minor tough, and these racks where way more wobbly then a billy. So I think it will be fine.
I won’t disagree that the effect is relatively minor, especially when you’re running multiple machines.
I’m running one machine, want good accuracy and good speed.
It’s cost me more than the original purchase cost of an IKEA table to get it rigid-enough. Then stuff started breaking and I wanted to move the machine to a better-conditioned space anyway… And it ended up on the floor.
Ultimately mine always end up on the floor at some point during troubleshooting. Likely a poured cement slab floor. Gives a good baseline.
Sadly not. Resonance within the printer frame and also the surface it’s resting on being the main issue, which is why mass-damping a printer frequently works better than isolation feet.
I’ve just discovered this the hard way. While attempting to print a very tall model, and failing about 10 hours in, three times in a row, I went back and watched the time lapse video to try to understand what was happening. Because the surface I was printing on wasn’t perfectly stable, when the printhead zigzagged for infill, it caused the entire housing to shake, and the model to sway with it. It worked fine for short and stable pieces, but once I started getting over 6 in tall with narrow models, the sway was very noticeable and ruined the print.
Usually you would attach the bookshelf to the wall from the top, after which it is pretty rigid.
There are many better suited options in the same price range, like filing cabinets, steel cabinets for workshops and 19″ enclosures. Used ones are often free for the asking, look for companies moving or closing.
Yeah how does this handle vibration dampening?
I have to say, I’m a fan of this design. Seal the gaps between the two shelves with some duct tape, add a bathroom vent-fan duct to the very top/back, and you’ll have a nice-looking negative pressure chamber that moves fumes away. Adjustable shelves would make it pretty easy to put 2-3 standard resin printers side-by-side. Plus storage underneath. All with a MUCH higher wife-approval factor and a clear door option.
Wobbly table will induce oscilations (resonance) of printer head, especialy on delta printers. Fixing to floor or/and adding mass to frame could fix that.
The same comes also in my mind but i was more into noise reduction. Such a wood enclosure can be pretty loud with all the vibration from the printer. On Youtube “CNC Kitchen – Seriously the BEST $2 3D printer upgrade!” tried vibration damping but the woobly problem stays. On expensive Handtools you have a counter weight to reduce vibration (example Fein Jigsaw ASte 638). Also read about noisless oil filled handdrills but putting a 3d printer in a oil filled Aquarium? Maybe if its closed in a vacuum. Are there other or better solutions?
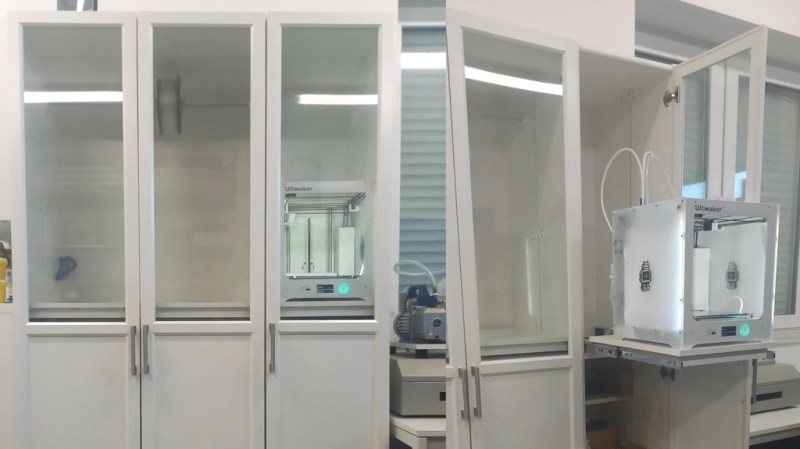
The printer in the photo is already enclosed.. what am I missing here?
WAF
Yes, it helps the Web Application Firewall.
Wife Approval Factor(saving others the google search)
It is sometimes also called the SAF or spousal approval factor.
I wouldn’t know about this but a chintzy cabinet or table never made a good place for a turntable. I used a garden paver as big as the stereo turntable sitting on padding on top on a foot high stand so nearer the floor. A PI filter in mass. It worked even with party dancing. Foot steps could be recorded in the printers pass.
To all those saying that it’ll introduce wobble, you can just put a concrete pavement stone on the shelf and set the printer on top of that, should be enough for mass damping. Stephan from CNC kitchen had a video on that
Guten Tag everybody…
I have pavers and an enclosed printer weighing near 45 pounds.
It still causes wobble because I’m trying to swing a direct drive hotend around fast.
Don’t get me wrong, mass helps, but having that mass on a rigid structure matters.
How about active dampeners like in wasching maschines?
I’m not seeing any of these available on the ikea website for less than $330 before taxes and shipping (they have about 125 different products all named Billy). You could probably pick up a hutch or cabinet offering a similar experience for way less at a garage sale or marketplace posting, or build something out of scrap plywood and cheap cabinet hardware.
Also, in regards to other comments about rigidity, the vibration and resonance problems introduced in prints may be negligible (but still measurable). However, the noise of the printer rattling the drawer slides definitely might not be.
You probably want Lack:
https://all3dp.com/2/ikea-3d-printer-enclosure-tutorial/
I think another solution is to use METOD+MAXIMERA+HEJSTA kitcken furniture. There are tall frames meant for fridges but they can be fitted with internal drawers. METOD ha better quality compared to BILLY, because it’s designed to allow mounting ovens and dishwashers inside. The problem is that is more expensive compared to a BILLY.
Hi – its me – wavlew, the owner of this Billy
I saw concerns raising and I’d like to answer:
1. There is no wobbeling problem
– The Billy Cabinet has two stable side plates made of 18mm plastic-coated chipboard.
Remember – it has to cope with lots of heavy books.
– There are two cabinets one behind the other. The connections make them more rigid.
– The Ultimaker never showed any wobbly problems – ok, it has a lightweight printing head.
– But even our printer with heavy parts moving (Conrad Renkforce RF1000) (which stood in the left compartment) never showed problems.
– If you like to have even more stability, you can mount the cabinet to the wall. I do not need to do that.
2. There is no resonance problem
– The comparison of a turntable with a 3D printer shows the character of this discussion. Hi-Fi enthusiasts put CDs in the freezer to get better sound …
3. @Bad Eyes Bob: The printer in the photo (UM3) is not enclosed. It is open to the front and the top.
I’m curious about the sliding shelf. Haven’t seen that in my IKEA store. Do you have a part number?
As a fellow UM3 owner: I’m more curious: where are you stashing your filament during printing?
Thank you for clearifying theese points.
I’m happy that you replied, but this response feels more dismissive than seeking improvement. I don’t want to neg, I want us all to do better.
You’re right, Billy is meant to deal with considerable weight of books – in the vertical axis. The lateral rigidity is suboptimal.
Yes, I’m swinging a heavy DD hotend around fast.
I’ve found that IKEA furniture requires significant diagonal bracing to acheive adequate performance. It’s not a super expensive proposition, but it’s significant compared to the price of the furniture.
Let me say again:
Additional diagonal bracing will greatly improve the performance of chipboard furniture under these use cases.
In my experience, the huge sheet of fiberboard in the back provides all the diagonal bracing you could need with this type of furniture. For a table or chairs or whatever, you’re right, but the backing provides exactly the diagonal bracing that you’re asking for.
My disagreement with the proposal is the base cost… the bookshelf itself is fairly economical, but the doors, extra shelves, sliders, etc are where IKEA seems to be making their profit. I know because our $250 wall of bookshelves ended up costing about 6x that amount after we got all the add-on pieces to satisfy my wife’s aesthetic sensibilities.
As someone else posted, the LACK is a much more economical option, and it goes on whatever surface you want, so it doesn’t introduce instability as a problem.
(As an example, my recollection is that ONE of those windowed doors cost more than the base bookshelf.)
Only applicable to slow printers.
Agreed, hence comment about rigidity.
IKEA stuff needs diagonal reinforcement to deal with wobbles effectively.
If you have a cheaper printer and/or a tighter budget investigate Sektion Base cabinet 302.654.14 and Vallstena door 605.418.25. (And some hinges, should be just under 100 all together). Put it upside down on a bench and you are set.
Hey, thanks for addressing people’s concerns. I really like your solution, much nicer, i think than the usual Lack table based enclosures.
An additional question though: how sturdy is that slide out shelf? do you think it’d hold up with a concrete paving slab in addition to the printer?
Alright one of this small greenhouses will also do.
The building of this Ikea Billy compound was 5 years ago.
After all this wobble concerns, I had a closer look at it this morning and I saw, that it is fixed to the wall on the upper side.
So I have to excuse myyself for the incorrect information in the last post.
The compound is rigid and I wonder, what kind of printers (and problems) you have.
For a normal DIY printer this constuction will suffice.
The drawer runner might be (550mm):
https://www.amazon.de/dp/B08M5XH9L3
The vendors says: 35kg – but I would not charge it with 20kg
But you can get stronger ones (550mm):
https://www.amazon.de/dp/B07X5WD1F5
This is a petty bad idea. When I got my printer I figured the Kallax would make a nice printer table.
I bought a 3 high version so the printer could be on top at a nice working level and the compartments below could be filament storage (bonus is you can add doors and somewhat seal them to regulate the humidity of your filament storage).
It looks pretty good honestly as my P1P is almost exactly as big as the Kallax so it’s a great pillar of printing. Ikea furniture however does NOT have the rigidity to handle a printer going full bore. I massively improved it by screwing a board to the entire backside of the Kallax and added 24 kilos of weight to the top of the Kallax (to add mass to make it harder for the printer to sway the tower) and another 10 kilos to the lowest compartment and now it’s ‘alright’. Although I still run my printer at 50% speed on critical parts.
I’m usually a big Ikea fan but this is one of those rare occasions where I’d advice you save yourself a massive headache and just spend a bit more on something a lot more solid.
Kallax consists of thin plywood and combs of paperboard.
I have no doubt, that you have problems with steadiness.
Billy is a bookshelf with 19mm chipboards. It is a different story.
As long as you anchor the Billy to the wall correctly, it’ll be very sturdy. Every book case comes with an anchoring kit and if you want to make it extra secure, you can always get a second anchor kit. Heck, you could get four or more and instead of anchoring it at the top (like the instructions say to do) you could put two or more anchors on either side of the book case to make it more sturdy. If I’m not mistaken, the anchor kits can be ordered for free.