Polish Railways Fall Victim To Cheap Radio Attack

Poland’s railways have recently come under a form of electronic attack, as reported by Wired. The attack has widely been called a “cyber-attack” in the mainstream media, but the incident was altogether a more simple affair pursued via good old analog radio.

The attacks were simple in nature. As outlined in an EU technical document, Poland’s railways use a RADIOSTOP system based on analog radio signals at around 150 MHz. Transmitting a basic tone sequence will trigger any duly equipped trains receiving the signal to engage emergency braking. It’s implemented as part of the PKP radio system on the Polish railway network. Continue reading “Polish Railways Fall Victim To Cheap Radio Attack”

$1 Graphene Sensor Identifies Safe Water

If you live in a place where you can buy Arduinos and Raspberry Pis locally, you probably don’t spend much time worrying about your water supply. But in some parts of the world, it is nothing to take for granted, bad water accounts for as many as 500,000 deaths worldwide every year. Scientists have reported a graphene sensor they say costs a buck and can detect dangerous bacteria and heavy metals in drinking water.

The sensor uses a GFET — a graphene-based field effect transistor to detect lead, mercury, and E. coli bacteria. Interestingly, the FETs transfer characteristic changes based on what is is exposed to. We were, frankly, a bit surprised that this is repeatable enough to give you useful data. But apparently, it is especially when you use a neural network to interpret the results.

What’s more, there is the possibility the device could find other contaminants like pesticides. While the materials in the sensor might have cost a dollar, it sounds like you’d need a big equipment budget to reproduce these. There are silicon wafers, spin coating, oxygen plasma, and lithography. Not something you’ll whip up in the garage this weekend.

Still, it is interesting to see a FET used this way and a cheap way to monitor water quality would be welcome. Using machine learning with water sensors isn’t a new idea. Of course, the sensor is one part of the equation. Monitoring is the other.

IKEA’s Billy Bookshelf Is A Useful 3D Printing Enclosure

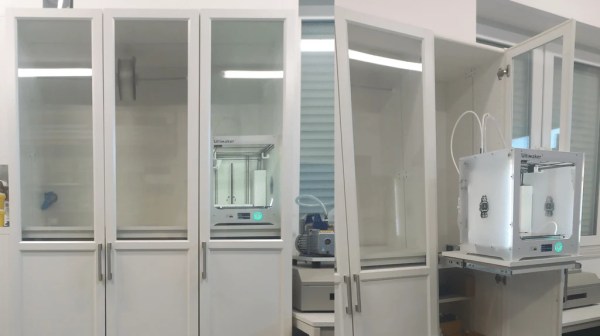
The results from your 3D printer may be improved if you use a dedicated enclosure for the job. This is particularly helpful for printing certain materials which are more sensitive to cold drafts or other thermal disruptions to the working area.  If you want an elegant solution to the problem, consider getting yourself an IKEA Billy bookshelf, says [wavlew].

The Billy makes a remarkably elegant 3D printing workstation, overall. It’s got a nifty slide-out drawer that makes a perfect mounting point for a 3D printer. It lets you slide out the printer for maintenance, using the controls, or extracting finished prints. It also naturally features plenty of storage for your filament, tools, and other accoutrements. When it comes to the business of actually printing though, you just slide the printer inside and shut the door. Its thermal and noise isolating performance can also be further improved by adding a silicone door seal.

We love this idea. Too often, 3D printers are left chugging away on messy desks, where they’re subject to blasts from AC vents and other disruptions. Having everything tidily tucked away in a cupboard neatens things significantly, and could also prove helpful if you pursue fume extraction, too.

If you’ve identified any other nifty maker applications for IKEA furniture, be sure to let us know!

Checking Belt Tension Gets Easier For (Some) Prusa 3D Printers

Belts on a 3D printer should be tight enough, but not too tight. That can be an iffy thing to get right for someone who lacks familiarity with CNC platforms. Prusa Research aims to make it a bit easier with a web app that can measure tension via your mobile phone’s microphone and diagnose belt tightness, at least for their MK4 and XL printers.

Using different tools to analyze belt tightness (including belt acoustics) have been tried in the past with mixed results, but this is a pretty focused approach that aims to give exact guidance for specific printer models. It’s pretty useful to provide someone with a reliable go/no-go number, after all.

What happens to a printer if a belt’s tension is not right? Well, there’s actually a pretty forgiving range within which the printer will mostly work fine, but not as well as it could be. Loose belts can have novices chasing other problems, and overly-tightened belts definitely put extra strain on parts. It’s one of those things that’s worth a little extra work to get right.

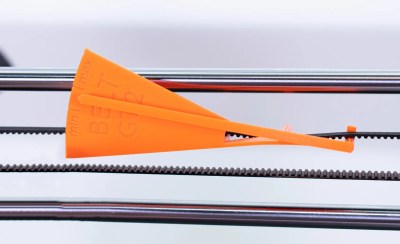
3D printable tension meter is a different option for Prusa MK3 and Mini printers, if one has some Prusament PETG to print it in.

Everything about belt tension for Prusa printers is covered in their documentation, but did you know there’s also neat 3D printable tension meter for Prusa MK3 and Mini printers? It’s meant to be printed in Prusament PETG (printing in other materials may have different results) but it’s a pretty neat idea for a tool.

If you have a Prusa MK4 or XL and want to try their new method, go here and allow access to your device’s microphone. Then select a printer model and an axis to test. Gently strum the upper part of the belt (avoid touching the bottom belt in the process) and watch live results telling you whether the belt is too tight, too loose, or just right. Prusa have a video demonstrating the process, also embedded below.

Continue reading “Checking Belt Tension Gets Easier For (Some) Prusa 3D Printers”

A WiFi RGB Camera Grip Is Probably Not Ideal For Night Shoots

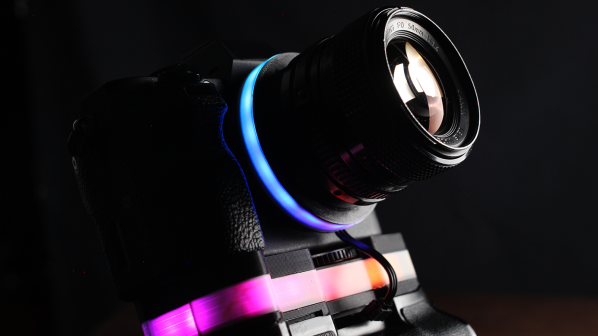
RGB LEDs can be found on everything from motherboards to sticks of RAM these days. [dslrdiy] wanted to bring this same visual flair to his camera setup, so built what he’s calling the world’s first RGB camera grip.

The build is based on an existing off-the-shelf camera grip. It’s disassembled for the build, with a pair of 18650 lithium batteries installed inside as a power supply. They run a small DC-DC converter, which powers a Raspberry Pi Zero and a WS2812B LED strip which provides the lovely colorful lighting effects. The LEDs light up a translucent spacer installed in the camera grip solely for the purpose of aesthetics.

So far, so straightforward. However, [dslrdiy] also implemented one more useful feature. The Pi Zero is able to scrape photos from the camera, and automatically load them on to a Windows network share. That’s a nice zero-fuss way to get pictures off your camera when you return to your home network.

We’re not sure too many professional photographers will rush after the RGB grip, as it’s often poor practice to introduce strange uncontrolled colorful lights into a scene. However, the wireless tethering feature does seem attractive depending on your usual workflow. Video after the break.

Continue reading “A WiFi RGB Camera Grip Is Probably Not Ideal For Night Shoots”

Retro Gadgets: The 1974 Breadboard Project

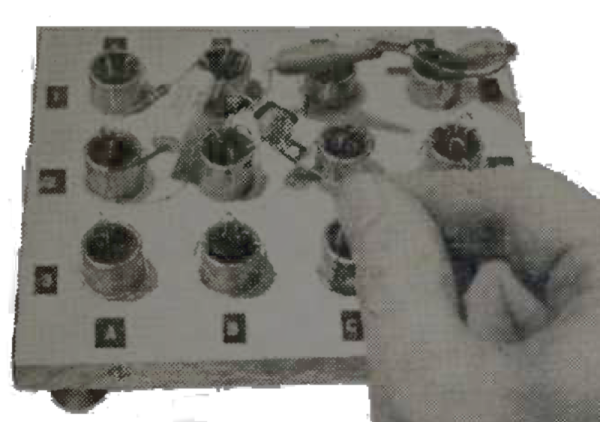
It is hard to imagine experimenting with electronics without the ubiquitous solderless breadboard. We are sure you have a few within arm’s reach. The little plastic wonders make it easy to throw together a circuit, try it, and then tear it down again. But, surprisingly, breadboards of that type haven’t always been around, and — for a while — they were also an expensive item. Maybe that’s what motivated [R. G. Cooper] to build Slip-n-Clip — his system for quickly building circuits that he published in a 1974 edition of the magazine Elementary Electronics.

The system isn’t really what you would think of as a breadboard today, but it was effective and certainly cheap to build. The biggest problem? It wasn’t something you’d use with DIP ICs. But in the early 1970s, you might not be building very much with ICs, and the ones you used might be in oddball transistor-like packages. Things were strange in the 70s!

A Brief History of Breadboards

In the very old days, people built radios and such on wooden substrates that were actually bread-cutting boards. That’s where the name came from. It was common to draw a diagram with the physical layout you had in mind, glue it to the board, and use it as a guide for building and troubleshooting. Wood was easy to drill and cut. A nail or a thumbtack would make dandy terminals. Probably the last time we saw that done was about a dozen years ago in Make Magazine. Even then, it was only a novelty — few people still build circuits like this, but you can see how [Colin] did it in the video below.

Continue reading “Retro Gadgets: The 1974 Breadboard Project”

WiFi, PWM Backlight, And Graphics On Updated Chumby Kernel

For some, the Chumby was a peek at what could have been. That vision never died for [Doug Brown], and he has been working tirelessly on bringing mainline Linux kernel support to the customizable smart display. He has posted several updates but recently got graphics and the PWM backlight working.

Of course, we covered when [Doug] first started working on the new kernel, so it’s high time we revisited the progress. The WiFi hardware uses a Marvell 88W8686 chipset, which talks over the SDIO bus, so it’s a matter of convincing the libertas driver to talk to it. With a USB to Ethernet adapter, [Doug] could boot new kernels over NFS, so he didn’t have to walk over to swap the SD card. After dealing with an unhandled fault when trying to read the SDHCI_HOST_VERSION register, [Doug] had access points showing up in NetworkManager but could not connect. As a nasty hack, he temporarily removed the interrupts and switched to polling in the driver. While that worked, it would never get upstreamed. A critical interrupt was being dropped, and commands went out of sequence. A second, perhaps ugly hack, read a register after acknowledging an SDIO interrupt, which seemed to work. But it was still a hack, and [Doug] wanted something cleaner. In a blind stroke of luck, he found the errata online and noticed that it mentioned that an interrupt could be missed when a signal was asserted. After following the workaround with a lot of head-scratching and deep diving, he had a fully working WiFi driver.

Graphics were a more straightforward endeavor compared to WiFi. He enabled the simpledrm driver (similar to simplefb) but using Direct Rendering Manager. He had a working panel that could run Qt apps by adding the frame buffer to the device tree with the correct compatible string, registers, and data. However, there was a Vivante GC300 graphics accelerator onboard that he wanted to use. A driver for Vivante GPUs already exists in the kernel, but after enabling it, the driver detects the GC300 and then starts complaining. He discovered that older revisions of the GC300 (like the ones found in Chumbys) mapped registered at different addresses and didn’t set some bits in their idle registers. Of course, just loading a GPU driver isn’t quite enough. He modified an x11 server that supported Vivante accelerators to support the GC300.

For hacking purposes, [Doug] set the backlight GPIO high. While easy to see, perhaps not the best for a device meant to blend in. The PAX166 comes with PWM hardware, though confusingly, it has two PWM modes for pin 84. PWM1 and PWM2 share some common clock and reset bits in a decidedly undocumented way. PWM2 doesn’t work until you configure and then turn off PWM1. However, the backlight turned off once out of UBoot and into Linux. Linux re-initialized the hardware too quickly, causing the device to freak out. This was solved using the abrupt shutdown register.

It’s a journey through debugging, Linux internals, and device tree hackery. Perhaps the most incredible thing is that these changes are submitted for upstreaming to the Linux kernel, with many landing in Linux 6.2. While it’s a shame new Chumbys aren’t being made, making your own smart display has never been easier.