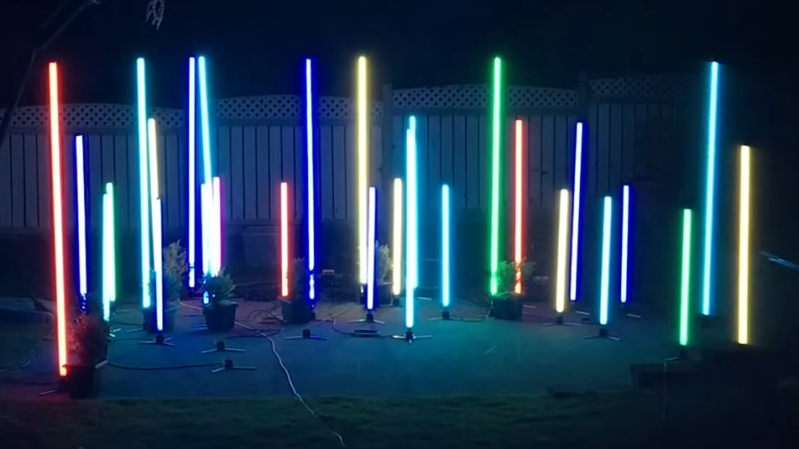
It’s the future. We should have weird glowy lights everywhere, all over our homes, cars, and businesses. In the automotive world, luxury automakers are doing their part with LED ambient lighting systems, but the rest of us have to step up. [Super Valid Designs] has developed an excellent modular DMX lighting rig that’s fit for this purpose; the rest of us just have to get to work and build our own! (Video, embedded below.)
The design relies on hot-swapping powered bases that let a variety of different lights to be swapped in as needed. They use a custom four-pin socket designed by [Super Valid Designs] using PVC and ABS plumbing and conduit parts and tent pole springs from Home Depot. There’s a 3D-printable version, too, which is useful for those around the world that can’t get access to American standard gear easily. Anyone from the Nerf scene will understand this frustration well.
The real cool part of the modular rig, though, are the tube fixtures. There’s a ball design too, but they don’t look quite as future-cool as the tubes. They use fluorescent tube protectors as a cheap source of clear tubes, and use plumbing and conduit parts to make easy-insert connectors for pairing with the modular bases. Light is courtesy of old-school non-addressable RGB LED strips, attached to flat aluminium trim with their own adhesive combined with a wrap of clear packing tape as well. The LED strip is attached to one side of the tube, with parchment paper layered inside the tubes to act as a diffuser.
Building in quantities of 8 or more, [Super Valid Designs] reckons that the tubes can be built for $50 each or less. Of course, that adds up to a few hundred dollars in total, but the results speak for themselves.
If you’re thinking of tackling this project, but DMX is beyond your current skillset, fear not. We’ve got just the primer to get you started! Video after the break.


Looks like a large lightsaber collection.
I’m always on the lookout for decorations for our yearly Halloween extravaganzas and this will probably make its way into the mix next year. Though I’ll likely make the nodes battery operated to eliminate the cables.
Extra props for finding very inexpensive tubes.
Inappropriate use of plumbing and electrical conduit parts, sketchy electrical connections, design decisions driven by what’s handy. This genuinely qualifies as “hacking”!
It hadn’t occurred to me that those plumbing fittings would have a taper to the outside, I guess I assumed they’d have a parting line down the middle and be identical on both sides. No reason they would need to be though, and I’m glad he pointed out that there’s a taper.
I made my share of projects with plumbing supplies, 3D printing now takes the time out of replication.
He pointed out the 4 pin aviation connector could not accommodate the 16/4 AWG cord. I had the same issue with and ended up with a heavy cord (16/2AWG) for the power and a smaller cord for the data with small pieces of heat shrink every every third of a meter to keep the cord bundle tidy.
My very first year of doing Computer-controlled holiday lights I made a simple series of arches from PVC and PEX tubing – ran some WS2812B LED strips through them and drove them off a Raspberry Pi – in fact, if you saw my Musical Jack-o-laterns (https://hackaday.io/project/193086-musical-jack-o-lanterns) that’s the same controller.
If you have any interest in Light shows, the software and hardware are highly accessible. My entire Christmas light show is built on open source software and hardware. Xlights, Falcon Pi Player for software, lots of open firmware is available that receives E1.31 signals. It’s really easy to get into, and the community is very friendly.
For the power/cabling setup you could go with much higher voltage (eg. 48V) and a small DC/DC buck converter in each base, or even with straight AC and a small AC/DC converter in each base, All very common stuff and inexpensive too.