If you do much practical 3D printing, you eventually need some sort of fastener. You can use a screw to bite into plastic. You can create a clearance hole to accommodate a bolt and a nut or even build in a nut trap. You can also heat-set threaded inserts. Which is the best? [Thomas] does his usual complete examination and testing of the options in a recent video you can watch below.
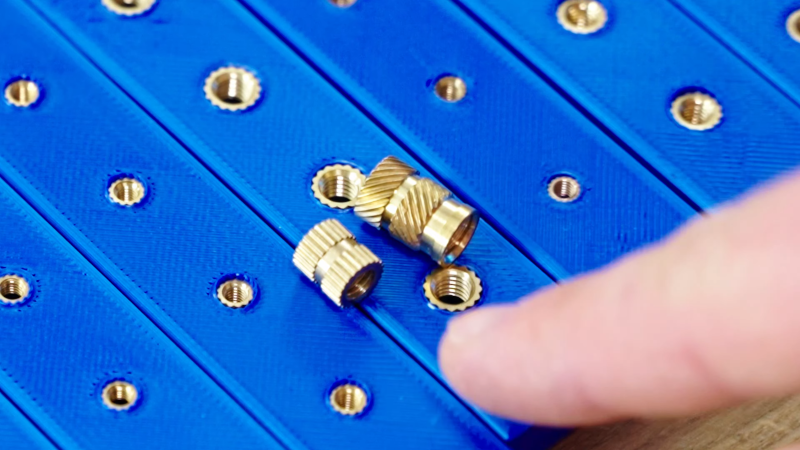
[Thomas] uses inserts from [CNCKitchen] and some cheap inserts for 3D printing and some for injection molding. There are differences in the configuration of the teeth that bite into the plastic. [Thomas] also experimented with thread adapters that grab a 3D-printed thread.
Of course, the real question is, do you even need the inserts? You can simply print threads in holes and forget all the extra parts. But will it be strong? Does the orientation of the thread matter?
As always, the end of the video summarizes the results. As you might expect, all of the inserts fail to allow the proper preload on the fasteners, so they will not achieve their maximum strength. However, there is more work to do to figure out the influence of infill and several other parameters.
[CNCKitchen] had a similar review if you want a second opinion. Or, you can read our take on it.


Interesting video and results. I had hoped to see more about the geometry and wall counts on the 3d printed parts.
If you read some of the manufacturers papers about designing for inserts, they’re fairly specific and might have helped Thomas avoid some of the pitfalls with the ‘waste’ plastic.
I wonder if that might be a subject for a further video on heated inserts.
Incomplete units. It’s not often that I care a threaded feature can handle a fastener torqued to 2nM
I care that a threaded feature can handle 2Kg of working load, and 5Kg of shock load.
Furthermore, square nuts and t slot nuts have both superior resistance to pullout and over-torque compared to heat inserts, yet he didn’t include either.
Square nuts and t slot nuts are also cheaper and just as easy to purchase.
Heat inserts are really only nice when you don’t have access to the back of a hole and need a threaded fastener that can be repeatedly removed.
With the low infill and few perimeter of his test parts I’d suggest T-slot would actually be hopelessly weak and just crumple when the screw is tightened without ever doing its job. Which really is the important part of anything mechanical and 3d print related – being sure you have enough plastic being put in the right places for strength, ideally in the right orientation too. A 3d printed part absolutely can take 2Kg of load on a thread, the shock load too but it has to be with the right plastic and enough of it in the right places.
I’d also point out heat set inserts are great for many things beyond just repeatable removal – anything that includes a nut can become nearly impossible to actually assemble in the space available as you need good access to both sides to line the nut and bolt up (which may mean extra people), the nut is relatively huge which can rather lower the density of screw fastenings you can put in or just get in the way of the rest of the project, and in the case of 3d prints they can work very well as reinforcement to hold the usually weaker layer to layer bond together. Both methods absolutely have their place.
>I’d suggest T-slot would actually be hopelessly weak and just crumple
At the same depth of insertion, the t-slot nut would have more engagement with both the skin and infill without needing to mess with alternating infill perimeters.
>as you need good access to both sides
I already said that in my comment.
>to hold the usually weaker layer to layer bond together
A nut in a pocket will provide the same, or greater layer reinforcement by allowing the fastener to compress the layers no differently than prestressed concrete.
Furthermore, the surface area of the nut will be acting on a greater area of plastic than heat inserts.
It appears that you missed the point I was making in my first two sentences.
His use of torque only measurements obfuscates his true target, which was the force necessary to pull the fastener from the plastic.
It also introduces unnecessary inaccuracies due to friction and the limits of his torque meter.
T slot are straight features that will not be very strong at all with such low infill – long thin and mostly hollow and flat just crumples in a way a cylinder or curved surface doesn’t. And the surface area increase doesn’t apply so cleanly to 3d prints as it does in normal materials – the very nature of changing the geometry for a different fastener changes the way the slicer treats it and so the internal structure of the printed part, and in general at such low infill with that pattern of infill being one of the worst as well its going to be rather weaker with that larger squareish shape cutout than a small round feature all the way through.
And a nut in a pocket is potentially worse as you are only actively clamping the few layers that are not part of the pocket cut out, the insert goes much or even all the way through the part without thinning it to provide those threads. And if you are applying the screw from the right side the whole thing ends up clamped together by the fastener in much the same way as the nut in your example.
And no I didn’t miss your comment on the method, and I largely agree but it isn’t actually that important, so didn’t see the need to comment on it. As the same test done on them all is suitably fair as a comparison even if its less that ideal.
You need to back off with that silly idea. You have done no GFEN to support it and with 20+ years of practical design I know you are wrong! The person above had the right idea try reading the manufacturers specifications about how to use inserts before you run tests. They are designed to work a certain way not the way you want.
T slots and nuts have never been used in plastic. The strength is not there.
Search YouTube there is a guy who tested different infill etc. .
Next look at off the shelf products. Do you see nuts ever being used in plastic? No!
I don’t need to back off with ideas that have lead me to sell thousands of units of functional FDM parts I’ve made myself, with no request for refunds or returns due to part breakage.
>T slots and nuts have never been used in plastic.
T slot nuts and square nuts have been used as long as the reprap community has existed.
They are cheap, they are easy, and they are extremely strong.
Even CNC kitchen did a bit about this.
https://youtube.com/watch?v=2wRc1KbEAU8&listen=false
Complains about units and then spells them wrong… it’s “2 Nm” and “5 kg”, just FYI.
Spelling != capitalization
When the project allows the hole to go completely through the material, it is possible to greatly increase the pullout strength by putting the heat set insert on the OTHER side of the object so that it get pulled INTO the object. 3D print the hole that goes all the way through the object with a diameter roughly equal to the size of the screw, and print the larger hole appropriate for the insert on the reverse side.
Except that when you insert the insert, it’ll build up melted plastic in the hole you can’t remove that easily (unless tapping).
That issue is very easily overcome.
I just use an extra long screw and insert it into the hole first. Then I screw the insert onto it just enough to keep it on, no farther as the farther you screw it in the more contact it makes with the insert the more heat it wicks away.
Since a screw is already in the hole it guarantees no plastic ends up in the way.
Then I heat the insert and push it in.
This has a couple additional benefits too.
If the part is wide enough it ensures the insert goes in straight, parallel to the screw hole and centered.
Plastic that bunches up around the screw at the bottom of the insert actually presses into the threads giving you a short length of tapped hole for even a little extra strength.
Came to say the same. When possible I always do it this way, it’s much better!
Not interested when it comes to Tom. Stefan, on the other hand… Although just doing them like Voron Design seems the way to go. At least they are plenty strong.
I would like to see the test with 100% infill.
Reviewer #2 here.
This one got my materials’ evaluation hackles up. He’s somehow conflating peak torque with visually observed pullout (tension) failure as a measure of quality. Easy to do, but meaningless – at best you could calculate strain from the screw pitch. An actual rough-and-ready tensile device needn’t be any more complicated than a small hanging scale from the usual places, some bike cable and a lever.
Worse, the subsequent idea of printing machine threads into a soft material makes no more sense than using a tap and die on a block of wood. You can do it, but why? Machine threads are explicitly meant for high-modulus elastic materials such as metals, not the soft, viscoelastic stuff of FDM. If you must print threads, print them for fasteners used in similar materials (such as a wood screw). Obviously you’d want the inserts if it was something that would be repeatedly disassembled.
I also don’t see the prints being made with high-infill near the threaded/insert areas which they probably should be depending on the application – the observed effects from “printing threads” is likely due to this but it should be extended outward to a larger fraction of the hole diameter.
Finally if the “cheap” heat-staked inserts push material ahead into the clearance hole/fastener, the geometry of those clearance holes can be adjusted to accommodate this – something that injection molding dies or drill-presses would find hard to to but can be done with FDM.
Why use printed or tapped threads in plastic? Because you don’t need much attachment strength. It’s still a good idea to understand how much strength you get so you know when to step up to something stronger.
Great video. Think designing the model to suit the application will help and should also be baseline tested. I always design-in a separate body to carry the thread (of whatever flavour, eg printed, or tapped or heat insert or entrapped nut etc). The separately designed solid body helps integrate the thread into the main body of the FDM part via infill / walls and skins etc, and is brought-in during slicing. Personally, I have found entrapping std metallic hex nuts into the print via such a separate body is always preferred.