Customer perception is everything when you’re running a business, particularly in retail. High-quality signage can go a long way into creating a good impression in this respect. [king process] decided to show us how professional-grade LED signage is made in a Korean shop that specializes in the work.
The signs we’re shown are custom builds that are matched to the shape of a company’s logo. No rectangular printed lightboxes here, this is fully custom stuff. To that end, a 3D printer is the perfect tool for the job, as it lets the shop produce signs in any shape desired with no need for custom tooling.
The 3D printers that build up the signs have seriously large build volumes, though more so in the X and Y dimensions rather than the Z. We see a whole fleet of printers working away to allow multiple signs to be produced quickly. The first step is to produce the outline of a sign, which serves as a base for the build. Cavities in the sign are then filled with a translucent silicone solution to act as diffuser material. Once cured, these various sections are colored by hand as required. LED strips are then installed on a backing plate to illuminate the sections of the sign.
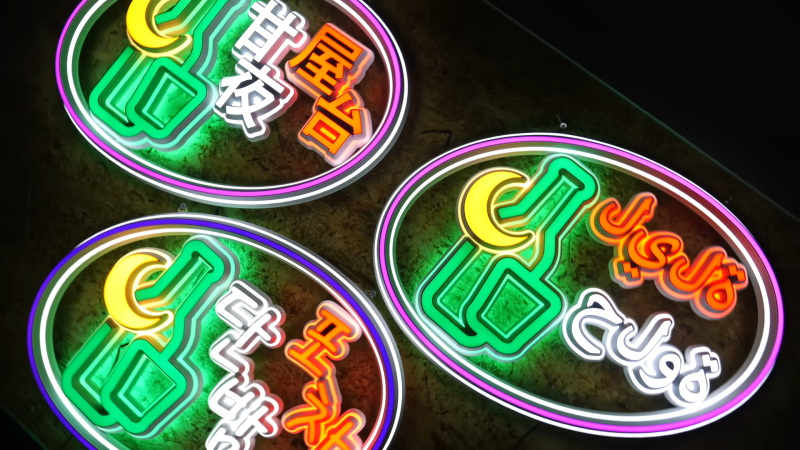
The final result is a sign with clean, bright glowing lines. It’s vaguely reminiscent of a neon sign, but without any of the limitations of the glass tubes influencing how it looks. It’s also neat to see the techniques a professional shop uses to make things right the first time, without dinging or marring any of the parts along the way.
Indeed, it seems the classical neon sign is, these days, bested by a variety of alternative technologies.


The real question is how these will look after a few years. Silicone yellows with UV and oxygen while plastics become brittle with UV alone.
They’ll probably look a bit older and a little shabby. What a surprise that’s going to be!
AR signage will be as clear and bright as the day it was displayed.
Especially since they use PLA filament (sticker briefly visible when spools loaded at the beginning).
Simply placing the sign behind a window pane will greatly reduce the UV exposure.
You do know a window acts like a magnify glass and will only cause for it to heat up faster making it sag and melt, if done with PLA Other more rigid plastics will work probably though
The glass would have to be impressively warped to magnify.
Ah yes, the common occurrence of everything behind a window catching on fire as soon as the sun comes up. I wonder why we even bother with them!
It doesn’t.
And regular window glass is pretty good at absorbing UV.
I see i’m not the only one who has these excessively pushed in to my youtube feedlately.
Arabic letters in a sign that seems to promote a tavern (Title Photo)?
How did you manage see that? I have huge obnoxious video suggestions covering the end of every video I try to watch.
“Professional” arabic rendered wrong
Nothing says “professional” than backwards Arabic with broken ligatures.
These seems to be samples, showing the multilingual nature of that service.
Maybe made just for the purpose of the video.
Interesting how adding language variants means producing very diverse items. There might be other tricks such as a common part to the logo, and a smaller variant. The variant could be very generic, such “restaurant”, and shared across many signage.
Neat! It’s always cool for me to see how professionals make something and, with the insight of how they do it, realize that I might be able to make something pretty close with tools and skills I have.
Professional only means you make money with what you are doing. Is tells nothing about the competence (or lack off) used.
True, but making products for paying customers day-in and day-out tends to push your quality higher than that of most DIYers like me and I’m always looking for tips to do things better. Irate customers tend take their money back, go away, and tank your business.
I differ. Still prefer neon and the backlit aerogels seen in Tron and Star Wars before it was ‘remastered’ (fun fact, Library of Congress is still waiting for an original copy of Star Wars, not the new version).
This is neat. But Neon is neon.
I agree. Genuine neon lights resonate with me because I remember their magical light from my childhood, such as the neon radiance of the simple red light of my dad’s circuit-continuity probe.
Interesting to see that they use LED strips with notches cut in the PCB for easier bending and folding, I can’t say I’ve seen those before. “Zigzag” seems to be what they go by.
This is interesting to see, but given they’re making channel lettering specifically, I wonder how they landed on this process rather than CNC bending machines and laser cutters.
I’m guessing they also make (or plan to make) true 3D signage, which is where the 3D printing plant would have a real edge. That would be a more interesting video, especially in terms of how they work with designets (there’s no 3D equivalent to Adobe Illustrator, though I notice they use Rhino, which could maybe become that)
I have made 6 meter 3D printed sign for local shop with single Ender recently and it’s looks nice actually. But working with letters in vector and 3d CAD is awful thing.
I have need of making some large scale 7segment displays, I’m wondering if it would make sense to use the same method shown here, print out segments as forms, fill with silicone, and then add a layer of white on top.
Anybody have an idea of what silicone would work well for this?
Silpak makes a good self-leveling translucent silicone; if it is a bit too clear they also have pigments. A touch of white pigment mixed in well would allow you to control the light diffusion through the silicone to some degree.
https://silpak.com/platinum-silicone/r-2340-40a-platinum-silicone/
Can anyone explain what the initial material put on the glass plate before printing is?
I’ve seen dozens of videos of this general process. Some are from sign manufacturers, some are from specialty (large format, low z-height) printer manufacturers or retailers, and some are from intermediate retailers.
It’s consistently something water soluble (or otherwise requires rinsing) and translucent or nearly transparent, but usually it’s either not addressed or described very generically like “acrylic glue”.
I’ve seen people selling it, but only in commercial quantities and without a safety data sheet.
They are putting glue down to ensure the print sticks to the glass. People often use Elmer’s Disappearing Purple School Glue Sticks for this.
disappearing as in getting stolen?
I think it’s a PVA glue like Elmers, but don’t take my word for it.
Definitely PVA glue. Maybe thinned with water. Don’t ask for more evidence cus I don’t have any.