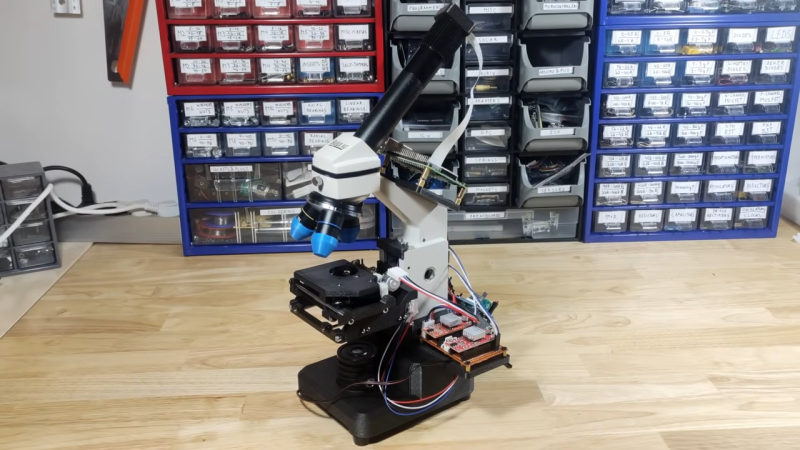
[Birdbrain] is trying to make their own microfluidic devices. To aid in this quest, they need a quality microscope to see what they’re doing. Instead of buying one outright, they purchased a cheap microscope and upgraded it to do the job instead.
The cheap education-grade microscope cost around $50 USD, had few features, and wasn’t much chop out of the box. The worst part was the sample stage — which was poorly adjustable in the up-and-down axis and could only track about two centimeters up and down. There was no X or Y axis panning either, and it lacked a proper condensor iris, too. Oh, and the included camera module had a resolution of just 240p.
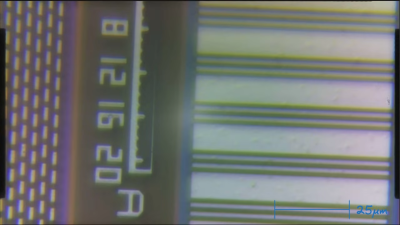
To fix these problems, the microscope was first outfitted with a fully redesigned X-Y-Z stage built out of old components from a salvaged DVD drive and an additional NEMA stepper motor. Camera-wise, it was hooked up with a 2K Raspberry Pi Camera Module 3 running at 10 to 15 frames per second, which broadcasts video over a local network for easy viewing on an external monitor. It also gained an epi-illumination setup for doing reflected light microscopy.
If you’re eager to build a quality microscope with all the controls you personally dream of, this could be a relevant project for you to study. We’ve featured some other builds along these lines before, too. Video after the break.
Thanks to [Kelvin Ly] for the tip!


Borg Microscope.
Magnification are futile
Amazing. Very good work.
That’s a great project, nicely documented.
Great Project! I am planning to update the stage on my microscope as well (XYZR) and I can see now that will be much more work than previously thought.
A tip would be to check eBay for used microscopes first as it will give a good base to start with, possibly with lenses included. In Germany, for example, from time to time you can find old Zeiss (Standard, f.ex.) for around 100EUR.
even better is to try ptychographic microscope
You can get pretty big bang for your bucks if you buy a quality used scope. I see a lot of high quality scopes available at school/university auctions for pennies on the dollar. They have good XY stages, fine focus adjustments, built in illuminators, etc. There are always a lot of stereo scopes as well as higher magnification biological and metallurgical scopes.
You can adapt an old cell phone to use as a camera on a scope. It’s especially easy if you have a 3D printer. Most cell phone cameras are much higher resolution than an RPi camera module.
It is true that the mobile phone cameras are much higher resolution, but typically the optical resolution from the microscope is massively over sampled by high res cameras. These small, high pixel count cameras also suffer badly from very limited dynamic range as they have small pixels and cannot store many electrons.
The optical resolution depends critically on the objective numerical aperture, with the resolution usually quoted from the Rayleigh Criterion as
resolution = (1.22 * wavelength)/ (2*NA), Notice the magnification has no impact on the resolution of the image. With a typical high NA air lens on a hobbyist microscope being 0.7, and green light having a wavelength about 500nm, this give a resolution of about 435 nm, if you lens is 60x, with a 10x eyepiece the mag at the eyepiece is 600x and this is then a little above 250 um. To sample this you need > 2 samples per cycle, so pixels of 100 um would be good. Typical mobile phone camera have pixels of 1.5 um, so you oversmaple by about a factor of 100, and read 10,000 pixels rather than 1. As the noise is dominated by readout noise on the camera you end up with about 100x as much noise as you could with many fewer, larger pixels.
All this is a long way to say in microscopy more pixels are generally not better. Research microscopes typically have the camera before the eyepieces and use cameras with pixel sizes in the 4-7 um range, although some are also larger, eg a prime 95 at 11 um or am EMCCD with 16 um pixels.
Some of that is true, except that if you ever find that you have broken up the same size sensor into more pixels than necessary, you can just downscale, combining the data from each smaller pixel.
I also wouldn’t describe phones as having massive issues with dynamic range, because while their sensors may only output a certain range, that doesn’t mean the phone can’t use multiple amplification values across the sensor or just capture two sequential frames at different exposures and perform HDR without the user doing anything. That’s the kind of stuff phones do all the time. And actually, even my old dslr can do that trick – only with alternating scanlines rather than per pixel.
I’ve used that dslr with a microscope objective before, although it throws out most of the capabilities of a proper microscope. An infinity-corrected 10x objective at a modest 0.25 NA is much more manageable to mount to the front of a camera lens than higher magnifications would be, since its depth of field and working distances are greater. In that case, a few more pixels wouldn’t go amiss, but it’s not bad.
If your microscope’s lowest-power eyepiece option is 10x, I guess that’s a bit annoying, but if it’s 4x and you’ve got a 4x or a 10x objective that isn’t terrible, that’s not so bad. Surely people aren’t all using 60x and higher objectives dry, someone’s got to be using lower powers still when in air. And if you’re using digital adapters, aren’t they in place of the eyepiece anyway?
I wonder how translatable that is to an average person in Estonia.
They have decent universities there AFAIK but is there enough public offsale to benefit from it and get good microscopes for ‘cents on the Euro’ I wonder.
Astounding. Well done!
Now that’s a hack! Nice work [Birdbrain]
“…and it lacked a proper condensor iris, too.[1]”
“…Epi-illumination mode (illumination and detection from one side of the sample) to further decrease the amount of excitation light entering the detector.”[2]
Suggestion(?): It looks like your illumination is causing chromatic abberation. Consider near-monochromatic, epi-illumination which is most commenly encountered in flourescence microscopes.[3][4]
1. Condenser (optics)
https://en.wikipedia.org/wiki/Condenser_(optics)
2. Optical Microscopy – Fluorescence
https://en.wikipedia.org/wiki/Microscopy#Fluorescence
3. Fluorescence Microscope – Epifluorescence Microscopy
https://en.wikipedia.org/wiki/Fluorescence_microscope#Epifluorescence_microscopy
4. Schematic of a fluorescence microscope
https://en.wikipedia.org/wiki/File:FluorescenceFilters_2008-09-28.svg