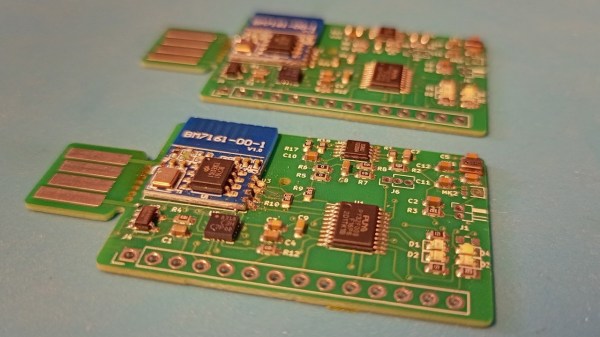
You might be under the impression that machine learning costs thousands of dollars to work with. That might be true in many cases, but there’s more to machine learning than you might think. For instance, what if you could shower anything with a network of cheap machine-learning-enabled sensors? The 1 dollar TinyML project by [Jon Nordby] allows you to do just that. These tiny boards host an STM32-like MCU, a BLE module, lithium ion power circuitry, and some nice sensor options — an accelerometer, a pair of microphones, and a light sensor.
What could you do with these sensors? [Jon] has talked a bit about a few commercial and non-commercial applications he’s worked on in his ML career, and tells us that the accelerometer alone lets you do human presence detection, sleep tracking, personal activity monitoring, or vibration pattern sensing, for a start. As for the sound input, there’s tasks ranging from gunshot or clapping detection, to coffee roasting process tracking, voice and speech detection, and surely much more. Just a few years ago, we’ve seen machine learning used to comfort a barking dog while its owner is away.
Bottom line is, you ought to get a few of these in your hands and start playing with ML. You still might need a bit of beefier hardware to train your code, but it gets that much easier once you have a network of sensors waiting for your command. Plus, since it’s an open source project, you’ll have a much easier time adding on any additional capabilities your particular application might need.
These boards are pretty cost-optimized, which makes it possible for you to order a couple dozen without breaking the bank. The $1 target is BOM cost, especially if you opt to not include one of the pricier sensors. You can assemble these boards yourself, or get them assembled at a fab of your choice for barely a cost increase. As for software, they will work with the emlearn framework.
Everything is on GitHub — from KiCad sources to Jupyter notebooks. As for Hackaday.io, there are five worklogs of impressive insight — the microphone worklog alone will teach you about microphone amplification in low-power conditions while keeping the cost low. Not as price-constrained and want to try on some image processing tasks? Here’s a beautiful Pi Pico ArduCam board with a camera and a TFT screen.


