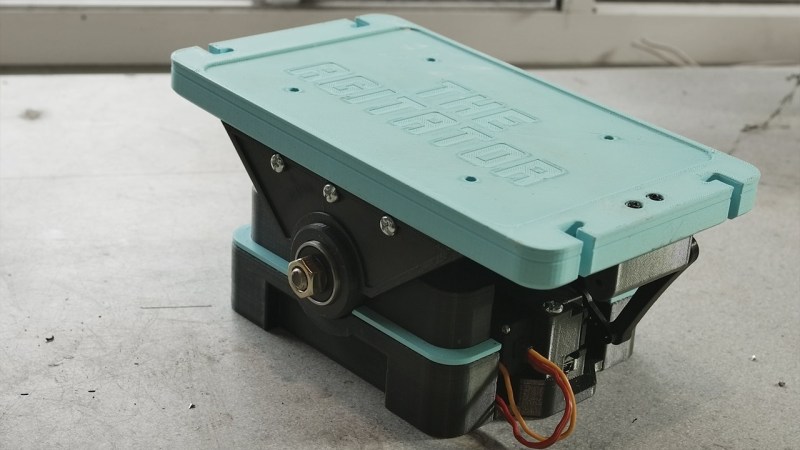
These days, PCB fab houses are just about everywhere, and you can’t go buy a taco without walking past eight of them. Still, some out there still like to etch their PCBs at home. If that sounds like you, you might see some value in [Chris Borge]’s PCB agitator.
The design mostly relies on 3D printed parts, including the main body. It has a heavy base which is filled with concrete to keep it nicely weighed down on the table. A table for holding a PCB and fluid tank is then installed on top, via a bearing which allows it to pivot in one axis. An Arduino Nano commands the agitation of the table top, and hence the PCB etching tank, with a servo used to actually shift the table back and forth.
It’s a simple design — far simpler than some of the advanced coffee-making hardware we’ve seen recently. Regardless, it gets the job done, and done well! In testing, it accelerated [Chris]’s etching jobs significantly, we’re talking hours here. Meanwhile, if you don’t have a 3D printer on hand, you could always try building one out of junk instead!


I always just throw some ferric chloride on the stove and let the boiling do the agitation. Boards usually etch in under 20 seconds…
I forgot and left some out once on my workbench for a few days. My bench has a shelf above it and when I got back a screwdriver hanging over the edge of the shelf was visibly rusted.
If you are serious…. what is it doing to your stove? vent hood?
No noticeable change but I don’t do this every day and if the weather is nice I will use the side burner on the bbq.
So, you only bring it up to a slow boil?
I usually use a glass baking tray inside a metal pot like a water bath. I bring the water to a boil and the ferric chloride is usually “rolling” with some bubbles but not a lot of bubbling. I use different shallow glass trays that just fit the pcb to save chemical.
If I can I will use surface tension to float the pcb on the ferric chloride but if it sinks the rounded corners of the glass dish prevent the pcb from laying flat on the bottom.
I had some issues with this in my kitchen but used copper and muriatic acid and hydrogen peroxide. The curtain rails and other metal parts were pitted. Ferric chloride especially when hot can be very reactant on metal surrounding the work area. Might not be obvious but can get worse over time if the stuff precipitates on metal parts and time and humidity will do the rest.
Very bad design choice to use a Servo for this. Gears will wear out soon. 4-Bar linkage and a brushless motor would have been the way to go.
That’s 4 too many linkages: an eccentric cam and a spring would work for a rocking motion (you can even profile the cam if you want a particular velocity curve).
A cam is a good ideea for small movement. If you need to “shake it baby” I suggest a disk (fitted on the engine axis) with hole on the edge, a mecano truss (lots of holes to adjust the rocking), a small screew to connect the disk and truss and something (made out of carboard or lego, whatever) to keep all connected and also keep the etching container to fly towards maximum dammage (thanks for the heads up mr. Murphy).
The KISS way would be to stick a PCB into a plastic jar, wrap it with a bit of cloth and run it through a washing machine cycle.
This guy put a lot more work into his agitator than I put into mine. Hard drive parts and a gearmotor out of a photocopier, ball bearings on all joints.
http://reboots.g-cipher.net/agitator.gif
Since this is 3D printed, it’s worth pointing out that you can easily use the heated bed/Y axis of a Mendel-style printer to do this without building anything extra. :)
You’re going to have a rusty X-axis bar!
Ewwwww!
Since the circuit done is not high frequency, it would be more economic (from the etchant consumption point of view) to erode only the boundry between traces.
When I feel the need to do my own boards these days, I put the board and etchant in a plastic bag, and with a gloved hand, run the etchant over the pcb with a soft sponge. This floods the board with fresh etchant and introduces some agitation to move the dissolved copper off the board, exposing fresh copper. Just pull out the board every so often to see if light goes through the etched portions. All this takes only a few minutes.
I’ve start making PCB with ferric chloride in the ’90 putting the PCB to etch face down in the solution, using a small acquarium pump to to have a lot of oxigen via the bubbles from the bottom of the ferric solution. I’had the job done in 20-30 minutes for and eurocard (10×16 cm) at ambient temperature. Agitator are not so useful as oxigen. Old professional PCBs machines make PCBs in vertical also with an oxigen pump. Now PCBway: no acid, no exposing and etching problems, no harmful product to manage, no waste disposal troubles, cheap and beautiful PCBs.