
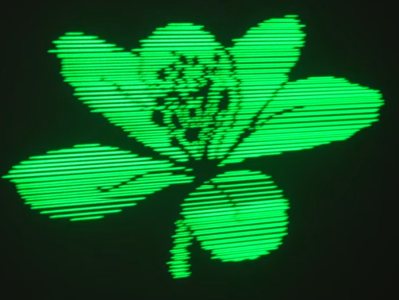
We’ve covered a scanning laser project by Ben Make’s Everything last year, and now he’s back with a significant update. [Ben]’s latest project now offers a higher resolution and RGB lasers. A couple of previous versions of the device used the same concept of a rotating segmented mirror synchronised to a pulsed laser diode to create scanlines. When projected onto a suitable surface, the distorted, pixelated characters looked quite funky, but there was clearly room for improvement.
The previous device used slightly inclined mirrors to deflect the beam into scanlines, with one mirror per scanline limiting the vertical resolution. To improve resolution, the mirrors were replaced with identically aligned mirrors of the type used in laser printers for horizontal scanning. An off-the-shelf laser galvo was used for vertical scanning, allowing faster scanning due to its small deflection angle. This setup is quicker than then usual vector galvo application, as the smaller movements require less time to complete. Once the resolution improvement was in hand, the controller upgrade to a Teensy 4 gave more processing bandwidth than the previous Arduino and a consequent massive improvement in image clarity.
Finally, monochrome displays don’t look anywhere near as good as an RGB setup. [Ben] utilised a dedicated RGB laser setup since he had trouble sourcing the appropriate dichroic mirrors to match available lasers. This used four lasers (with two red ones) and the correct dichroic mirrors to combine each laser source into a single beam path, which was then sent to the galvo. [Ben] tried to find a DAC solution fast enough to drive the lasers for a proper colour-mixing input but ended up shelving that idea for now and sticking with direct on-off control. This resulted in a palette of just seven colours, but that’s still a lot better than monochrome.
The project’s execution is excellent, and care was taken to make it operate outdoors with a battery. Even with appropriate safety measures, you don’t really want to play with high-intensity lasers around the house!
Here’s the previous version we covered, a neat DIY laser galvo using steppers, and a much older but very cool RGB vector projector.
Thanks to [Chan] for the tip!


Analog still wins in this game.
The jitter comes from the clock edges randomly aligning with the time the photointerrupter is triggered: you get an uncertainty of a whole clock period.
The trick is you sync everything to a common clock: the rotation rate is driven by a clock derived from the same thing that pulses the laser.
You can either do this by making the microcontroller generate the driving waveform, or by using a phase-locked loop locked to some integral divisor of the microcontroller’s DAC rate.
Deciding to push pixels based on when you see a photogate trigger is just asking for a jitter headache.
Yeah something like this you pretty much want everything past a certain point to be analog and synced together the old fashioned way
Same with the color issue; trying to find a DAC fast enough to do PWM on top of the rest seems rough. But what about variable voltage
Fast DACs are not that difficult to find.
For 10 Msps 8 bit parallel, e.g. TLC7524 can be used (and it is available in DIP).
For higher speeds, 3 channel video DACs like ADV7123 (10 bit parallel) or ADV7125 (8 bit parallel) can reach 330 Msps (lowest spec version is 50 Msps). They are 48-pin 0.5mm pitch QFP though.
Reminds me of having to account and adjust for gear backlash in marine radar systems.
Scophony could have been a hit with lasers. It was a pre-war high def large screen optical stuff I can’t quite understand per the Wikipedia article. The last hurrah before the war shut everything down and electronics took off after the war. Scophony even made it to the US before we too had to commit production.
I’d never heard of Scophony. Interesting device. Thanks for that.
Vaguely like an acoustic equivalent to the Eidophor, in that they both manipulated a physical medium to modulate light.
A system operating on a similar principal has been used for professional displays using ionized gas lasers. AOMs and PCAOMs (for broadband color lasers) could modulate a laser beam for both color and blanking. With those systems the beam passed through the vibrating crystal itself, rather than a column of water vibrated by the crystal as described in the Scophony article. (PC)AOMs are not really en vogue anymore since today’s solid state laser sources can directly modulate their laser output for both color and blanking. (PC)AOMs were really cool tech in the late nineties and early aughts though!
Why are dichroic mirrors needed instead of normal mirrors. Isn’t the laser output a narrow enough wavelength range?
Dichroic mirrors are used to combine the 3 beams into one: one colour passes through while the other color is reflected into the same beam line.