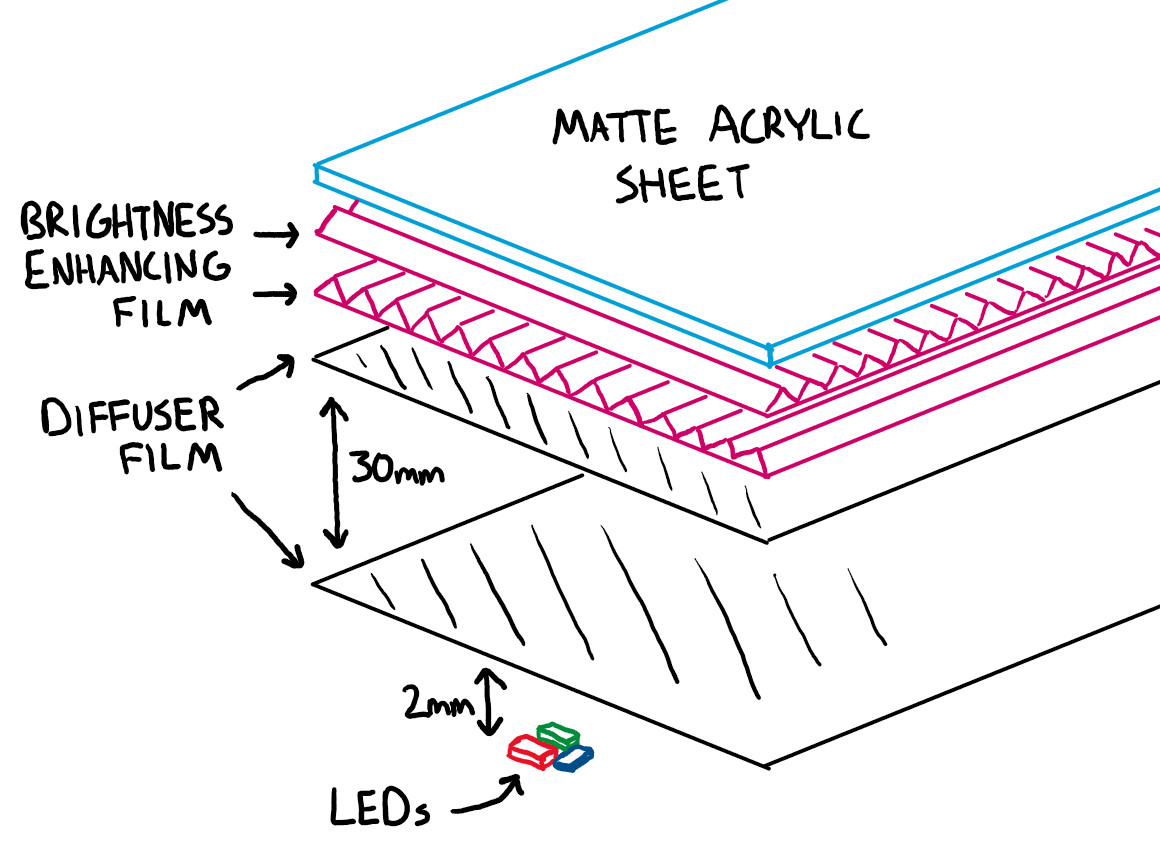
Once upon a time, the cathode ray tube was pretty much the only type of display you’d find in a consumer television. As the analog broadcast world shifted to digital, we saw the rise of plasma displays and LCDs, which offered greater resolution and much slimmer packaging. Then there was the so-called LED TV, confusingly named—for it was merely an LCD display with an LED backlight. The LEDs were merely lamps, with the liquid crystal doing all the work of displaying an image.
Today, however, we are seeing the rise of true LED displays. Sadly, decades of confusing marketing messages have polluted the terminology, making it a confusing space for the modern television enthusiast. Today, we’ll explore how these displays work and disambiguate what they’re being called in the marketplace.
Some people just want to have their cake and eat it too, but very few of us ever get to pull it off. [Erich Styger] has, though with V5 of his “MetaMetaClock”— a clock made of clocks, that uses the orientation of the hands to create digits.
We’ve seen previous versions of this clock. As before, the build is exquisitely detailed and all relevant files are on GitHub. This version keeps the acrylic light-pipe hands of version 4, but adds more of them: 60 clocks vs 24. Larger PCBs are used, grouping the dual-shaft steppers into groups of four, instead of the individual PCBs used before. Each PCB has an NXP LPC845 (a Cortex M0 microcontroller) that communicates on an RS-485 bus. Placing four steppers per microcontroller reduces parts count somewhat compared to previous versions (which had each ‘clock’ on its own modular PCB) albeit at the cost of some flexibility.
While the last version used veneers on its face, this version is cut by CNC by from a large slab of oak. It’s certainly the most attractive version yet, and while bigger isn’t always better, more clock faces means more potential effects. Date? Time? Block letters? Arbitrary text? Kaleidoscopic colours from the RGB LEDs? It’s all there, and since it’s open source, anyone who builds one can add more options. A BLE interface makes it quick and easy to wirelessly switch between them or set the time.
It’s nice sometimes to watch projects like this improve incrementally over time. [Erich] mentions that he plans to add Wifi and a web-based user interface for the next version. We look forward to it, and are grateful to [jicasi] for the tip. Just as it is always clock time at Hackaday, so you can always toss a tip of your own into the box.
Scanning a film negative is as simple as holding it up against a light source and photographing the result. But should you try such a straightforward method with color negatives it’s possible your results may leave a little to be desired. White LEDs have a spectrum which looks white to our eyes, but which doesn’t quite match that of the photographic emulsions.
[JackW01] is here with a negative scanning light that uses instead a trio of red, green, and blue LEDs whose wavelengths have been chosen for that crucial match. With it, it’s possible to make a good quality scan with far less post-processing.
The light itself uses 665 nm for red, 525 nm for green, and 450 nm blue diodes mounted in a grid behind a carefully designed diffuser. The write-up goes into great detail about the spectra in question, showing the shortcomings of the various alternatives.
We can immediately see the value here at Hackaday, because like many a photographer working with analogue and digital media, we’ve grappled with color matching ourselves.
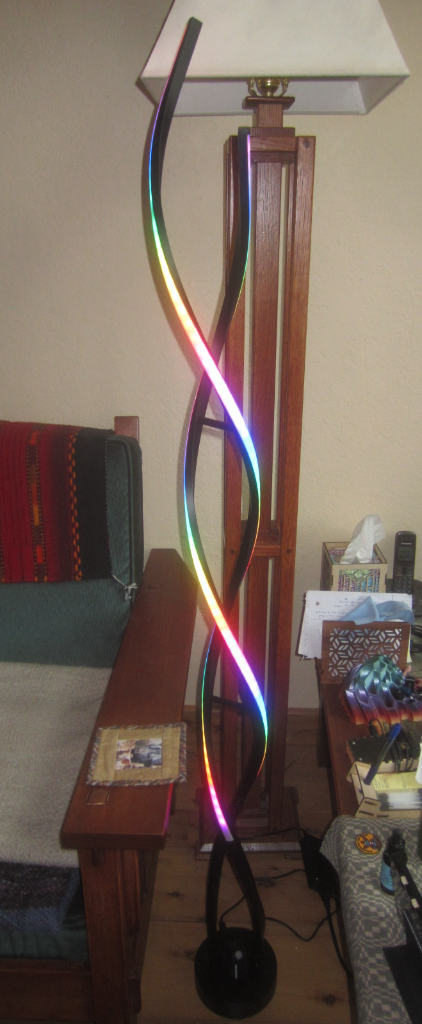
Home Depot has at times sold a neat spiral lamp that relies on LEDs to supply its soothing white glow. When [Craig Lindley] saw some modified versions on YouTube he decided he had to build one himself. The result is a charming rainbow lamp that really lights up a room (pardon the pun).
[Craig] first set about stripping the lamp of its white LED strips, replacing them with addressable WS2812B LEDs. No more would the lamp just output white light—any color in the RGB gamut was now on the table.
A powerful 10 amp 5 volt power supply was then installed to provide the necessary juice. A Wemos D1 Mini was pressed into service as the controller, which was also hooked up to an HC-SR04 infrared motion sensor. This provided the capacity to trigger the lamp when it detects someone moving nearby.
Alternatively, the lamp was given a time-activated mode as well. Either way, when activated, the lamp displays a range of colorful patterns on its elegant spirals, all with the aid of the popular FastLED library.
The final result is impressive—it looks almost stock, except it’s far more colorful and interesting to look at than the original. It’s also amusingly hard to display in our usual image formats because it’s so tall and narrow. In any case, we’ve seen some great lamp builds before, too. If you’re working on your own charming illuminations, don’t hesitate to drop us a line!
You might not have noticed if you’re not a digital artist, but most painting and image apps still get color mixing wrong. As we all learned in kindergarten, blue paint and yellow paint makes green paint. Try doing that in Photoshop, and you’ll get something altogether different—a vague, uninspiring brownish-grey. It’s the same story in just about every graphics package out there.
As it turns out, there’s a good reason the big art apps haven’t tackled this—because it’s really hard! However, a team of researchers at Czech Technical University has finally cracked this long-standing problem. The result of their hard work is Mixbox, a digital model for pigment-based color mixing. Once again, creative application of mathematics has netted aesthetically beautiful results!
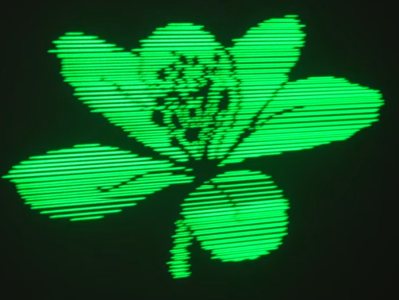
We’ve covered a scanning laser project by Ben Make’s Everything last year, and now he’s back with a significant update. [Ben]’s latest project now offers a higher resolution and RGB lasers. A couple of previous versions of the device used the same concept of a rotating segmented mirror synchronised to a pulsed laser diode to create scanlines. When projected onto a suitable surface, the distorted, pixelated characters looked quite funky, but there was clearly room for improvement.
More scanlines and a faster horizontal pixel rate
The previous device used slightly inclined mirrors to deflect the beam into scanlines, with one mirror per scanline limiting the vertical resolution. To improve resolution, the mirrors were replaced with identically aligned mirrors of the type used in laser printers for horizontal scanning. An off-the-shelf laser galvo was used for vertical scanning, allowing faster scanning due to its small deflection angle. This setup is quicker than then usual vector galvo application, as the smaller movements require less time to complete. Once the resolution improvement was in hand, the controller upgrade to a Teensy 4 gave more processing bandwidth than the previous Arduino and a consequent massive improvement in image clarity.
Finally, monochrome displays don’t look anywhere near as good as an RGB setup. [Ben] utilised a dedicated RGB laser setup since he had trouble sourcing the appropriate dichroic mirrors to match available lasers. This used four lasers (with two red ones) and the correct dichroic mirrors to combine each laser source into a single beam path, which was then sent to the galvo. [Ben] tried to find a DAC solution fast enough to drive the lasers for a proper colour-mixing input but ended up shelving that idea for now and sticking with direct on-off control. This resulted in a palette of just seven colours, but that’s still a lot better than monochrome.
The project’s execution is excellent, and care was taken to make it operate outdoors with a battery. Even with appropriate safety measures, you don’t really want to play with high-intensity lasers around the house!
Full-size keyboards are great for actually typing on and using for day-to-day interfacing duties. They’re less good for impressing the Internet. If you really want to show off, you gotta go really big — or really small. [juskim] went the latter route, and added RGB to boot!
This was [juskim]’s attempt to produce the world’s smallest keyboard. We can’t guarantee that, but it’s certainly very small. You could readily clasp it within a closed fist. It uses a cut down 60% key layout, but it’s still well-featured, including numbers, letters, function keys, and even +,-, and =. The build uses tiny tactile switches that are SMD mounted on a custom PCB. An ATmega32U4 is used as the microcontroller running the show, which speaks USB to act as a standard human interface device (HID). The keycaps and case are tiny 3D printed items, with six RGB LEDs installed inside for the proper gamer aesthetic. The total keyboard measures 66 mm x 21 mm.
Don’t expect to type fast on this thing. [juskim] only managed 14 words per minute. If you want to be productive, consider a more traditional design.