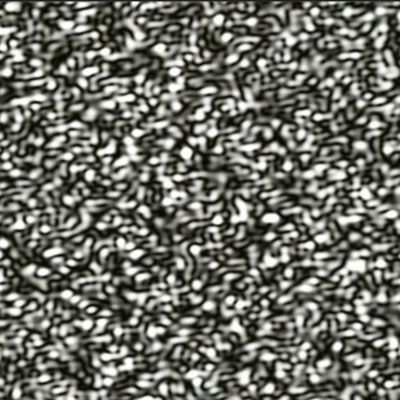
The difference between holography and photography can be summarized perhaps most succinctly as the difference between recording the effect photons have on a surface, versus recording the wavefront which is responsible for allowing photographs to be created in the first place. Since the whole idea of ‘visible light’ pertains to a small fragment of the electromagnetic (EM) spectrum, and thus what we are perceiving with our eyes is simply the result of this EM radiation interacting with objects in the scene and interfering with each other, it logically follows that if we can freeze this EM pattern (i.e. the wavefront) in time, we can then repeat this particular pattern ad infinitum.

In a recent video by [3Blue1Brown], this process of recording the wavefront with holography is examined in detail, accompanied by the usual delightful visualizations that accompany the videos on [3Blue1Brown]’s channel. The type of hologram that is created in the video is the simplest type, called a transmission hologram, as it requires a laser light to illuminate the holographic film from behind to recreate the scene. This contrasts with a white light reflection hologram, which can be observed with regular daylight illumination from the front, and which is the type that people are probably most familiar with.
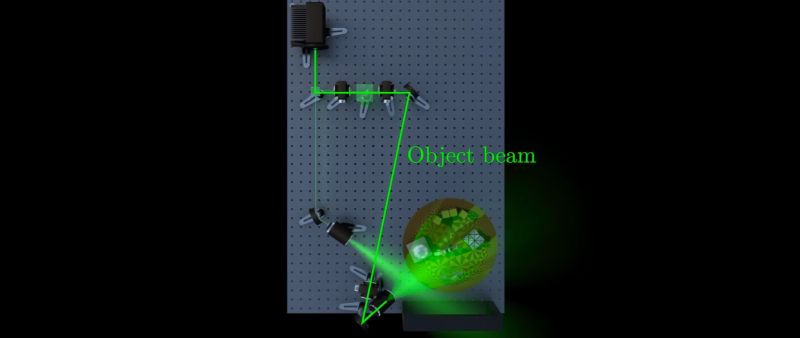
The main challenge is, perhaps unsurprisingly, how to record the wavefront. This is where the laser used with recording comes into play, as it forms the reference wave with which the waves originating from the scene interact, which allows for the holographic film to record the latter. The full recording setup also has to compensate for polarization issues, and the exposure time is measured in minutes, so it is very sensitive to any changes. This is very much like early photography, where monochromatic film took minutes to expose. The physics here are significant more complex, of course, which the video tries to gently guide the viewer through.
Also demonstrated in the video is how each part of the exposed holographic film contains enough of the wavefront that cutting out a section of it still shows the entire scene, which when you think of how wavefronts work is quite intuitive. Although we’re still not quite in the ‘portable color holocamera’ phase of holography today, it’s quite possible that holography and hologram-based displays will become the standard in the future.


That video is just pure gold.
Not to speak about the project itself which is mindblowing.
I watched a few minutes of the beginning of the video,
yes! It is good. And I’d love to learn more about the making of holograms.
But taking 46 minutes to watch the video would take away from my precious commenting time on Hackaday!
B^)
well I am thankful that I have a 1 hour lunch break
If you used > on keyboard (shift-.), you can increase video playback speed. Try for 1.5x and reduce the video time by around 15 minutes
I watched this one in its entirety. Was worth it for me.
(Seeing transmission holograms in real life should be on your bucket list, if it’s not already.)
Okay, you’re the Boss!
B^)
(from your favorite PITA!)
This kind is really worth it for sure.
Some of those hologram examples from the Exploratorium were part of a traveling exhibition I saw in – not kidding – 1983. They were kind of mindblowing to me at the time and, like the video, prompted me to think about what was actually stored on the film.
After noodling about it for (quite) a while I figured I could numerically generate my own holograms. The real question was how to physically produce it. First I numerically generated a synthetic hologram of the simplest possible object: a point. This I generated as a full-page (8×10″) image on my Apple II, and printed it on the highest resolution printer I had access to. I photo-reduced that print to 8x10mm onto the highest resolution 35mm film I had, and photographed under monochromatic sodium light to eliminate lens chromatic aberration. Illuminated by a (borrowed) HeNe laser light, it produced an obvious point holographic image. Short answer: it worked. It was the simplest possible object, but it was possible in 1985 for a not-too-smart but motivated kid to make a numerically-generated hologram using not very special hardware.
What did the pattern end up looking like. Was it like a zone plate or one of those scratch holograms they put on novelty records?
Yes, a zone plate.
Do those scratch patterns even count as holograms?
If you’re into radios, SDRs and the like, one way of thinking about the recording process is this: Like the video explains, ordinary photography captures the power (amplitude squared) of the scene, discarding the phase information.
We could capture the wavefronts from the scene with some imaginary supercamera, and record all the instantaneous phases at every pixel, except we can’t digitize hundreds of terahertz signals directly yet. But what’s key is that the light is just the carrier signal, and the information of the scene is encoded as phase and amplitude of that carrier. And the actual information (the scene) occupies much lower bandwidth than the hundreds of terahertz carrier.
So instead we mix that scene information (incoming signal) with a local reference beam. In radio-speak, that’s your local oscillator. The film is recording the phase and amplitude of that much lower bandwidth mixed-down signal.
There are details that don’t translate too well to that description without more explanation, but it gives another perspective on what’s going on.
Except that the bandwidth is the same, since you’re capturing the phase every wavelength (the “slits” in the experiment are spaced at wavelength distance). It’s not like a plain convolution (that you’ll do with a radio signal, where you’d multiply the carrier with the low bandwidth signal, in frequency space), since you are multiplying the signal with the signal itself (only shifted in phase due to the additional space traveled for the multiple reflection/refractions on the scene). So there’s no bandwidth saving at all here, and that’s why it’s so impressive by itself.
On “every wavelength”: There’s only one wavelength used here: The 532 nm of the reference beam. All the information is in the phase and amplitude of that (essentially) single wavelength.
No, you misunderstood. There’s a slit at x then x + lambda than x + 2 lambda. You capture the phase for each slit, which are spaced by exactly one wavelength. So you capture/sample the phase every wavelength. And BTW, it’s possible to capture for multiple reference light’s wavelength too, but it becomes mind blowing.
As I understand from the video is that we will need a much, much higher resolution in our display technology to be able generate some kind of Holographic display. (He mentioned the Number in the Video) And it would be a real representation of 3d from many angles, and not a 2 Picture (Stereoscopy) trick. In 10 Years, maybe?
We’ve already created light-field cameras that take advantage of the increasing pixel density of CMOS image sensors, incorporating a micro-lens array over the sensor to capture an array of images.
Nothing except for practicality prevents one from doing the same with a high DPI display. Combined with a micro-lens array, it would work exactly like the light-field camera, but in reverse, displaying an array of images instead of capturing one.
For this, we’d need to use similar lithographic techniques to make a display instead of a sensor. The problem is that sensors can be small, but displays need to be large, and such techniques don’t usually scale well. One solution would be to create a tiled display.
Of course, there are other difficulties, such as how to produce different color light-emitting elements at the necessary scale. Different color LEDs require different base materials, and they have greatly different output capabilities. An alternative is to use only blue LEDs and combine them with quantum dots to produce red and green.
Finally, one needs a way to generate and transmit the arrays of images needed. You’d probably want to incorporate compression at several levels, since all the images would be similar to one another.
I find it confusing that it’s possible to encode all this information on a 2d plane. My intuition tells me that the light field would be 4-dimensional:
If we think about a single point on the 2-dimensional plane (of the hologram), we can consider all the light rays passing through this point, the intensity (and phase) of these light rays being dependent on the (2-D) viewing angle. Clearly, if we somehow encoded all this information, it would perfectly reproduce the full light field, but it would be 4-D.
What trickery allows us to store this as a 2D image?
Well you can encode a 2d or 3d effect in a single line vector using only 0 or 1.
This is how computer works in the end.. so having this in mind it’s not that weird.
Just change the perspective ;)
The video is literally titled, “How are holograms possible?”
As the video mentions, a standard photo may encode 10 lines per millimeter, whereas holographic film records over 4000 lines per millimeter. The light wavefronts from the original scene are encoded as diffraction patterns. Shining the reference laser on the diffraction patterns reproduces the wavefronts. Watch the video to understand how.
And if you want a step by step tutorial on making one yourself: https://www.wikihow.com/Make-a-Hologram or https://www.integraf.com/resources/articles/a-simple-holography-easiest-way-to-make-holograms and you can get kits https://www.litiholo.com/hologram-kits.html#ChooseSection ora https://shop.ultimate-holography.com/index.php?id_cms=20&controller=cms or https://hologram.se/hologram-kit-produce-own-holograms/ have fun!
It’s an amazing video. After decades of trying to, but not understanding holograms, I finally do!
Grant is such an amazing educator.