Despite having been technologically obsolete for a decade or two, analog photography is still practiced by hobbyists and artists to achieve a particular aesthetic. One might imagine a similar thing happening with early digital cameras, and indeed it has: the Game Boy Camera has seen use in dozens of projects. [Michael Fitzmayer] however decided to combine the worlds of analog and early digital photography by equipping a Holga with the image sensor from a Game Boy Camera.
 The Holga, if you’re not familiar, is a cheap film camera from the 1980s that has achieved something of a cult following among retro-photography enthusiasts. By equipping it with the sensor from what was one of the first mass-market digital cameras, [Michael] has created a rather unusual digital point-and-shoot. The user interface is as simple as can be: a single button to take a photo, and nothing else. There’s no screen to check your work — just as with film, you’ll have to wait for the pictures to come back from the lab.
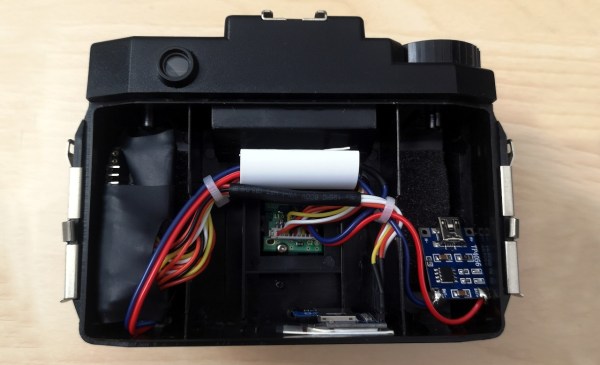
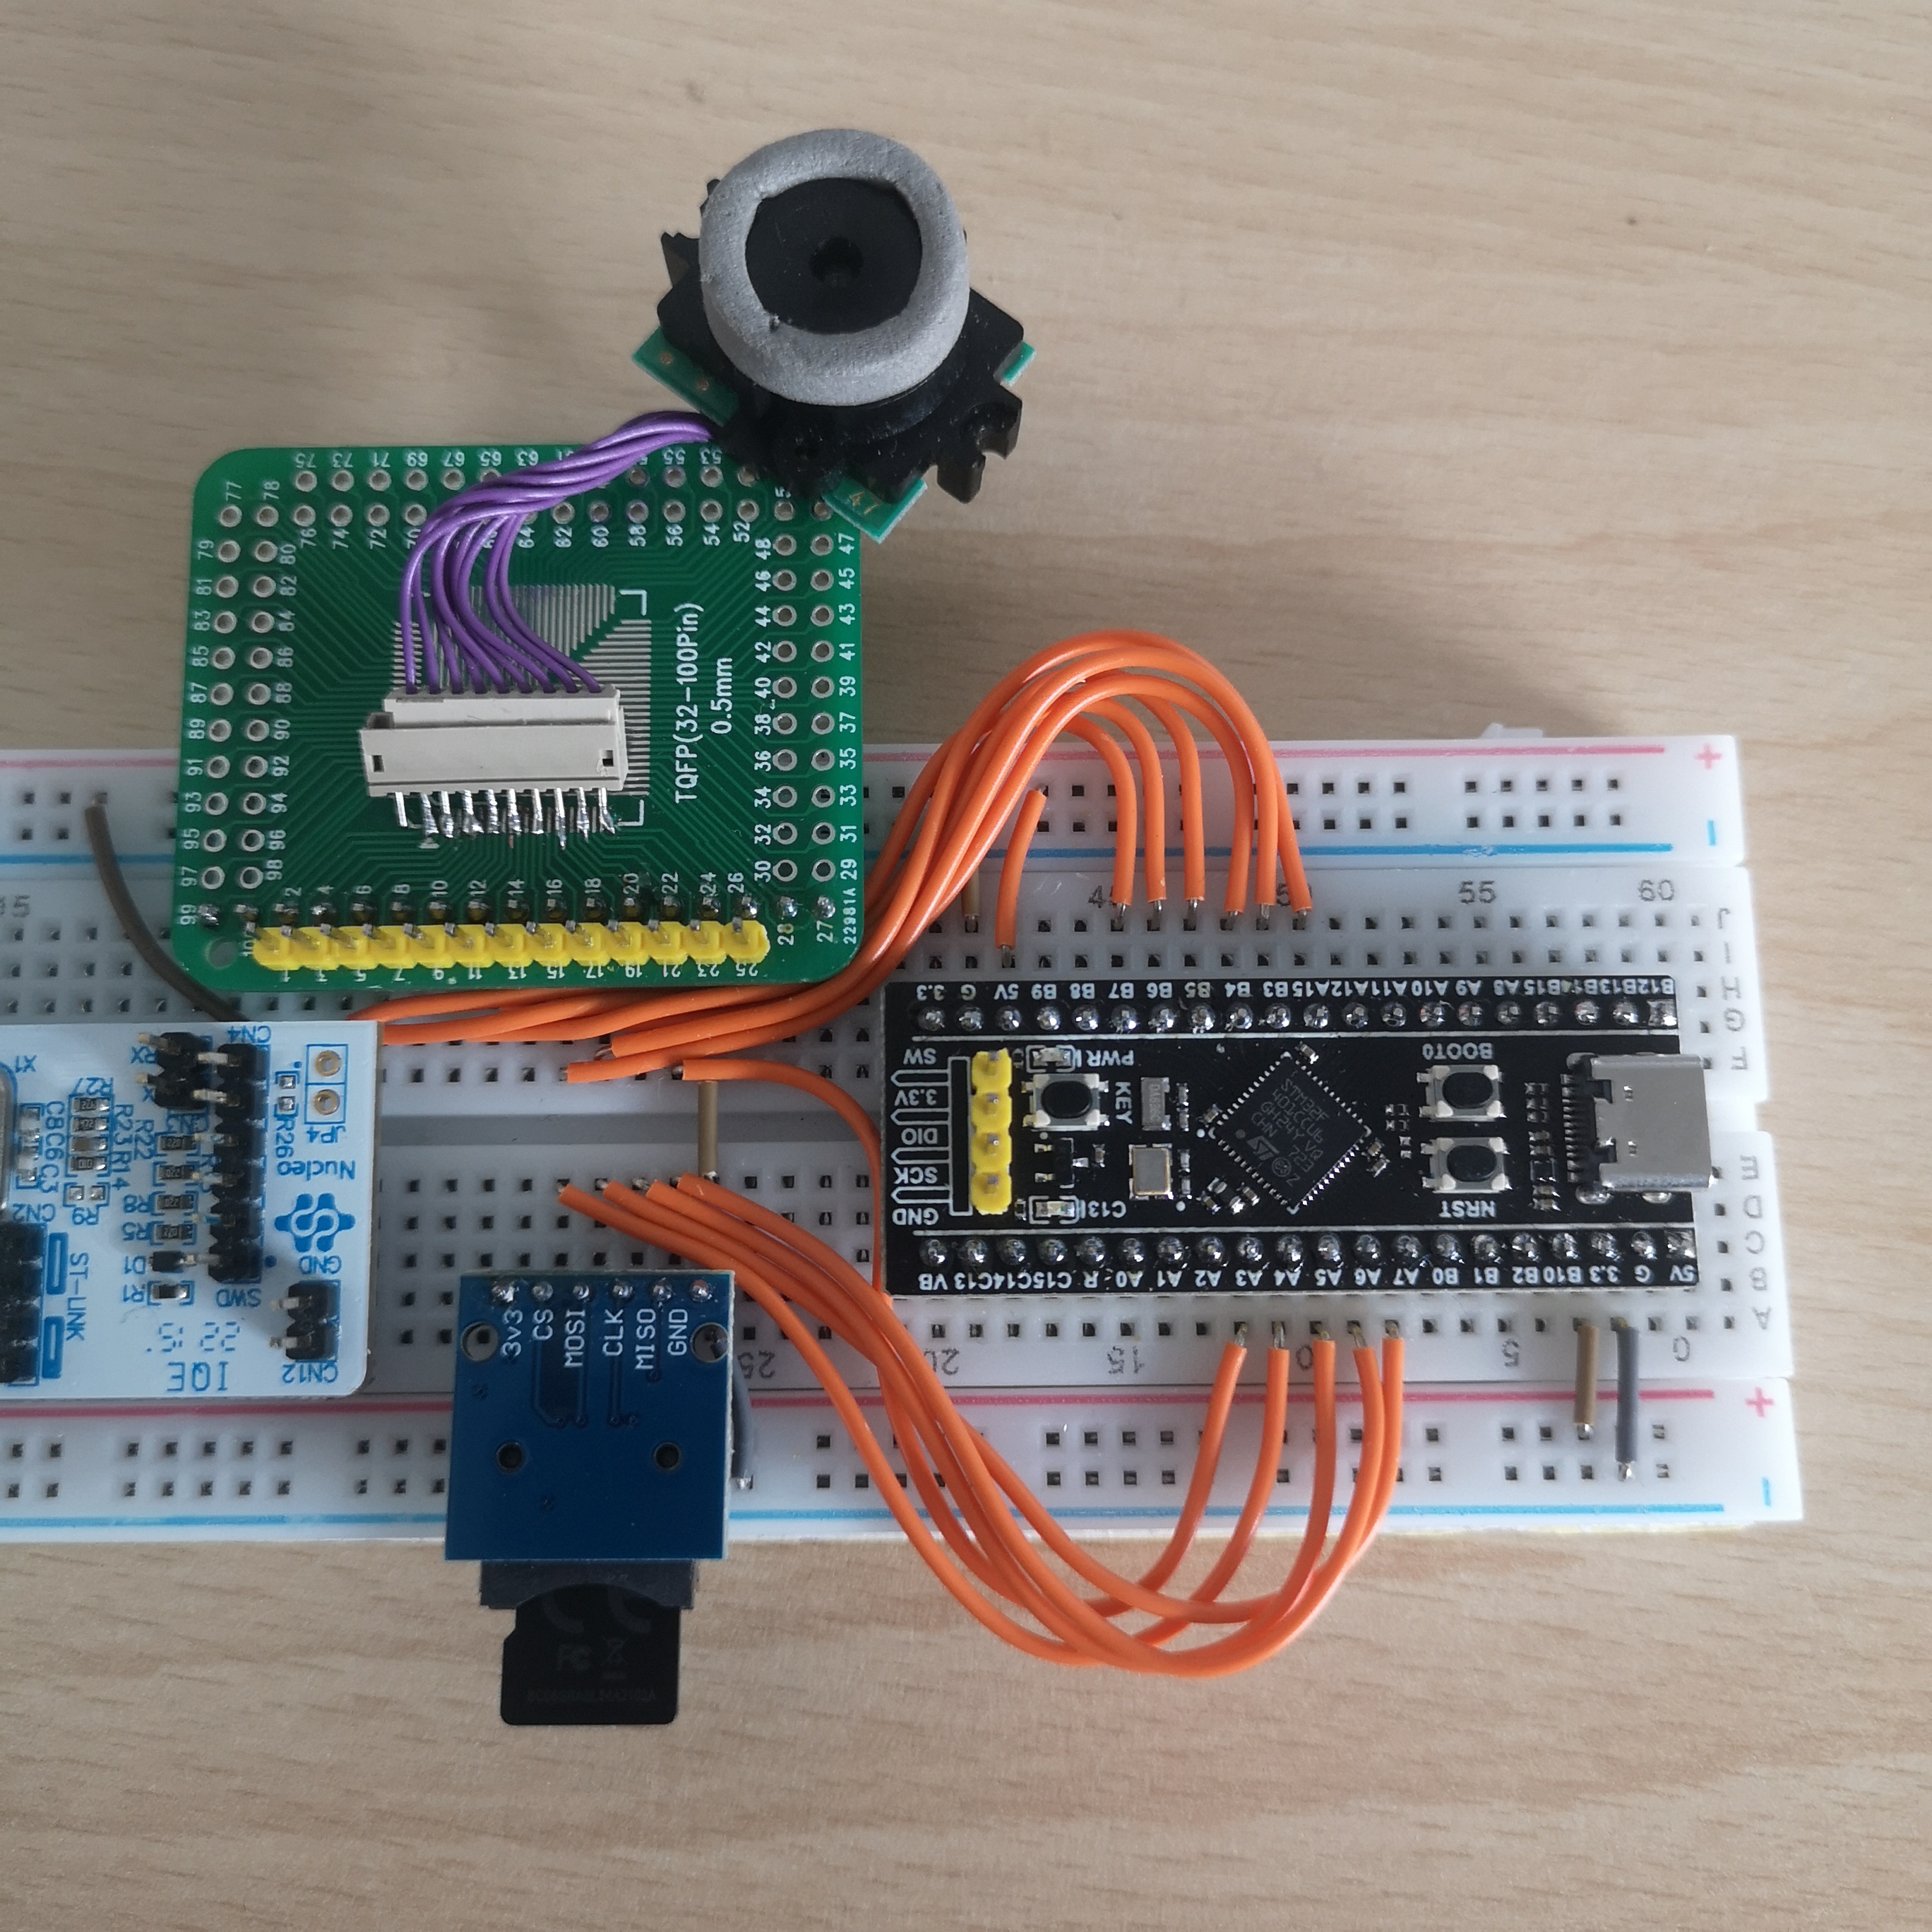
The sensor used in the Game Boy Camera is a Mitsubishi M64282FP, which is a 128 x 128 pixel monochrome CMOS unit. [Michael] hooked it up to an STM32F401 microcontroller, which reads out the sensor data and stores it on an SD card in the form of a bitmap image.
With no film roll present, the Holga has plenty of space for all the electronics and a battery. The original lens turned out to be a poor fit for the image sensor, but with a bit of tweaking the Game Boy optics fit in its place without significantly altering the camera’s appearance.
 [Michael] helpfully documented the design process and shared all source code on his GitHub page. Holgas shouldn’t be hard to find to find, but if none are available in your area you can just roll your own. The Game Boy Camera is actually one of the most versatile cameras out there, having been used for everything from video conferencing to astrophotography.