Solder Reflow Toaster Oven

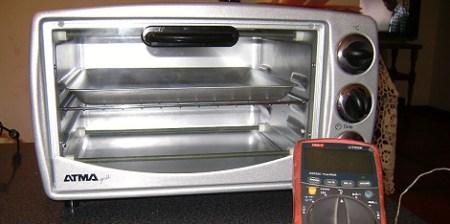
[Sebastian] needed a small solder oven so he bought himself a small toaster oven (Spanish, Google Translate). It’s not the kind of thing we’d make our breakfast in now, but for soldering it’s a very nice oven.

After a little bit of research on Google, [Sebastian] discovered that the best technique when dealing with reflow ovens and solder paste is following a specific temperature curve. Ideally, Tin/Lead solder needs to preheat from room temperature to 150 degrees C, then level off so the flux can activate. After that, a quick jaunt above 183 degrees C makes the solder flow. To get his toaster working optimally, [Sebastian] stuck a thermistor in the toaster and measured the temperature profiles of different ‘modes.’

The correct temperature curve was calculated using different heater elements and [Sebastian] was off to the races. He did have a few problems on his first few boards – solder bridging, mostly – but that’s not the fault of the oven. An LCD display (translate) was added recently so accurate real-time temperature monitoring is available.

How To Populate A Surface Mount PCB

Reflow_08

Let’s face it friends, everything is moving toward surface mount components. We’ve seen quite a few features here that cover using stencils to populate boards and using ovens to reflow. [Oleg] has put together a tutorial on the process he uses to populate and reflow his own boards.

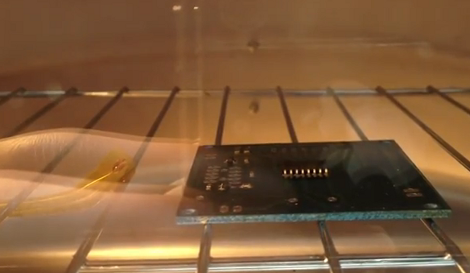
[Oleg] is the creator of the USB Isolator and therefore has a need to frequently populate the same board. He’s using an acrylic frame that fits the PCB perfectly to hold it in place so that paste and be applied right up to the edges of the board. He ordered a laser cut Kapton stencil for applying the solder. The paste is squeegeed into the stencil holes, the stencil is removed, and parts are placed with tweezers and a steady hand. For the final step, the boards go into an old toaster oven for reflow.

[Oleg] uses temperature marker on his boards to monitor the progress of the reflow. This marker is basically a crayon that begins to melt at a specific temperature. When the board has cooled, the melted mark can be scraped away or removed with alcohol.

Of course this is only really useful if you have a bunch of high-quality boards to populate. But with the relatively low cost of getting professionally made boards we think the need for this type of assembly process is on the rise.