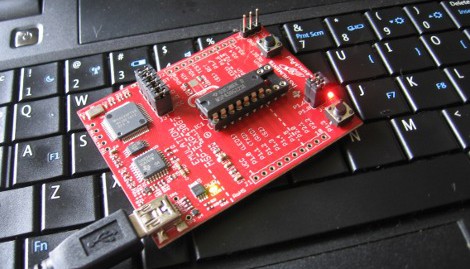
When TI released their Launchpad development board at the end of June it generated a lot of Buzz. Here’s a package that delivered a programmer, debugger, two microcontrollers, and some accessories for less than five bucks (including shipping). They even provided a choice of two software suites but only for users running Windows who don’t mind proprietary software. If you’re looking to go another way you should consider trying out the open source alternative MSPGCC. After the break we’ll take a look at getting the tool-chain up and running in a Linux environment.
We’ll be working with Ubuntu 10.04 Lucid Lynx. When the Launchpad is connected to USB it is identified and mounted to /dev/ttyACM0. It’s not immediately apparent how to use the device but fortunately it can be done. To talk to the hardware for programming and debugging we’ll need to use MSPDebugger. For compiling our code we’ll be using the MSPGCC open source compiler package.
Compiling and Installing MSPGCC
The first thing we’ll need to do is satisfy our build dependencies.
sudo apt-get install subversion gcc-4.4 texinfo patch \
libncurses5-dev zlibc zlib1g-dev libx11-dev libusb-dev \
libreadline6-dev
Now we’ll checkout the source code from the subversion repository:
svn checkout https://mspgcc4.svn.sourceforge.net/svnroot/mspgcc4
Next we enter the directory and start compiling:
cd mspgcc4
sudo sh buildgcc.sh
This will take some time so go read some posts and come back in 20-45 minutes.
To add the tools we just installed to the path, we need to edit the /etc/profile file:
sudo nano /etc/profile
Add this line to the end of the file (CTRL-X to exit once you’re done):
export PATH=${PATH}:/opt/msp430-gcc-4.4.3/bin
Now reload the profile you just edited for this to take effect:
source /etc/profile
Great, now you have the tools necessary to compile your C code into an .elf file that the microprocessor will understand. Next we’ll need a way to get that file onto the chip.
Compiling MSPDebug
We’ll use the MSPDebug instructions for downloading and compiling. First you need to go to the download page and get the latest version. We downloaded version 0.9 and will use that in the filename for the following commands. Now go to the directory where you saved that download and unpack the archive, compile, and install the package using the following set of commands:
tar xvfz mspdebug-0.9.tar.gz
cd mspdebug-0.9
make
sudo make install
That should take just a few seconds and it’s the last of the tools that we need. Next we can use our new software to connect with the device.
The code
It’s best to try out some proven code the first time around. Download our simple code package to test out the compiler and use the debugger for programming. This is much simpler than the temperature demo found on Ramblings and Broken Code be we are using their Makefile and once you’re comfortable with the process there’s a lot of great code examples in that package.
Unpack the code, open a terminal window, and navigate to the directory where the files are located. Compile the file by typing:
make
If that went well, great. If you get an error like “msp430-gcc: command not found” there’s something wrong with your path to the MSPGCC tools.
Connecting to the chip
MSPDebug is what we use to connect to the chip. The following command will most likely NOT work for you:
mspdebug rf2500
Spitting out the error message:
Trying to open interface 1 on 033
rf2500: warning: can't detach kernel driver: Operation not permitted
rf2500: can't claim interface: Operation not permitted
rf2500: failed to open RF2500 device
This is most likely caused by a permission problem. This will work if you add ‘sudo’ to the beginning but that’s not ideal. Let’s add a UDEV rule to take care of the Launchpad every time we plug it in. We need to create a rule file that has this line of code in it:
ATTRS{idVendor}=="0451", ATTRS{idProduct}=="f432", MODE="0660", GROUP="plugdev"
Use nano to open and edit this file. Press CTRL-X to exit when you’re finished, then reload UDEV:
sudo nano /etc/udev/rules.d/46-TI_launchpad.rules

sudo restart udev
*** If you need more help with this, take a look at our guide to writing udev rules ***
Unplug the Launchpad and plug it back in. Make sure you’re in the same directory as the ‘main.elf’ file created by the compiler earlier. Now give MSPDebug another try:
mspdebug rf2500
Now you will be greeted with the (mspdebug) prompt. It’s just a matter of programming the chip and running that program:
prog main.elf
run
Both LEDs will start blinking at about 1 Hz. Congratulations, you’ve compiled and loaded a program using open source tools.
A look into how the code works:
Let’s take a quick look into how this simple program works in an effort to get you comfortable with learning to code with MSPGCC. The keywords used in the code are defined in the include files from MSPGCC. You need to spend some time in the /opt/msp430-gcc-4.4.3/msp430/include/msp430 directory until you get used to the keywords. Once you get the hang of it you can probably guess new keywords based on what you read in the datasheets for the microprocessors.
Our code blinks two LEDs. Blinking means we need to use some method of tracking time. First let’s investigate the system clock:
Download a copy of the MSP430x2xx family datasheet (we’re using Rev. E) and follow along. This is a more useful document than the chip-specific datasheet as it lists the operating information for all of the peripherals.
Review the various system clock features in Section 5.1 paying attention to LFXT1CLK, VLOCLK, and ACLK. Next read Section 5.2 on page 289 which tells us that after power-up the system clock will be running at 1.1 MHz. If we used the system clock for timing we’re going to have trouble counting high enough with a 16-bit timer for a meaningful delay. Be we can use the auxiliary clock instead. The same page of the datasheet tells us that the ACLK is sourced from LFXT1CLK (an external crystal or clock source) but let’s change that. The VLOCLK can be used as a source for the auxiliary clock and it runs at 12 kHz, so 1-second timing is well within the range of a 16-bit counter. Let’s set up the clock source. Section 5.2.2 clearly tells us “VLOCLK source is selected by setting LFXT1Sx = 10 when XTS = 0.”. Now we just check the register description until we find that LFXT1S is set on register BCSCTL3 and then write code to implement this setting:
BCSCTL3 |= LFXT1S_2;
Next we want to set up an interrupt based on the auxiliary clock. In Section 12 you can read about TimerA. We’ll configure it to run in UP mode. On page 410 the configuration of the timer control register TACTL is covered. We need TASSELx to be set to use ACLK and MCx configured for UP mode. Notice that the settings for each portion of the register are listed in binary next to the description. We can use these to select the proper bits. Setting the MC bits to 1 (binary 01) and TASSEL bits to 1 (binary 01) with the following code:
TACTL |= TASSEL_1 | MC_1;
Now we must enable the capture/compare interrupt for TimerA compare/capture register 0:
TACCTL0 = CCIE;
Now we can start the timer by writing a value to it. Because we are using the internal very low oscillator at 12 kHz, we can count up to 11999 to keep track of about 1 second passing (0 is counted and that’s why we set the compare match for one cycle less than the clock speed):
TACCR0 = 12000;
And finally we enable global interrupts:
eint();
Now we just need some code in an Interrupt Service Routine that will toggle the LEDs:
interrupt(TIMERA0_VECTOR) TIMERA0_ISR(void) {
  LED_OUT ^= (LED0 + LED1);	//Toggle both LEDs
}
We pulled all of this together to make the example file. Take some to trying to understand what the datasheet is telling you. Although they can be confusing, everything you need to know is there.
Resources:


Still waiting for mine I ordered it 1 day after it came out and it was back ordered until September 13 at mouser
good article though
Very cool! Thanks for the article.
Only 3 months of backorder so far. I hope to have it in september. I was looking at the other 430 offerings that TI has available with some interest.
I compiled mspgcc and mspdebug under Mac OS X.
When I start ‘mspdebug rf2500’ I get:
rf2500: can’t claim interface: Permission denied
rf2500: failed to open RF2500 device
and with ‘sudo’ the same.
As far as I known – there is no udev on Mac, what should I do?
Very nice, it looks like I’m going to buy one of these afterall :)
Got 2/3 shipments of my orders, not sure what’s up with yours.
Still waiting for my that I ordered over a month ago (there was no warning about backorder/stock at the TI site).
Bookmarking this page for when the damn things eventually turn up.
great article, but I think it quite graphically illustrates why this thing is absolutely no arduino killer.
I ordered mine the day after announcement, and have had it long enough that I actually cut it in 2 trying to make a useful jtag / usb serial converter (the 2 chips on the emulator part are far more interesting than the ones they give you)
4.30$ yea if you want to fool with it (and I have a whole host of reasons to let this one pass)
arduino killer? not that they ever really marketed it like that but where is the community, scattered, and that is #1 on the arduino list of pluses
This is great! I, like everyone else, am waiting on mine to ship. Hope it’s here before I’m shipped off!
no gui, too much hassle for me. I’ve just refurbished an old xp computer to try this instead of the coridium board i like.
I bought 2 from mouser a few days after release and got them weeks ago
@UltraMagnus
Who was saying it was going to be an Arduino killer? I thought the goal of the project was to get some low-cost TI uC development tools in our hands.
@ iv_s:
Mac OS X HID driver is probably loading the USB device. see the instructions for the codeless kext:
the the bottom of the MSPDebug download page <http://mspdebug.sourceforge.net/download.html
There are new instructions for getting mspdebug to work on MacOSX at the mspdebug site ( http://mspdebug.sourceforge.net/download.html )
(I’ve been busy!)
(I’m not sure whether anyone had tried these with a LaunchPad yet. They were developed based on earlier similar msp430 tools.)
I’ve used linux for a long time, but now only on my server. All the freedoms of linux sure come with a lot of limitations. I kept wanting to run programs that only worked with windows. Wine didn’t always cut it. It’s the same reason I don’t use a mac for my main computer. I’ll stick with TI’s code composer studio. It’s Eclipse based, and I’ve been enjoyed using its nice integrated debug environment.
Did you manage to have the serial port to work well ?
On mine, the serial port works randomly on linux (fine on windows). I tested on two boards w/ the same result. I read MacOS users seems to have same issue too.
SWEET! Another thing I can use without needing to reboot into Windows! Woohoo!
And why was Linux development instructions provided only for Ubuntu?
There are others, specifically Slackware. It happens to be the oldest one out there.
Damn, now I wish I had ordered one of these while the $5 offer was still in effect. Or maybe it is still in effect. Off to search… :)
Hrm.. another “How-to: lets do something with Linux”, but Linux is mentioned inside the article only once, stating how hard it is to do something there… And then continues on talking about Ubuntu ;)
Guys, please edit these kind of articles like this: first, mention the software one needs to get things done on Linux (ie mspgcc and mspdebug) and then continue on with distribution specific packages.
Thanks from the other Linux distribution user.
And also: `sudo make install` is generally a no go: please use `configure –prefix=$HOME/foo && make` :S
of course mspgcc doesn’t include a GUI, it’s a compiler. you can use any linux IDE with it.
have a makefile :P http://pastebin.com/0FBBN1Cx
oh, incidentally, anyone done any interesting stuff using the USB connection with one of these yet?
@ epooch, WestfW
Thanks for info. Some changes, but still note working,
After installing kernel extension I start mspdebug and it hangs on:
Trying to open interface 1 on 003
If I pull out LaunchPad I get:
Initializing FET…
rf2500: can’t send data: Result too large
fet: open failed
Any ideas?
I tried this back when I first got my Launchpad, but it never worked. I mean, it would seem to work, it would compile and download, but the code would never run. Instead I’m using CCS on Windows XP running on VirtualBox. Wish I could make it work on Linux, but something about it is screwy.
the usb chip feeds another msp430 mcu above it, the problem is the 12mhz clock is connected to the smd 430, then piped out of that into one of the xtal pins on the usb chip
so, you either have to reprogram the emulator MSP chip, the usb converter chip (which does irda and 485 too) or maybe both
you cant cut n play, its usb serial mcu bit banger / emulator serial targer MSP
replying to nave.notnilc btw :)
A perfect example of why Linux hasn’t taken surpassed Windows. Until Linux has a framework for simply adding and removing pre-compiled binaries that works across most distributions, it will continue to languish. Don’t get me wrong, I like Linux and xBSD and use them in preference to Windows wherever possible. But just saying…
Sweet, now I might get my ass out of the wagon and actually try and use them… =o)
I refuse to believe that these Launchpads actually exist.
Ordered #2, still hasn’t shipped, mouser shows 11 weeks leadtime? Really?
Even if TI got me interested in using their stuff knowing that I could never expect to get things in a reasonable timeframe kills it.
I can go to Sparkfun and get any number of Arduino boards delivered in 3 days. Where can I get the Launchpad? Nowhere.
/rant
In my post above, “pre-compiled binaries” is probably a bit of a stretch, at least the compile process should be uniform across distributions and automated in a user-friendly add-remove program framework.
@Drone
Every consumer-oriented linux distribution (Redhat, Fedora, Ubuntu, Debian, Caldora, just off the top of my head) has a nice graphical package manager.
The package manager downloads, installs, and automatically updates pre-compiled binaries for almost everything you’d ever want. I’m pretty sure mspgcc is actually available in most distros.
As a quick aside, I think it’s actually a place where linux has completely obliterated windows in functionality. There’s one central program that manages updates for everything you install, OS, drivers, and applications.
Orrrrr….
you can do what I did and just kludge together an old PC to run Windows so I can do my micro stuff.
TI is just like everybody else (AVR, PIC, etc.) in that they certainly aim it at Windows, unfortunately. I do Linux on everything but micro stuff, and use the old frankenPC with Winblows XP just for my micro stuff.
Good to know this article is here though. I will try the steps someday and see how it works.
BTW, last I heard even TI’s packaged Windoze thing isn’t that easy to deal with (haven’t tried it yet). So yea, not quite an Arduino competitor. But it is pretty cool for the money.
I received my board weeks ago but haven’t taken the time to set it up yet. I use Ubuntu for my µC work – so I’ll definitely be reading this article thoroughly some time in the future.
Why is it that every time I touch something that has “mspgcc” & “Ubuntu” on it, it breaks?
First it was version 3.2.3, (never did get that going) now 4.4!
~$ sudo apt-get install subversion gcc-4.4 texinfo patch \
> libncurses5-dev zlibc zlib1g-dev libx11-dev libusb-dev \
> libreadline6-dev
Reading package lists… Done
Building dependency tree
Reading state information… Done
E: Couldn’t find package gcc-4.4
(I’m beginning to think I should go dig holes or something)
So, where is gcc-4.4 ?
Nice article. Thanks.
And to the hater who wants it done generically, so that Slackware user can follow along, surely you Slackware users can figure it out for yourselves?
I ordered mine at the beginning of July. I called last week and learnt they hat 6000 orders that were not delivered yet and that I was in rank 5000 to receive one.
I definitely don’t wait for it anymore. Hopefully, i didn’t really needed it but wanted to test.
Perhaps I’ll find it under the Christmas tree.
Anyway, it’s not very serious from such a big company not to be able to deliver 6000 pieces.
good article and tutorial, thank you
With all the Duino’ love here why not a Arduino linux howto? Get the n00bs up to speed using a real OS for dev work.
Nice article and useful information. Ta
Boommarking, thanks for reminding me that my first day order is still on backorder.
Not an arduino killer, but hopefully a solution to the arduino overkill. Somethings really don’t need to be running on a sanguino.
@ ftorama 6000 orders does not mean 6000 pieces many people ordered two or three so at least 12000 pieces
“Not an arduino killer, but hopefully a solution to the arduino overkill. Somethings really don’t need to be running on a sanguino.”
you know these things are more powerful than the arduino lineup right?
you don’t need an arduino tutorial, you just download and install a .deb and the IDE shows up in your menu, or you can use a ppa, it’s really easy.
BTW; my launchpad is still backordered (from early July), but my MSP430g samples arrived in 5 days… (now, to put together that PCB.)
I got my launchpad just two weeks after I ordered and that was an international delivery. I just have to find the time to actually do something with it.
(I hope the people complaining the “I can’t be bothered unless there’s a GUI” are not the same people who complain about “too many” Arduino-based Hack-a-Day postings. Sheesh!)
@osgeld
No. The ATmega328p is significantly more capable than the low-end MSP430G2xx parts that the Launchpad includes and supports.
I got mine quickly from newark.com and they might still have them, but shipping isn’t free.